You can set up 3 distinct routines within Bitdefender Parental Control to schedule when your child’s internet access is turned off. They provide a structured approach to managing a child’s online activities, promoting healthy habits and family engagement while ensuring their safety. These routines are independent of each other, meaning you can choose to activate just one, two, or all three of them according to your preferences:
Focus time
Use Focus time to create a schedule that includes time for homework, study, and other activities.
Bedtime
Sleep is essential for a child’s health and development. Use the Bedtime routine to lock out a resting period for your child.
Family time
Encourage spending time with family while promoting positive device use. Use the Family time routine to block out time for your child to be present during family meals for example.
Routines vs Daily Internet time
During routines, the time spent online doesn’t count toward the Daily Internet time limit. Once the routine ends, the Daily Internet Time function resumes counting the child’s internet usage.
To prevent confusion for parents, while a routine is in progress, the Daily Internet Time card won’t be visible on the child’s profile dashboard until the routine concludes. Instead, the name of the active routine will be displayed during this time.
Routines setup
To set up any of the parental control routines:
- Visit https://central.bitdefender.com and sign in to your Bitdefender Central account.
- On the left-hand side menu, click on “Parental Control.”
- Go to the child profile and select the desired routine from the “More” menu (Focus time, Bedtime, or Family time).
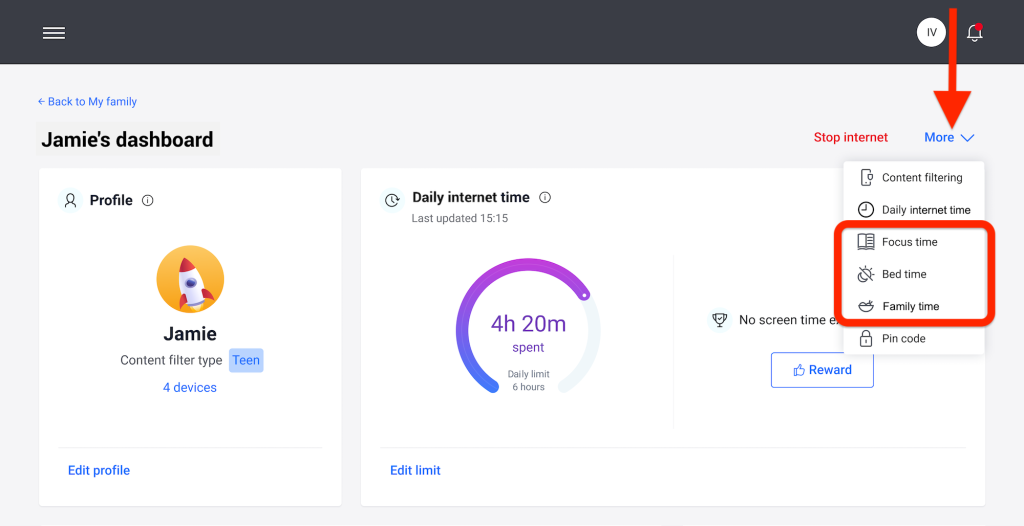
- Click the “Enable” button to activate the selected routine.

- “Schedule” and “Internet access” panels will then appear.
Schedule
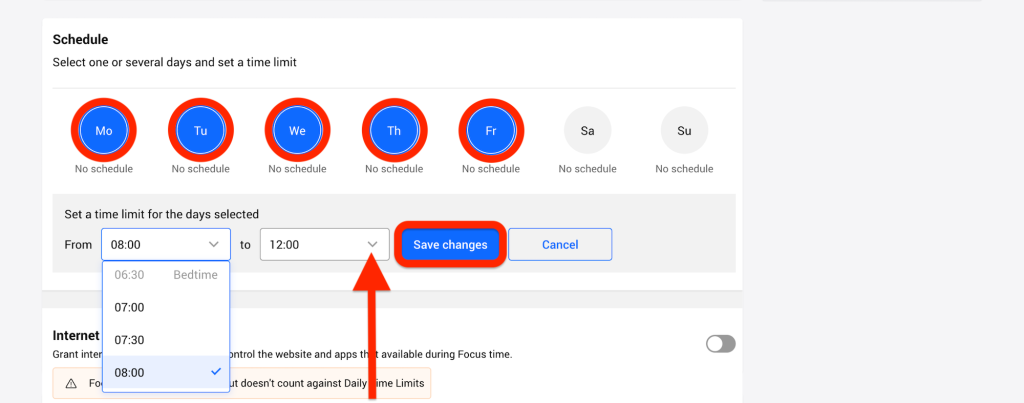
- To set a routine for one or multiple days of the week, click on the day’s name in the “Schedule” panel.
- Then, select the start and end times for the routine from the dropdown menu provided.
- Finally, click the “Save changes” button to confirm your selections.
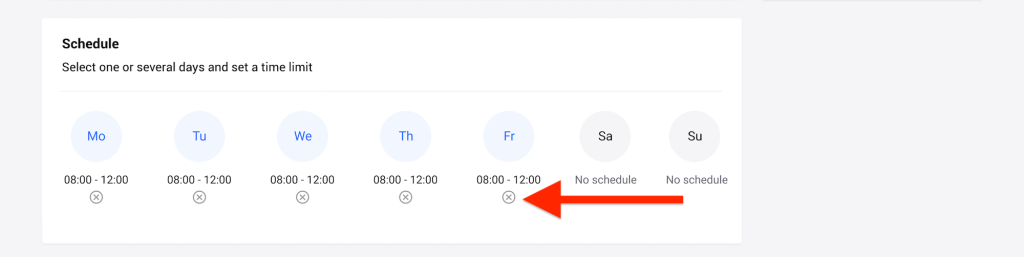
- To remove the routine for a particular day, click the ⊗ button corresponding to that day of the week in the “Schedule” panel.
Internet access
The Internet access panel within a routine offers two main functions to control a child’s online activities during specific time frames:
- Complete Internet cutoff: Parents have the option to completely disable internet access for their child during the scheduled routine time. By toggling off the “Internet access” switch, the child’s devices will be unable to access the internet within the designated timeframe.

- Selective Category or Website: Alternatively, parents can choose to allow internet access during routine hours but restrict certain websites or categories of content. When you toggle on the “Internet access” switch, two additional tabs, namely “Categories” and “Exceptions,” become visible within the Internet access panel.
Blocking & Allowing Website Categories
In the “Categories” section, the types of websites your child can see online are allowed or blocked by default, depending on the age set when the child’s profile was created.
To allow or block certain content categories:
- Select a category, such as Advertising.
- To block access, choose “Blocked” from the drop-down menu. To allow access, choose “Allowed”.

Important! If you block the “File Sharing” category for your child’s profile, the macOS update won’t work. To fix this, temporarily allow File Sharing, update macOS, and then block it again afterward.
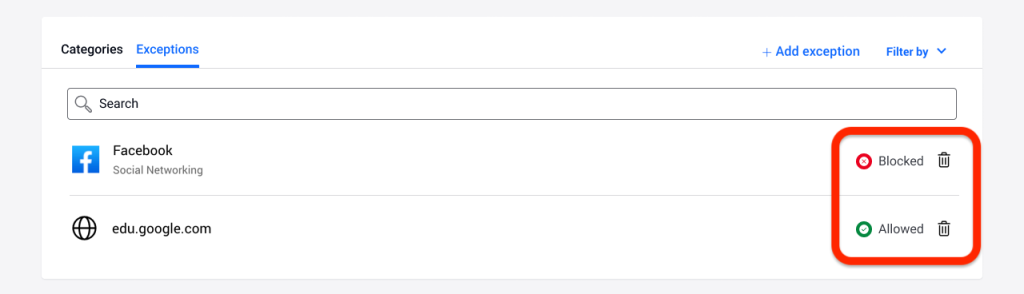
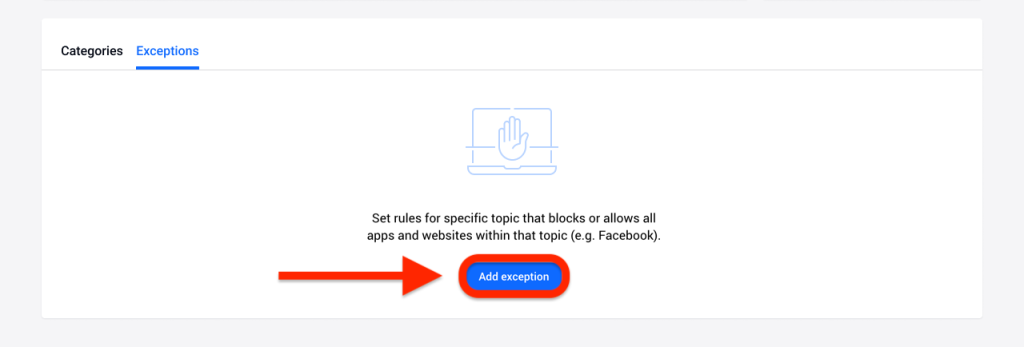
Setting Exceptions
In the Exceptions tab next to the Categories tab, website and application exclusions can be set.
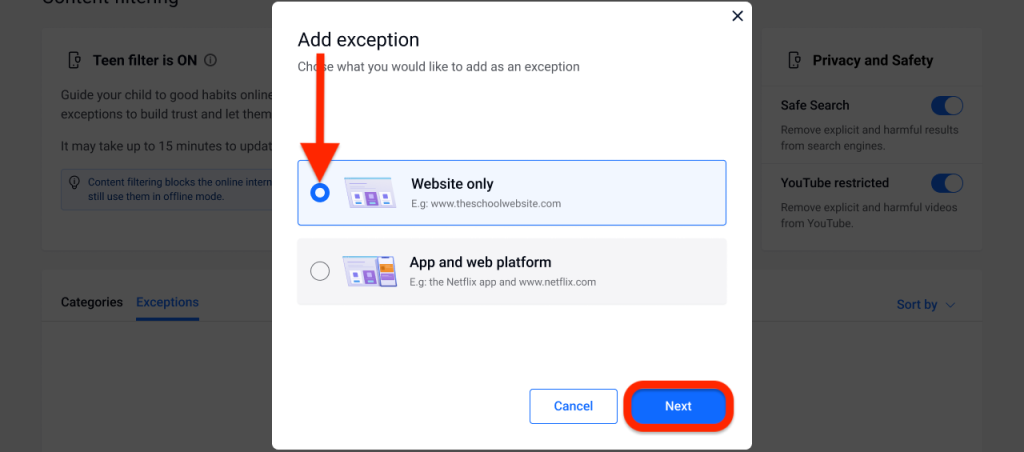
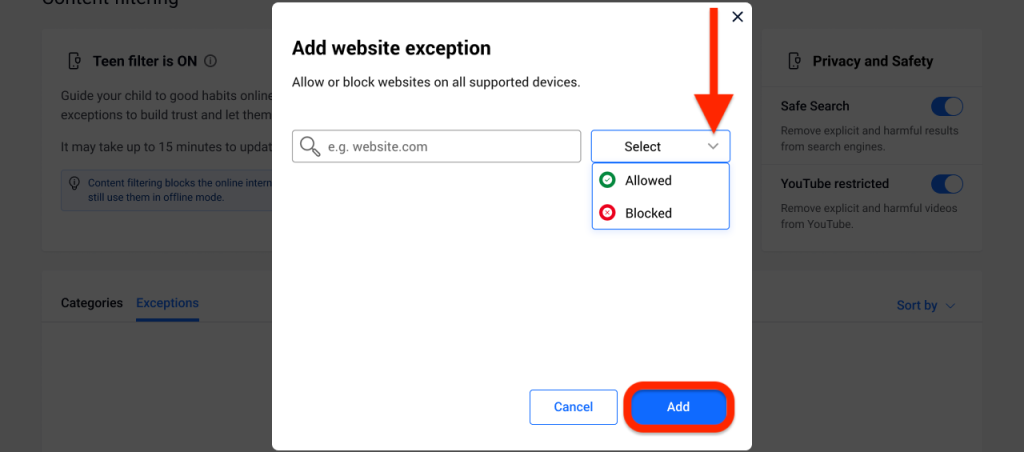
Website exception
With “Website only” exception, specific websites can be allowed or blocked. For example, if you want to block the Social Networking category but make an exception for a particular website, select “Website only”.
- Click on the “Add exception” button.
- Select “Website only” then click on the “Next” button.
- Type in the website address (e.g. facebook.com) and select whether to allow or block it from the drop-down menu.
- Then click on the “Add” button.
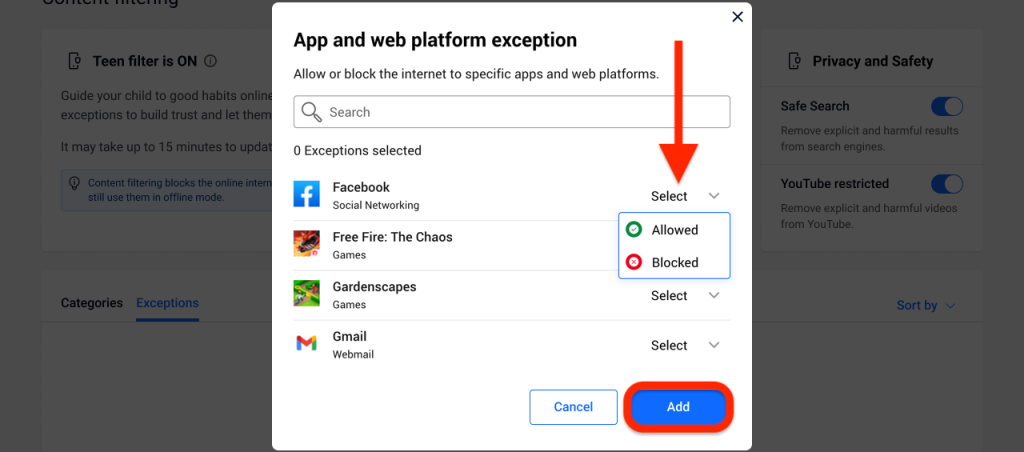
App and web platform exception
With “App and web platform” exception, you can block or allow all content related to a specific topic across different platforms like browsers, mobile apps, or desktop applications. For example, you can allow or block access to Facebook across all platforms by selecting “App and web platform” and choosing “Allowed” or “Blocked” for Facebook.
- Click on the “Add exception” button.
- Select “App and web platform” then click on the “Next” button.

- Choose the platform you wish to make an exception for from the provided list or use the search bar to find it (e.g. Facebook).
- Select whether to allow or block it from the drop-down menu.
- Then click on the “Add” button.
Removing Exceptions
The exceptions you set up for a routine will appear on the routine’s page, in the list of Exceptions at the bottom.
To delete an exception, simply click on the trash can icon located to the right of it.