In this tutorial, you will learn how to install Anti-Tracker using your Bitdefender security solution for Mac. Bitdefender’s Anti-Tracker browser extension helps you increase your online privacy. It blocks trackers that collect your data and allows you to view and manage this information on each website you visit. It keeps your browsing data private and enhances performance by loading webpages faster. Bitdefender Anti-Tracker supports the following macOS browsers:
- Safari
- Google Chrome
- Mozilla Firefox
Once Bitdefender is installed on your Mac computer, follow the steps below to add the Anti-tracker extension to your browser and block tracking cookies.
1. Click on Privacy on the left-hand side of the Bitdefender interface.
2. Open the Anti-tracker tab at the top.
![]()
3. Click Enable extension or Get extension next to the installed web browsers on your computer: Safari, Google Chrome, Mozilla Firefox.
![]()
4. You will be redirected to your browser’s extension store. Follow the appropriate instructions, based on the web browser that you are using:
![]() Google Chrome
Google Chrome
- Click the Add to Chrome button
 on the Bitdefender Anti-tracker page that opens in Google Chrome.
 - In the confirmation box, click Add extension to enable the Anti-tracker extension.
![]()
![]() Mozilla Firefox
Mozilla Firefox
- Click the Add button in the pop-up at the top right corner of the Firefox browser.
- Click Okay to complete the Anti-tracker installation.
![]() Safari
Safari
- In the Safari Extensions pop-up, check the boxes for Anti-tracker Engine and Anti-tracker Icon.
![]()
- Select Anti-tracker Icon, then click Always allow on every website if you have this option. If the button doesn’t appear, skip this step.
![]()
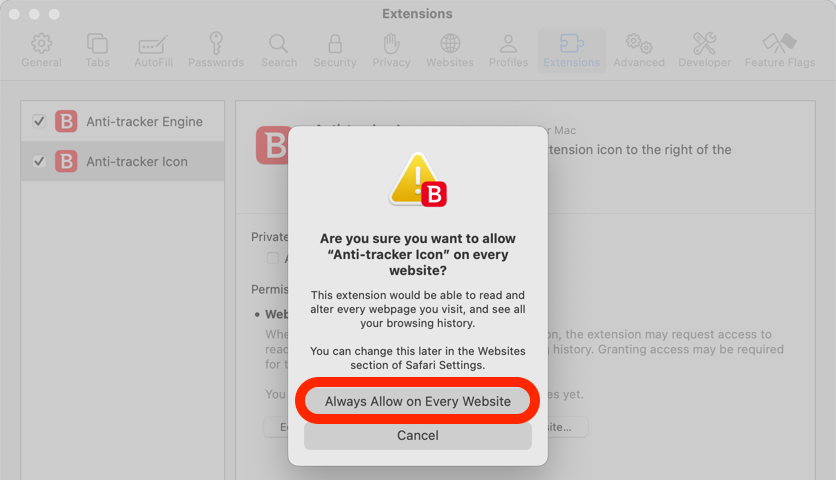
- Choose Always allow on every website in the confirmation window.