Bitdefender SecurePass allows you to securely store your credentials and autofill them when needed. Follow the steps below to manually add an account or other information, like credit cards or notes, to the SecurePass vault.
Step 1: Add a New Item
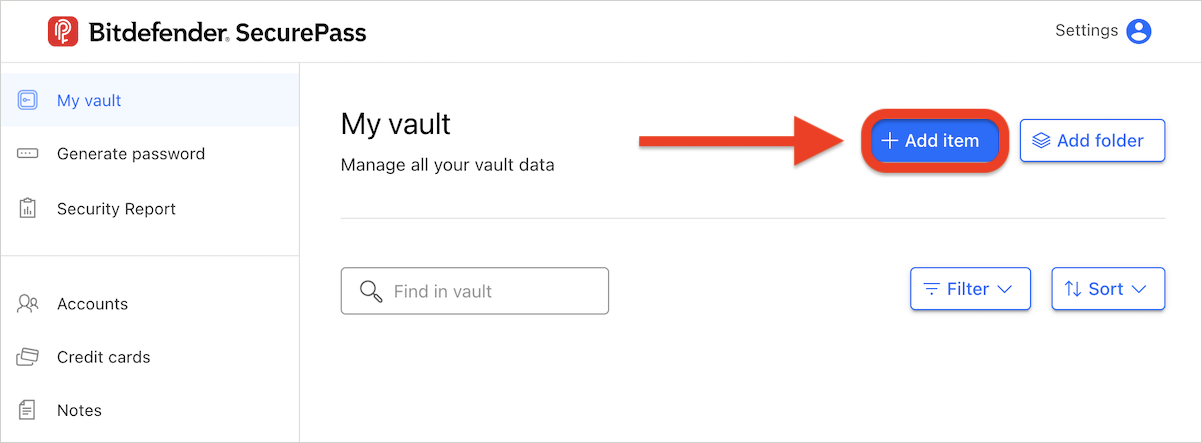
- Open the Bitdefender SecurePass app or web browser version.
- Press the + Add item button.
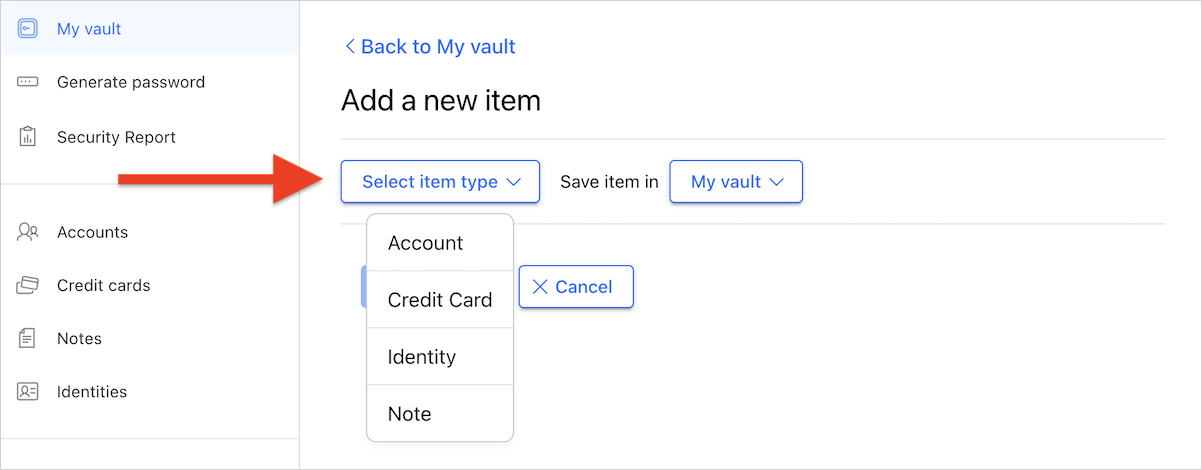
- Select the type of item you want to add from the following options:
- Account
- Credit Card
- Identity
- Note
Step 2: Fill in the fields
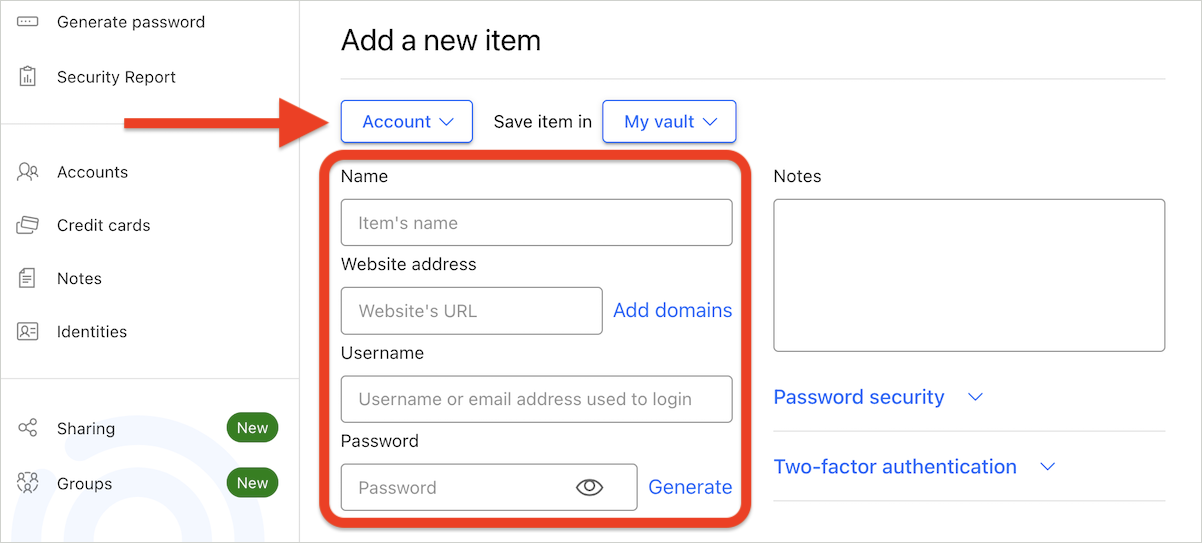
Now fill in the required fields depending on selected item. For example, to add login information for a website:
- Select Account from the list.
- In the Name field, enter the name of the website, e.g. Netflix.
- In the Website address field, type the website URL, such as
www.netflix.com. - Enter your Username for the website.
- Enter your Password for the website or use SecurePass to generate a strong one (see step 3 below).
Step 3: Generate a Strong Password (optional)
If you want to generate a new secure password instead of using your own:
- Next to the Password field:
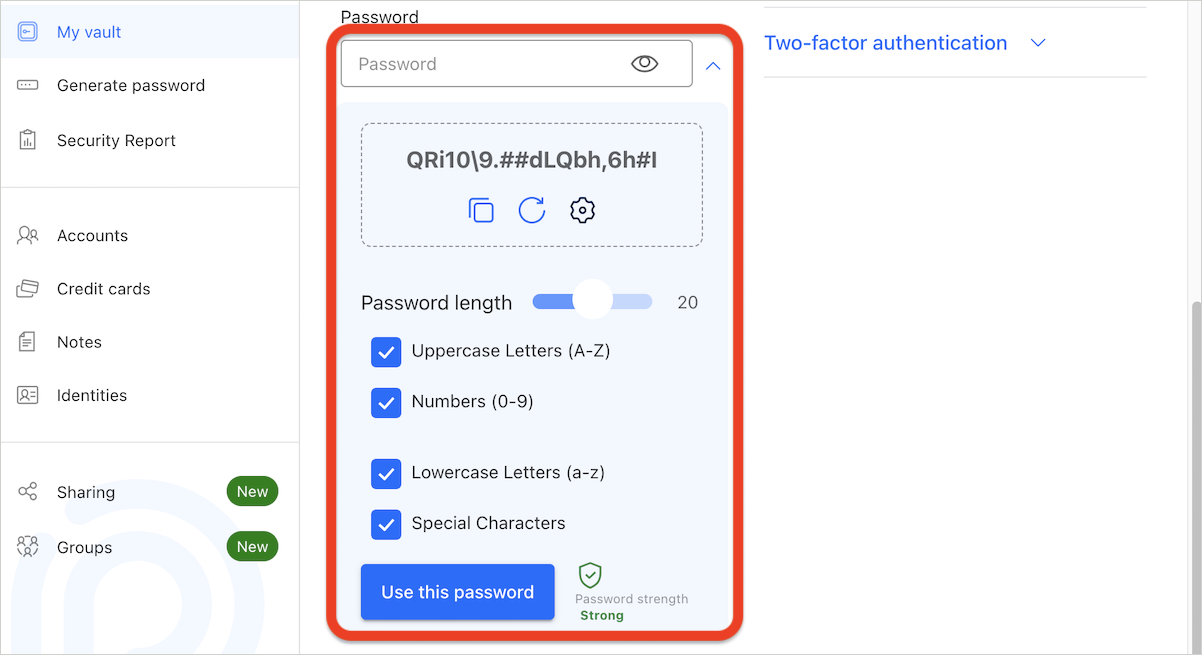
- In the browser version: Click the Generate option next to the Password field to open the password generator.
- In the mobile app: Click the small arrow next to the Password field to open the password generator.
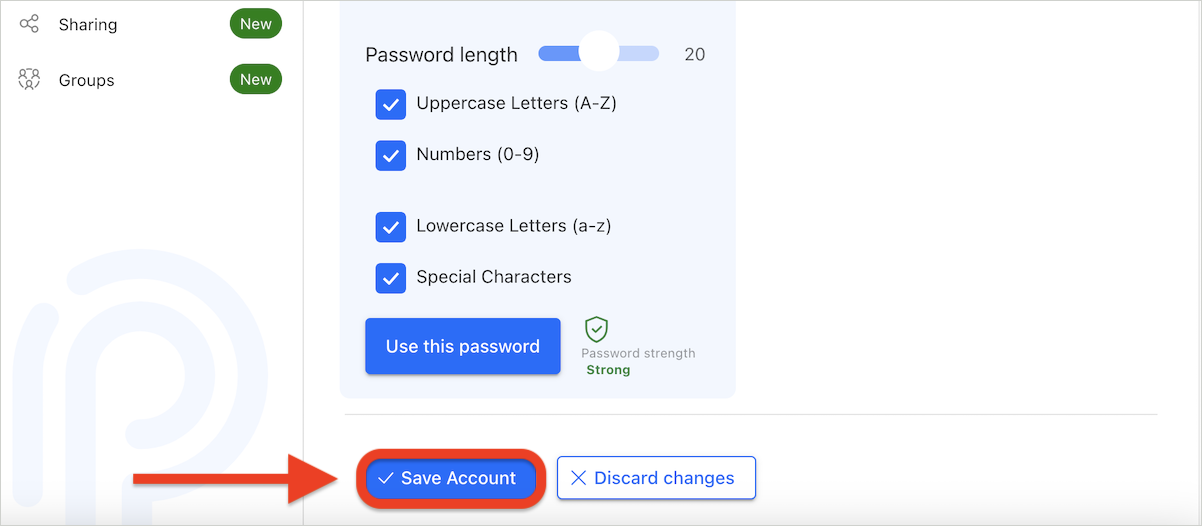
- Press the cogwheel icon to configure the generated password. You can adjust:
- Password length
- Use of Uppercase and Lowercase letters
- Inclusion of Numbers
- Inclusion of Special characters
- To generate a new password, press the circular arrow icon beneath the current password.
- Once satisfied with the generated password, press Use this password.
Step 4: Save Changes
- To save changes and add the account to your SecurePass vault, click the Save Account button at the bottom.
If you do not want to save your changes, press Discard changes.
Now you’re ready to use your saved credentials with Bitdefender SecurePass for seamless, secure logins.