Bitdefender SecurePass provides a secure way to share sensitive information, such as passwords or credit card details.
Share Passwords via Link
This tool allows you to securely share any item saved in your vault with others, even if they don’t use Bitdefender SecurePass. The data is shared in an encrypted environment, so you don’t need to worry about it being compromised.
- Choose an Item:
- In the browser version:
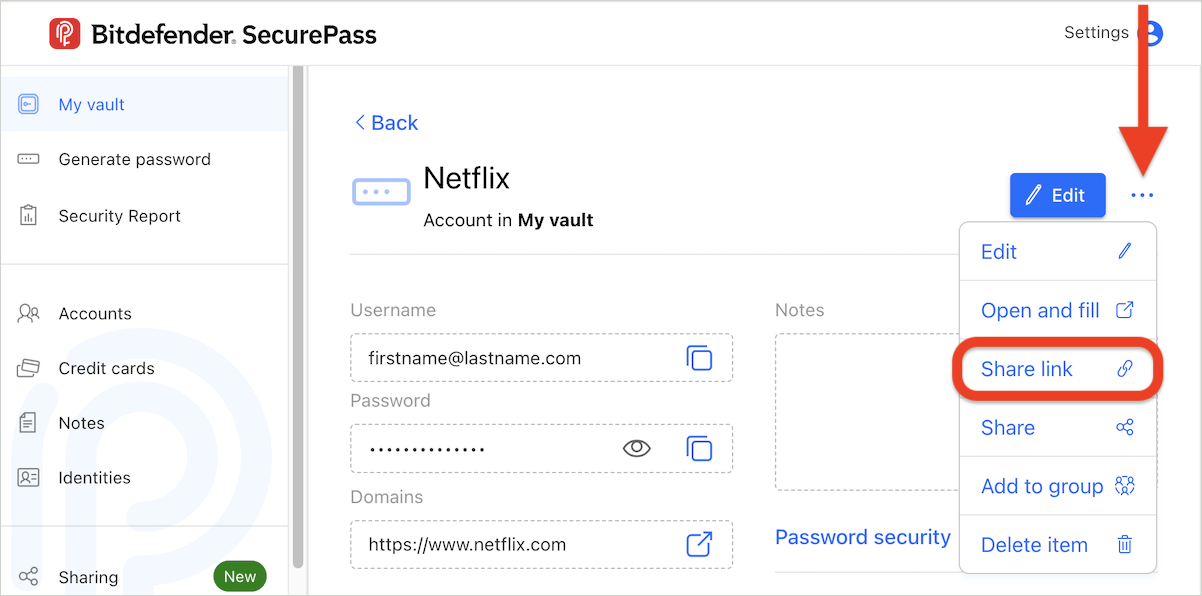
- Go to your vault and click on the item you want to share.
- Click the three dots menu in the top-right corner of the item.
- Select the Share link option.
- In the mobile app:
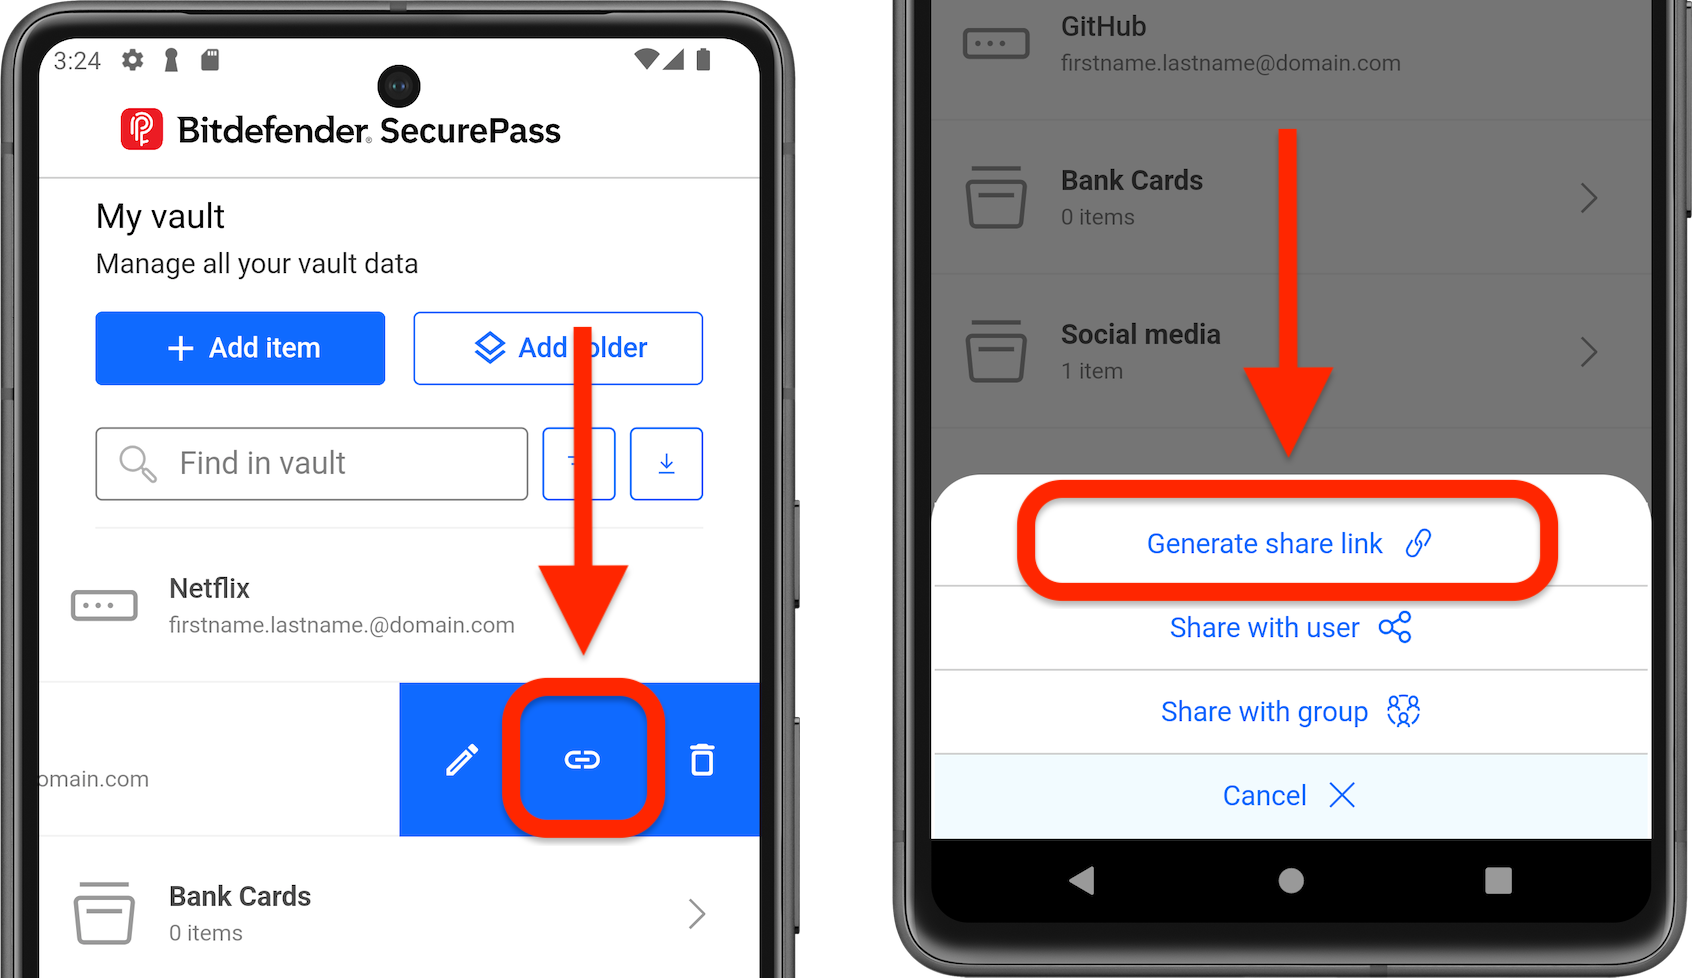
- Go to your vault and swipe left on the item you want to share.
- Tap on the link icon.
- Choose the Generate share link option.
- In the browser version:
- Create a Share Link:
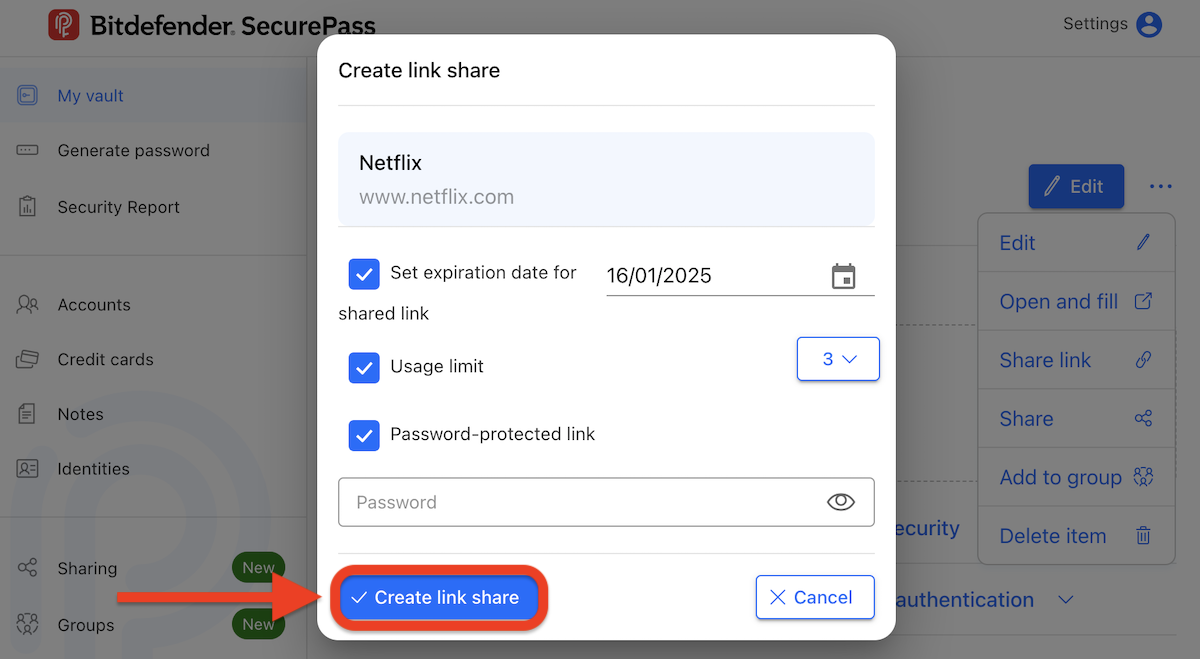
- Specify:
- Expiration date (when the link should expire).
- Usage limit (how many times the link can be used).
- Password protection (optional, but recommended for extra security).
- Press the Create link share button to generate the link.
- Copy the generated link and send it to the intended recipient.

- Specify:
- Accessing Shared Items:
- If you’ve password-protected the link, recipients will need to enter the correct passphrase to access the shared item.
- Incorrect password entries will prompt an error message.

Share Passwords with Groups
Groups make password sharing even easier. You can create different groups with other Bitdefender SecurePass users (family, friends, coworkers) to securely share sensitive data in an encrypted environment.
- Create a Group:
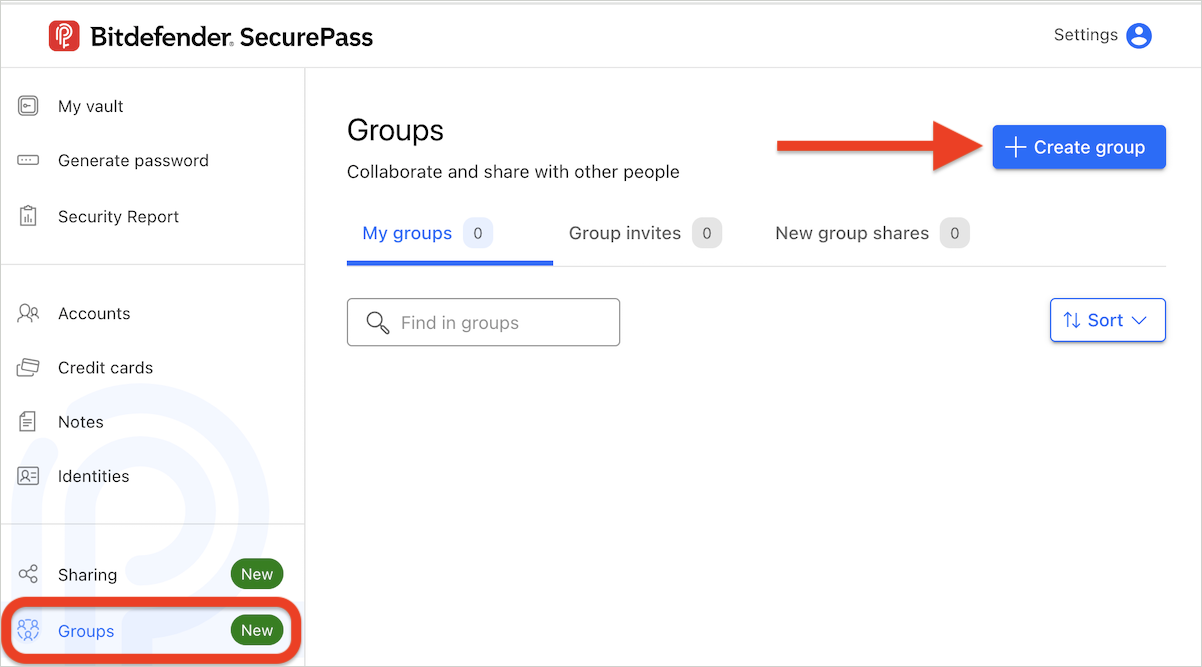
- Go to Groups in the Bitdefender SecurePass menu.
- Press the Create group button.
- Set a group name, then press the Create group button.
- Add Item to Group:
- To share an item with a group:
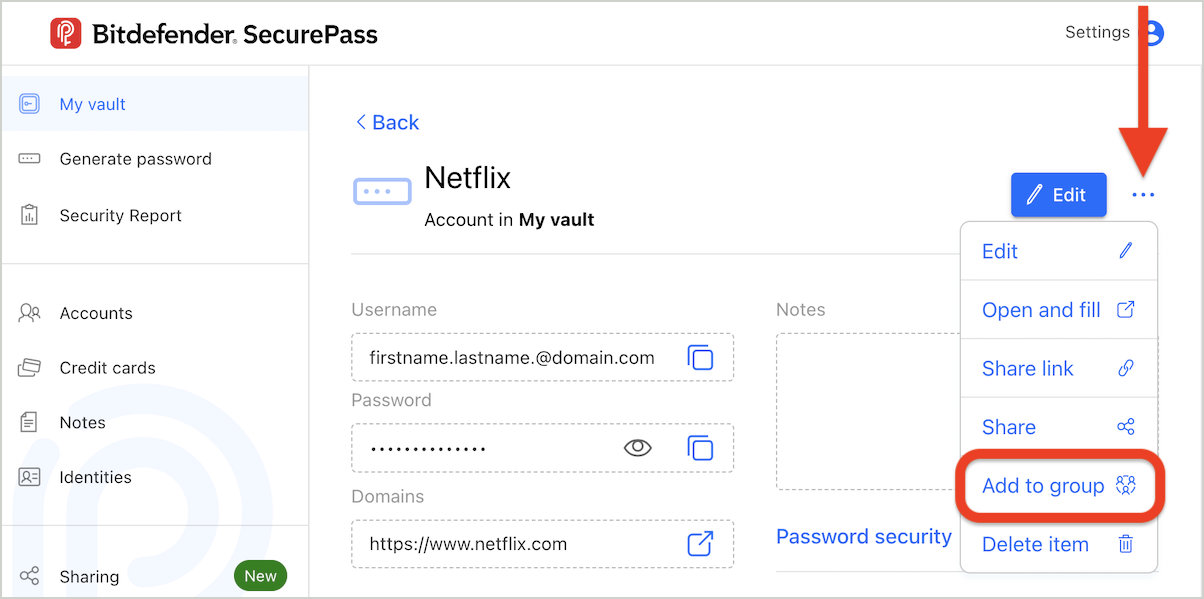
- In the browser version:
- Go to your vault and click on the item you want to share.
- Click the three dots menu in the top-right corner of the item.
- Choose the Add to group option.
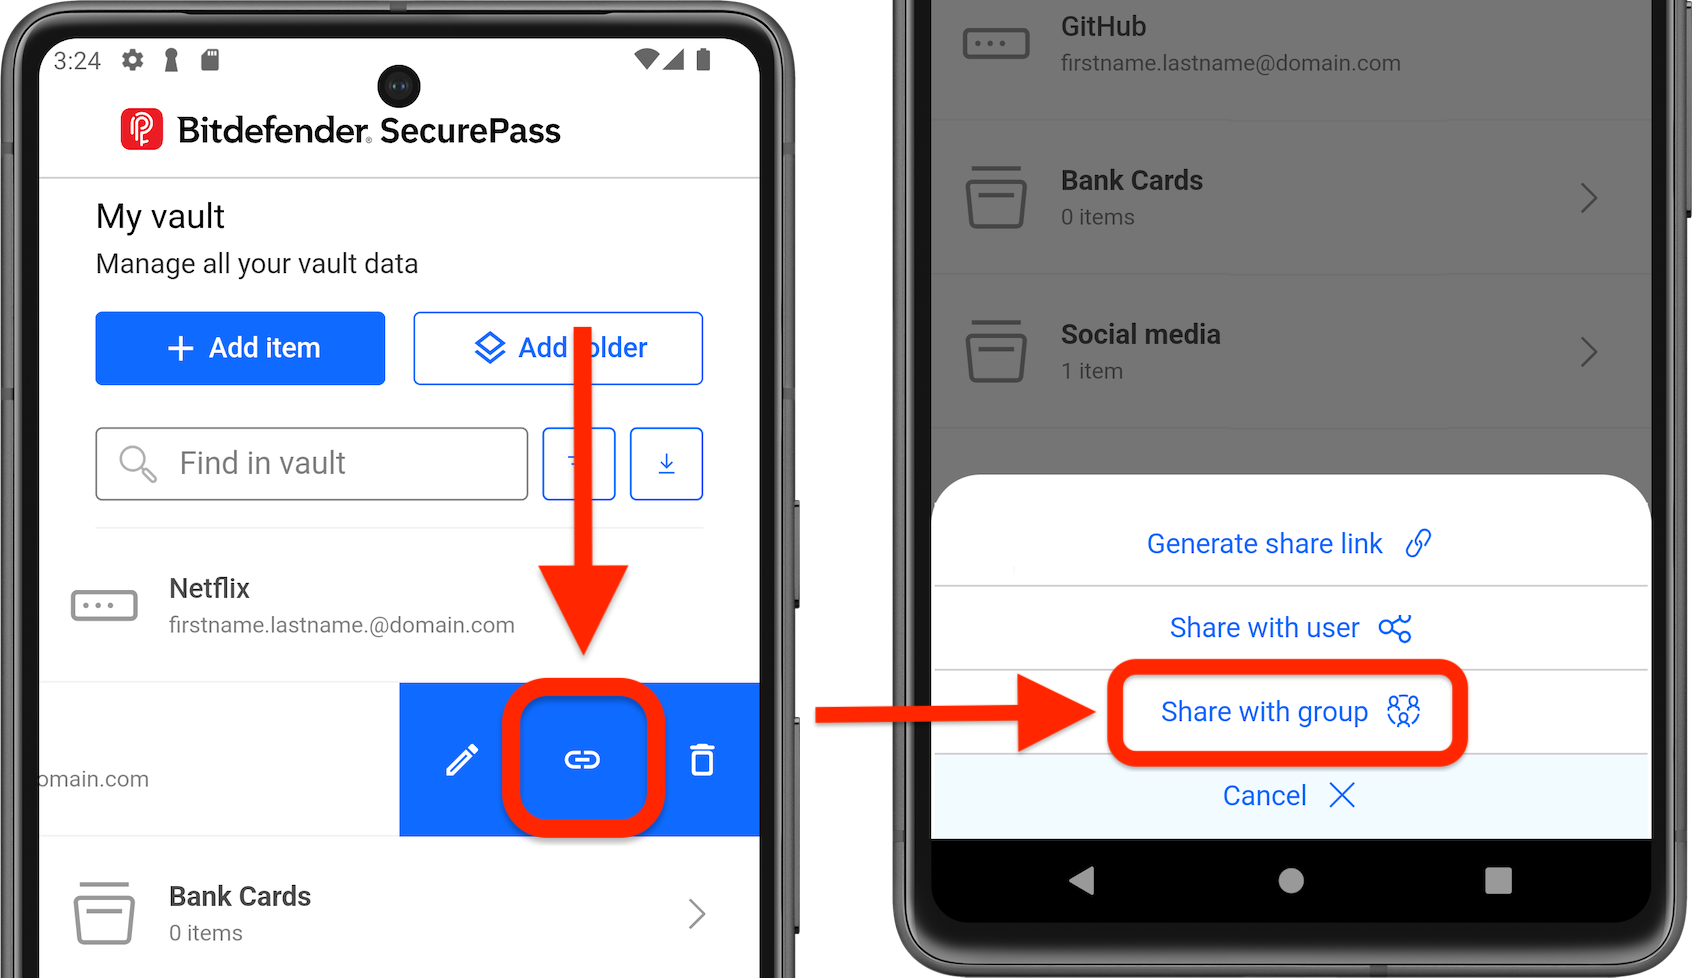
- In the mobile app:
- Go to your vault and swipe left on the item you want to share.
- Choose the Share with group option.
- In the browser version:
- To share an item with a group:
- Set Edit Rights:
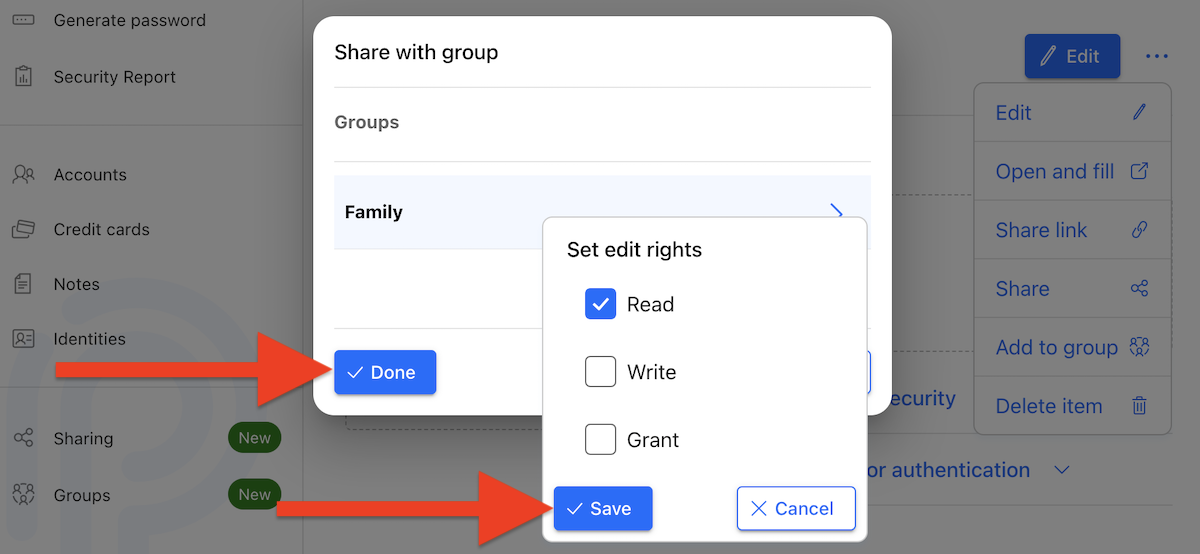
- Select the name of the group you want to share the item with.
- Set access rights (read, write, grant) based on the level of control you want for group members.
- Click Save, then Done.
-
- Shared items can be viewed by group members in the group’s section.
Manage Groups
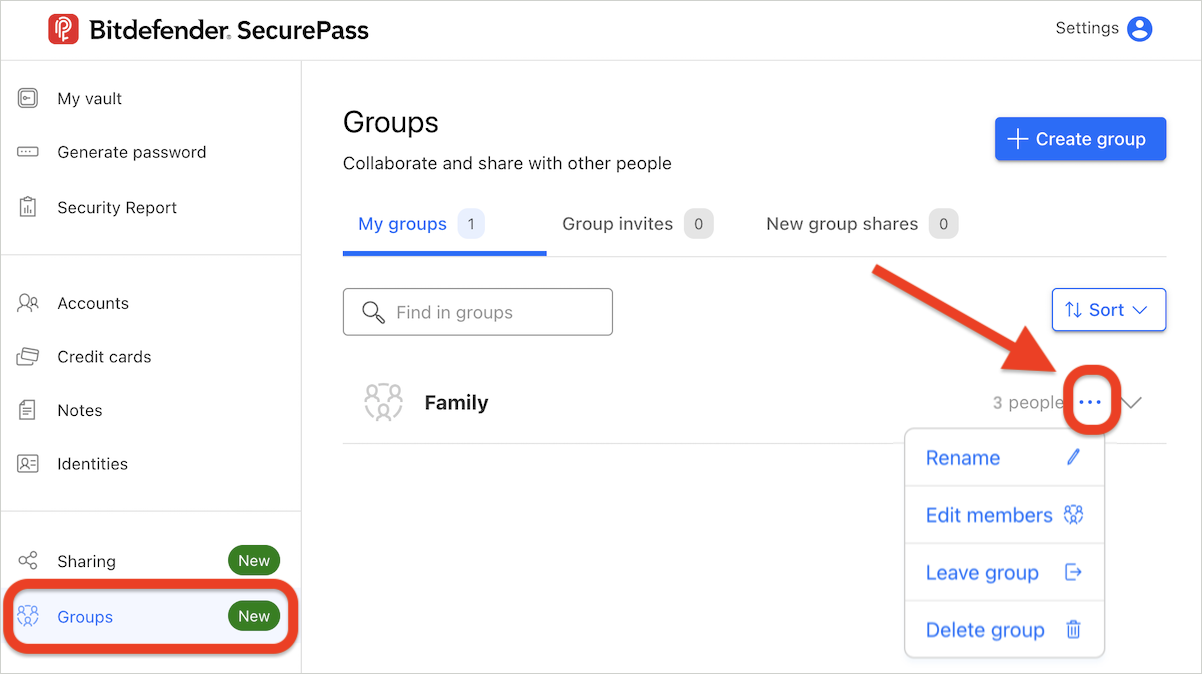
All created groups and the number of members in each appear in the Groups section of Bitdefender SecurePass.
Select a group name, then press the three dots menu to:
- Rename the group.
- Edit members:
- Invite members: Send email invitations to add new members (they must have an active SecurePass subscription).
- Assign rights:
- Grant admin rights to specific members.
- Enable sharing rights for members.
- Remove members: Click the trash icon next to a user’s email to remove them from the group.
- Leave group: Exit the group as a member.
- Delete group: Permanently remove the group from SecurePass.
Manage Shared Items
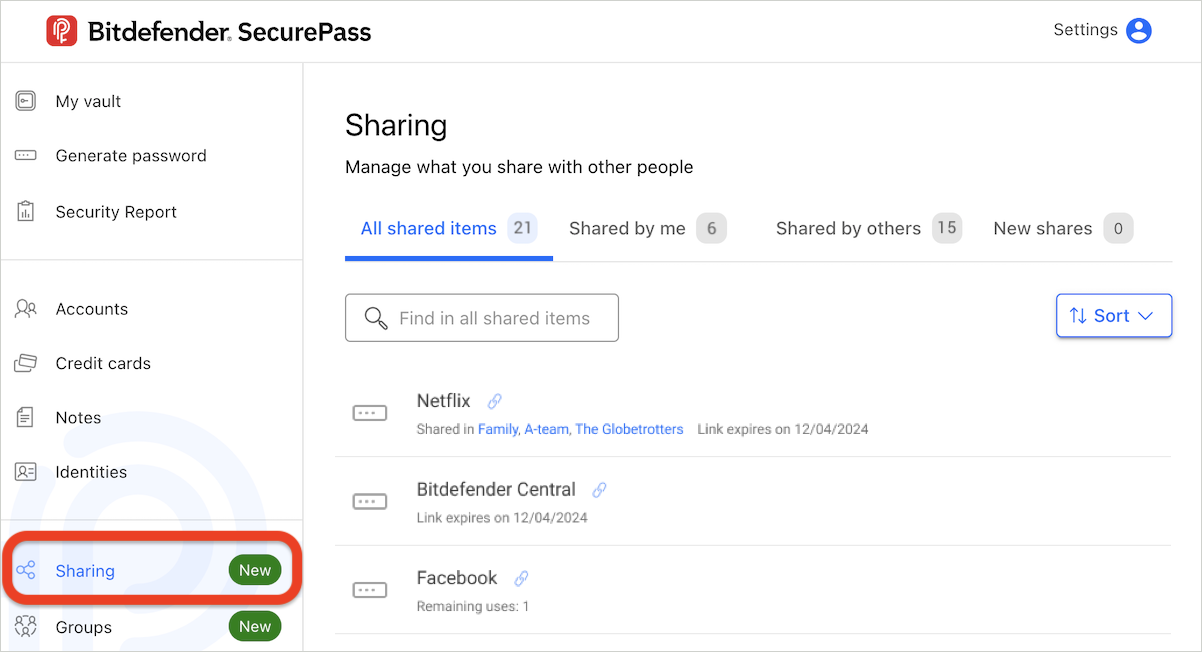
- Bitdefender SecurePass users can track all shared items in the Sharing section.
- When you receive a shared item, it will appear under the New shares tab. You can accept or decline the share request by pressing the checkmark respectively the x button.
- Once accepted, the shared item will be saved in your vault.
These features provide a flexible and secure way to manage shared access to sensitive information across individuals or groups, while maintaining control over permissions and security.