Running Disk Cleanup on your Windows computer is a quick way to free up space and improve performance. Whether you’re using Windows 7, 8, 10, or 11 the process is simple and can help remove unnecessary files like temporary files, system files, and more. In this easy-to-follow guide, we’ll show you how to use Disk Cleanup on any version of Windows, step-by-step, to keep your system running smoothly.
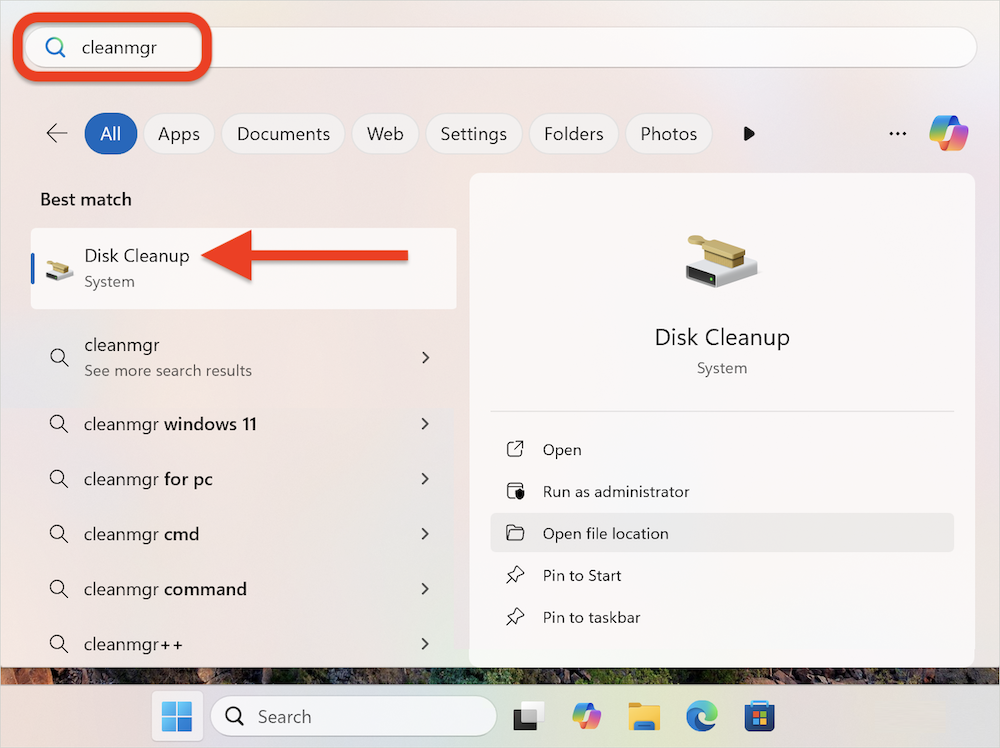
1. Open Disk Cleanup
- Click the Start button (Windows logo in the bottom-left corner).
- Type cleanmgr in the search bar and select Disk Cleanup from the search results.
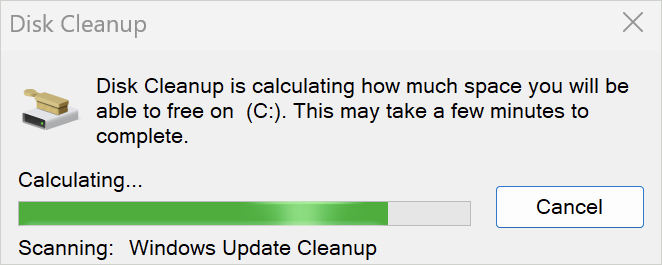
2. Select the Drive
- When the Disk Cleanup window opens, select the drive you want to clean (usually C:) and click OK.
- It will take a moment to calculate how much space you can free up.
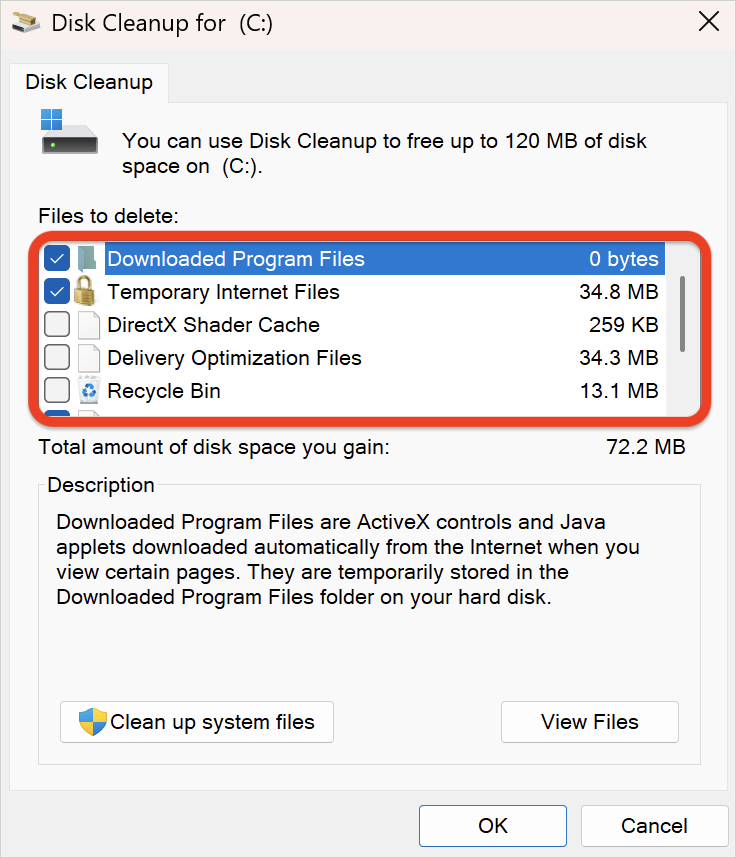
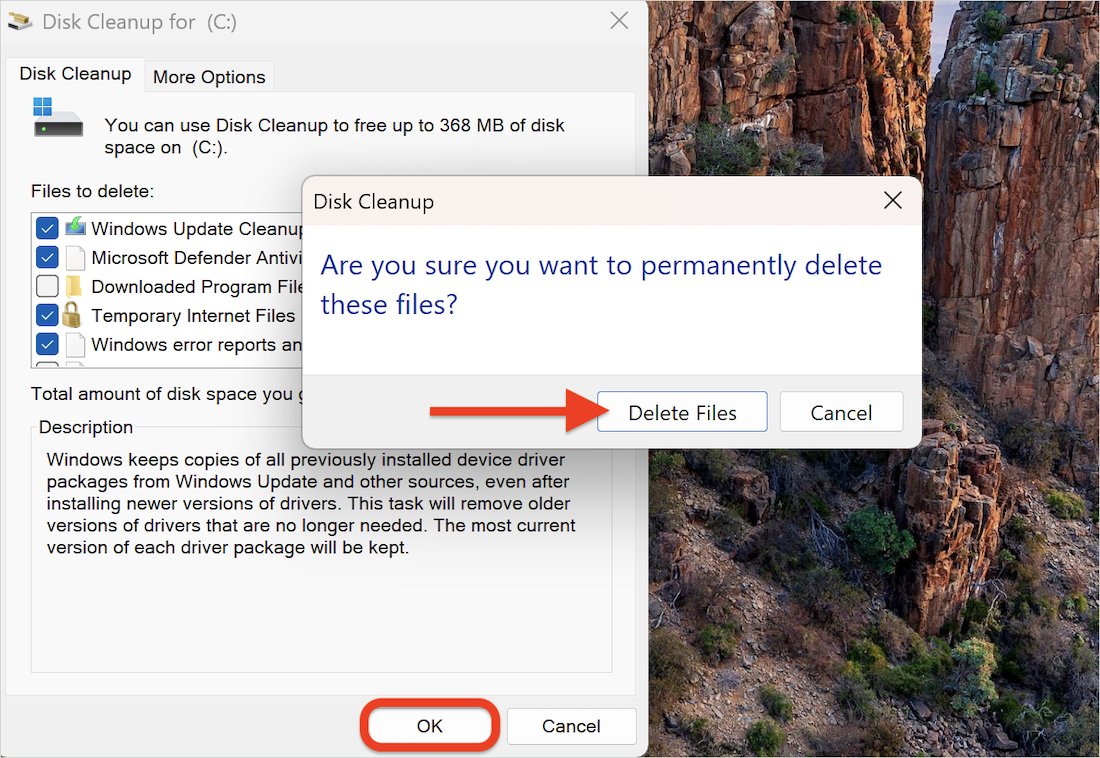
3. Choose Files to Delete
- In the list of file types (e.g., Temporary files, Recycle Bin, etc.), check the boxes next to the types of files you want to delete.
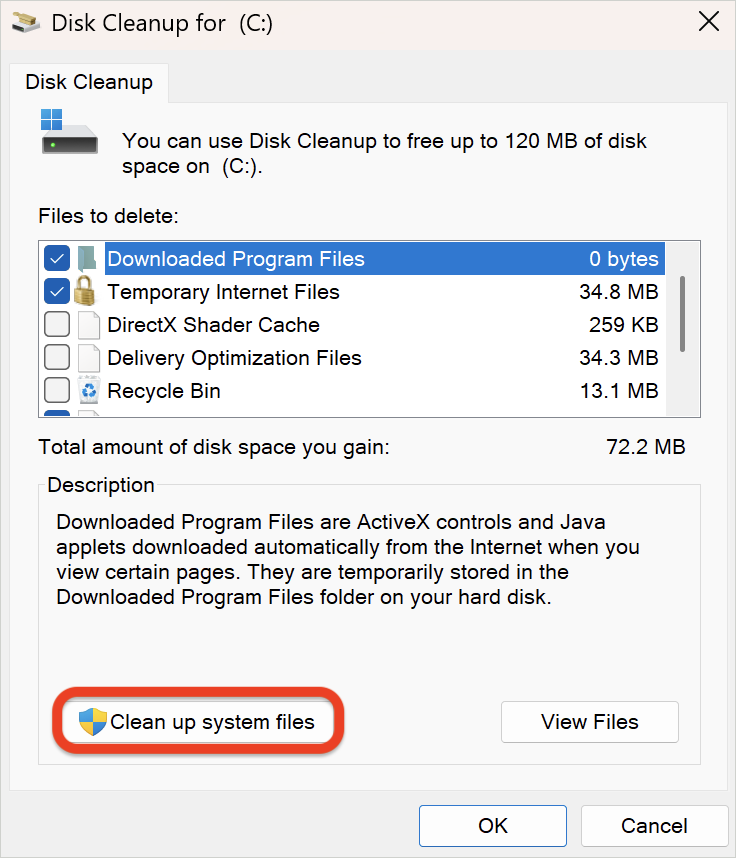
4. Clean Up System Files (optional)
- If you want to clean up system files, click Clean up system files. You may need to choose the drive again.
- You can select additional files to delete, such as old Windows updates.

5. Start Cleanup
- Once you’re ready, click OK, then confirm by clicking Delete Files.
- Disk Cleanup will begin deleting the selected files, freeing up space on your computer.
That’s it! Your disk should now have more available space.