If you’re switching to NETGEAR Armor from another password manager, you can easily transfer your saved passwords and other information. This guide will walk you through the steps to import data from your old password manager into NETGEAR Armor Password Manager.
1. Select the Import Option
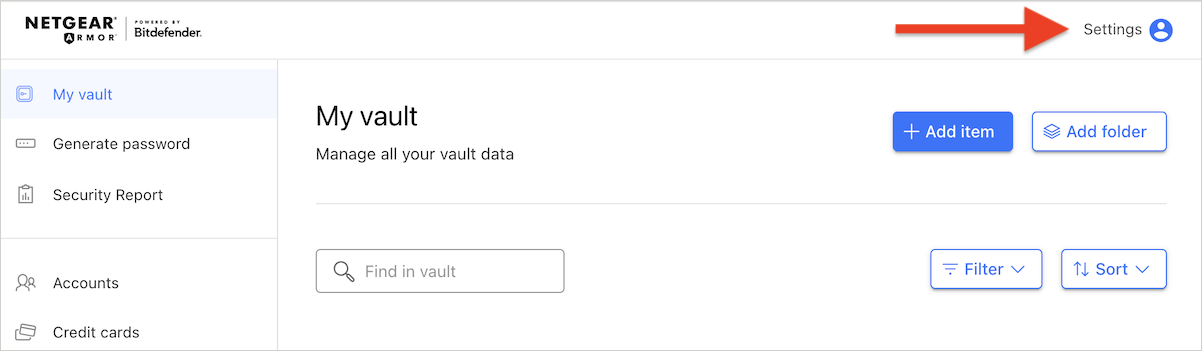
- Open NETGEAR Armor Password Manager.
- In the web version:
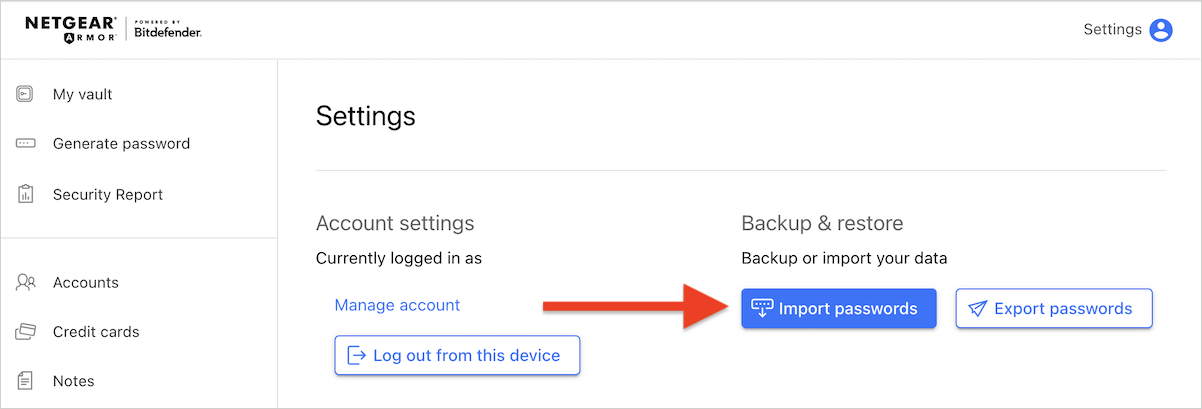
- Click on Settings in the top right corner of the page.
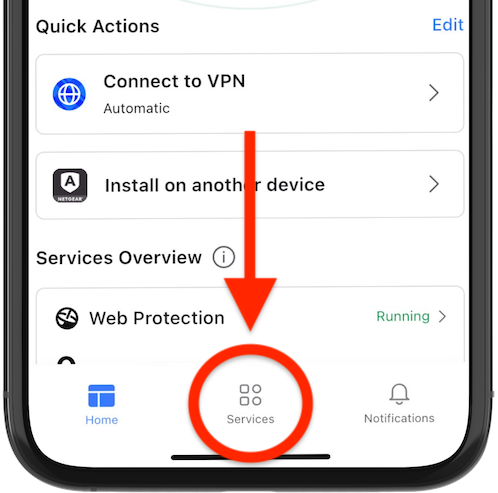
- In the mobile app:
- Tap Services at the bottom of the NETGEAR Armor app.
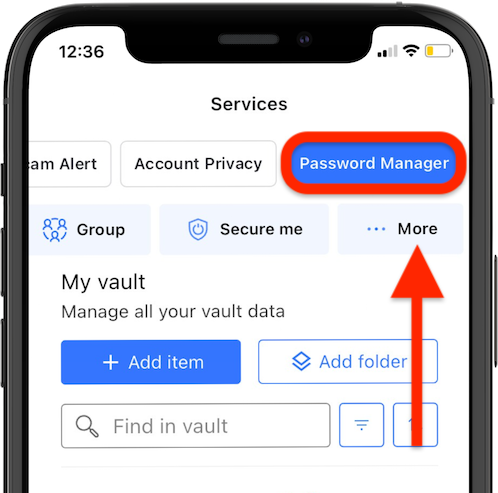
- Select Password Manager at the top of the Services screen.
- Tap the More button.
- Click on Import passwords.
- This will open the import window.
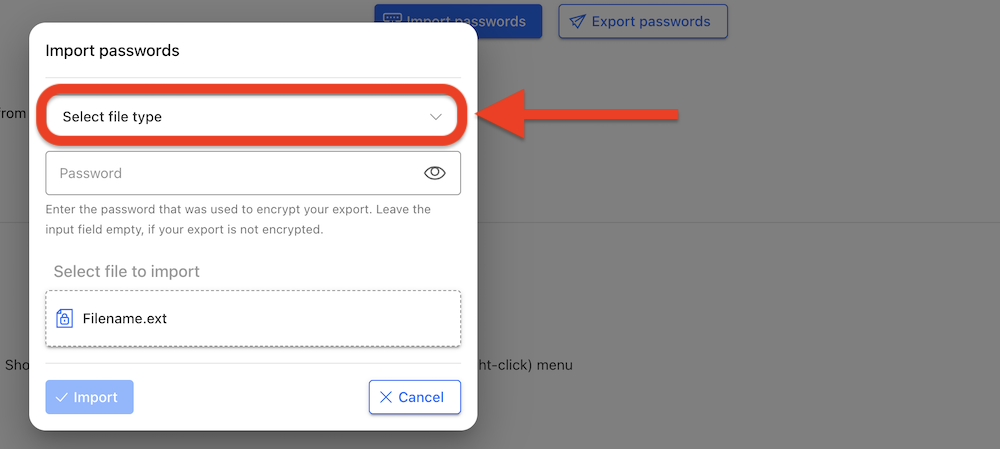
2. Choose the File Type
- Click on the Select file type field.
- From the drop-down menu, select the name of the password manager or web browser you’ve used before (e.g. 1Password, Firefox etc.).
- If a password was used to encrypt the file, enter it in the Password field; otherwise, leave it blank.
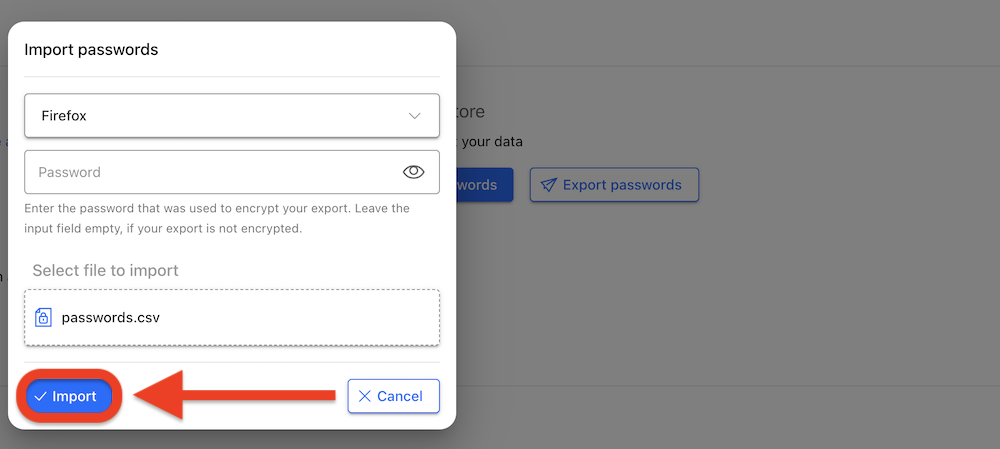
3. Select the Exported File
- Click on the Select file to import field.
- Navigate to the location where you saved the exported data from your old password manager.
- Choose the file and click Open.

4. Start the Import Process
- After selecting the file, click Import.
- The import process will begin, and you’ll see a progress indicator.
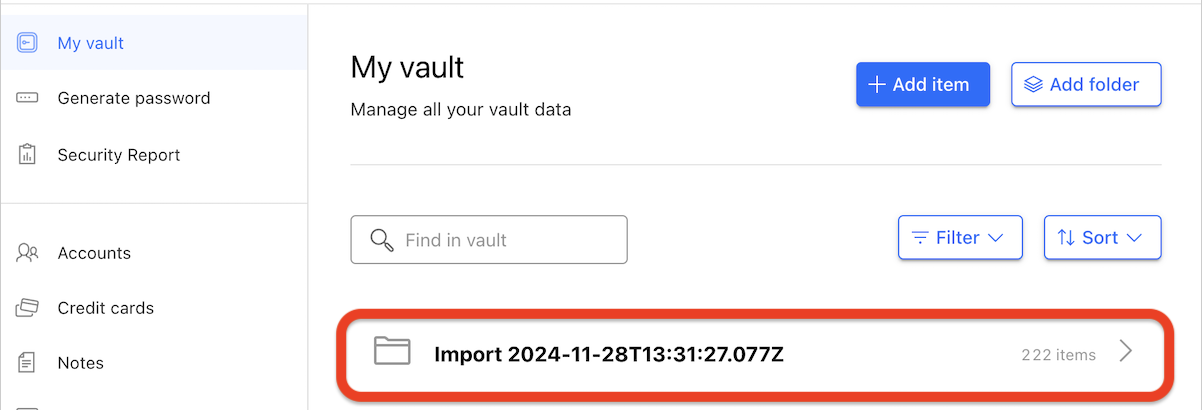
5. Access the Imported Data
- Once the import is complete, a folder named Import will appear in your NETGEAR Armor vault containing your data from the previous password manager.
- You can organize imported items later by creating new folders or rename existing ones. Learn How to organize passwords into folders in NETGEAR Armor Password Manager.
Note:
- If you import data multiple times from different password managers, NETGEAR Armor Password Manager will create a new Import folder for each instance.
- These folders can contain various types of data, depending on what was stored in your previous password manager.