NETGEAR Armor Password Manager provides a convenient way to organize and manage your saved items, such as accounts and credit cards. By using the Add folder option, you can categorize your items into specific folders for easy access. Follow the steps below to learn how to create folders and manage your items with ease.
Step 1: Create a Folder
- Open the NETGEAR Armor app or web version.
- Go to your Password Manager vault and tap the Add folder button.

- Name your folder.
- Press the Create button.

The new folder will now appear in your NETGEAR vault.
Step 2: Move Items to a Folder
To better organize your accounts, you can move them into folders. For example, let’s move an account from the default vault into the newly created folder:
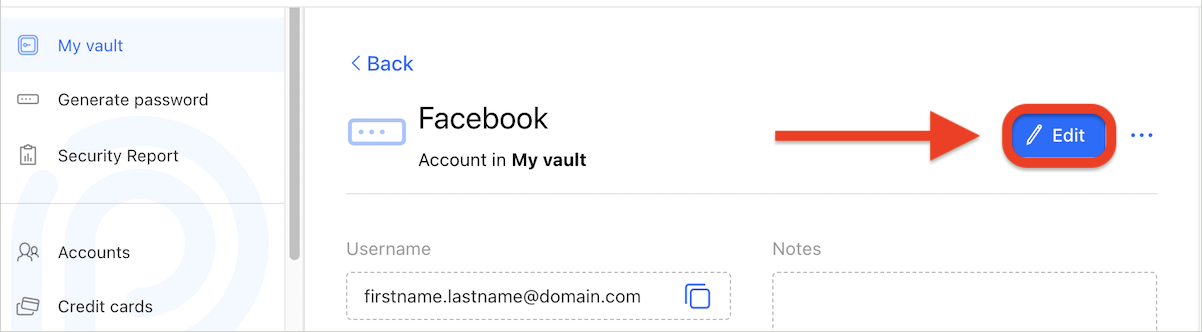
- In NETGEAR Armor Password Manager, click on the account you want to move.
- Then press the Edit (pen) icon.
- Press the location (usually My vault) shown next to Save item in.
- Select the folder name from the list.
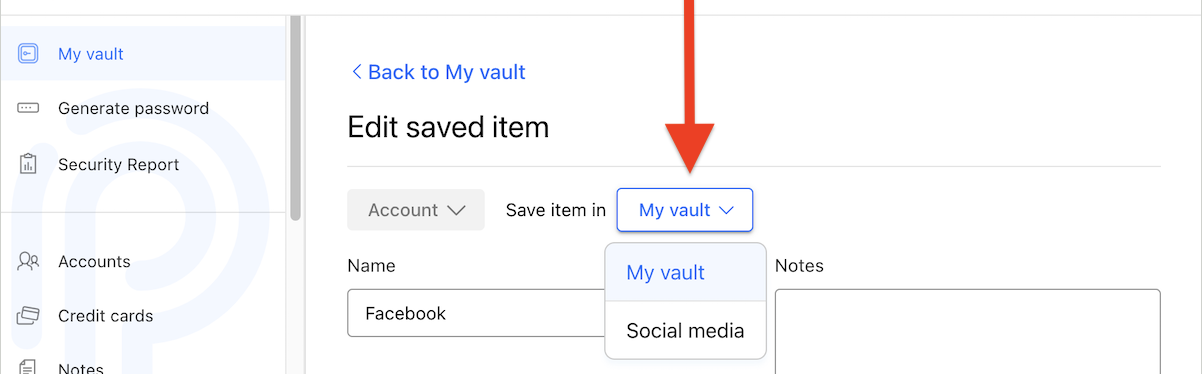
- Press the Save Account button.
The account will now be stored in the selected folder. You can verify this by navigating to the folder, where you will see the account listed.
Step 3: Save Items Directly to a Folder
You can save new items directly to a specific folder, eliminating the need to add them first and move them later. For example, if you’ve created a folder for bank cards and want to add a new card to it:
- In NETGEAR Armor Password Manager, press the Add item button.

- Choose Credit Card as the item type.
- Press the location shown next to Save item in.
- Select the folder name from the list.
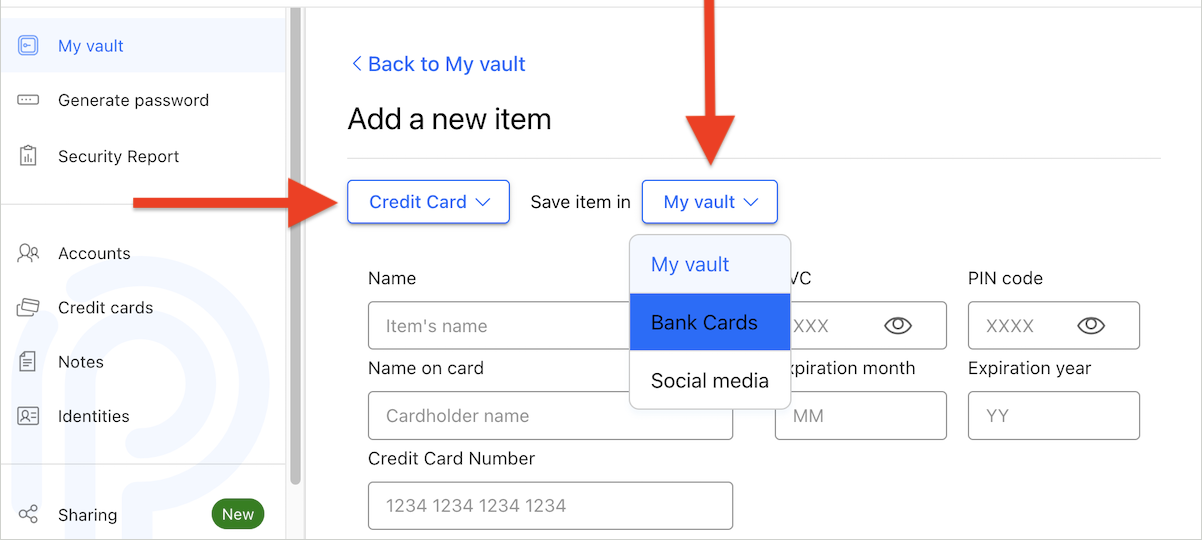
- Name the card, e.g. VISA card.
- Fill in the required credit card details:
- Cardholder name
- Card number
- CVC (card verification code)
- PIN code
- Expiration month and year
- Press the Save Credit Card button to store the card.
The family card will now be created in your selected folder. You can choose to move it into a different folder, following the same steps outlined above for moving items.