This guide will show you how to download and install NETGEAR Armor powered by Bitdefender on Windows computers using your NETGEAR Armor account. Once the installation is complete, your product will be activated.
- System Requirements: Windows 7 with Service Pack 1 or later
Video tutorial
- How to Install & Use NETGEAR Armor for Windows: Step-by-Step Guide
1. Open a web browser and visit https://armor.netgear.com/
2. Sign in with the NETGEAR account you used to activate NETGEAR Armor on your router.
3. Click Allow to give Bitdefender access to your profile information (needed for NETGEAR Armor).
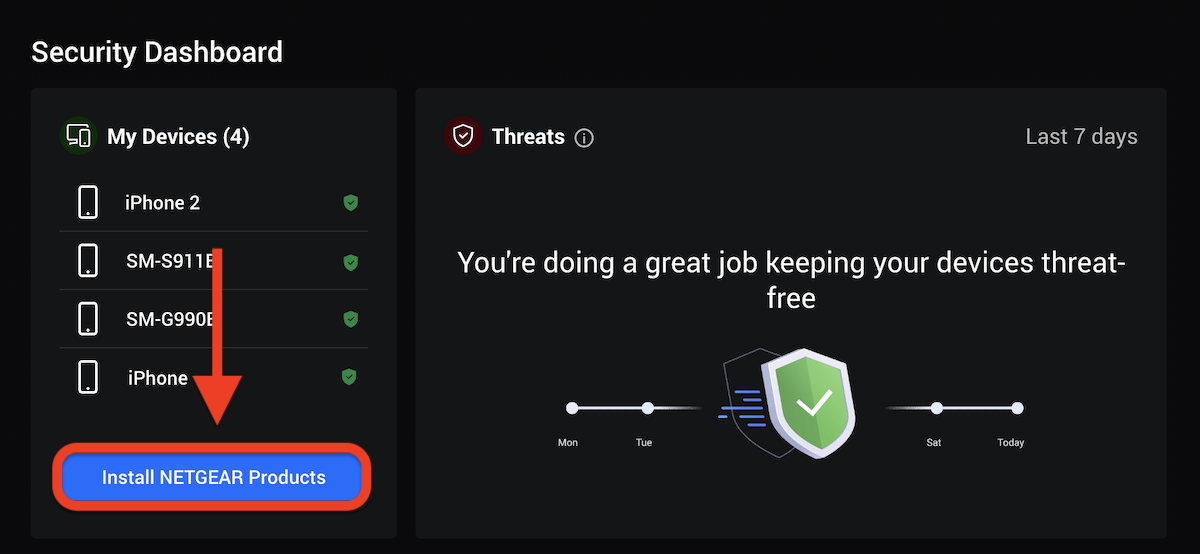
4. Once you enter the NETGEAR Armor portal, click the Install NETGEAR Products button.
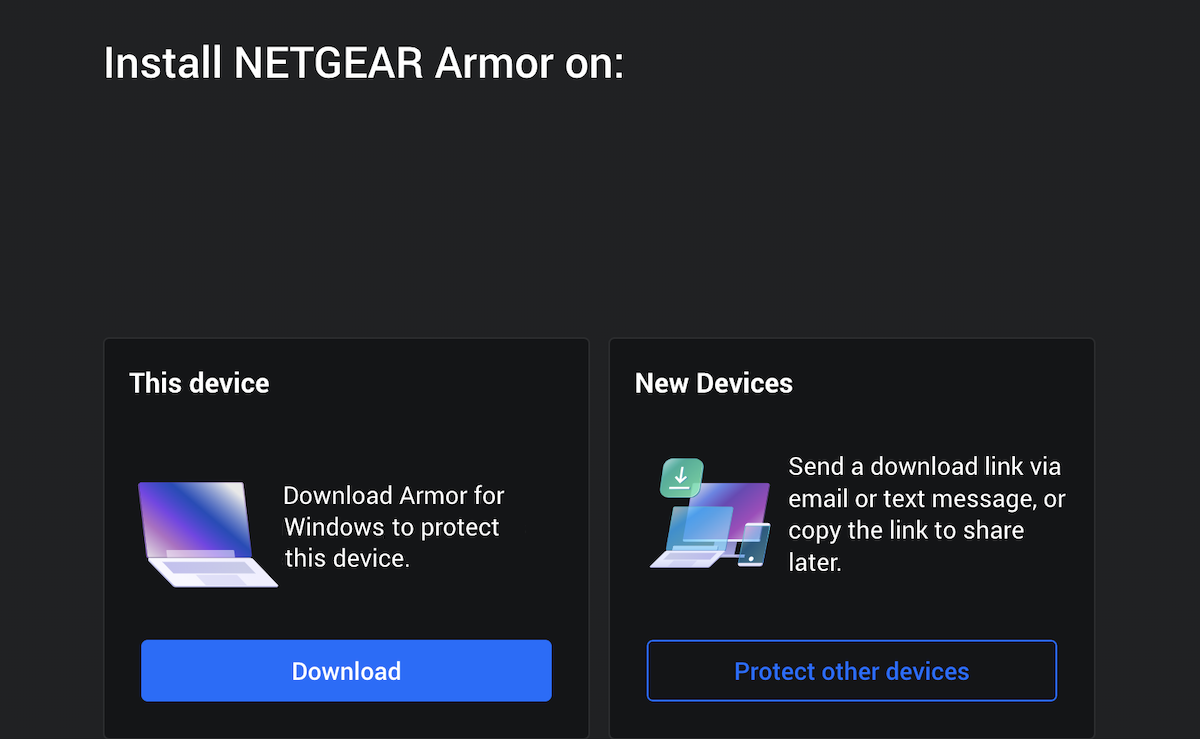
5. Choose to install the Security product.

6. Choose how you’d like to install:
- Download – Install directly on the current device.
- Protect other devices – Send a download link valid for 24h to the other device via email, QR code, or direct link.
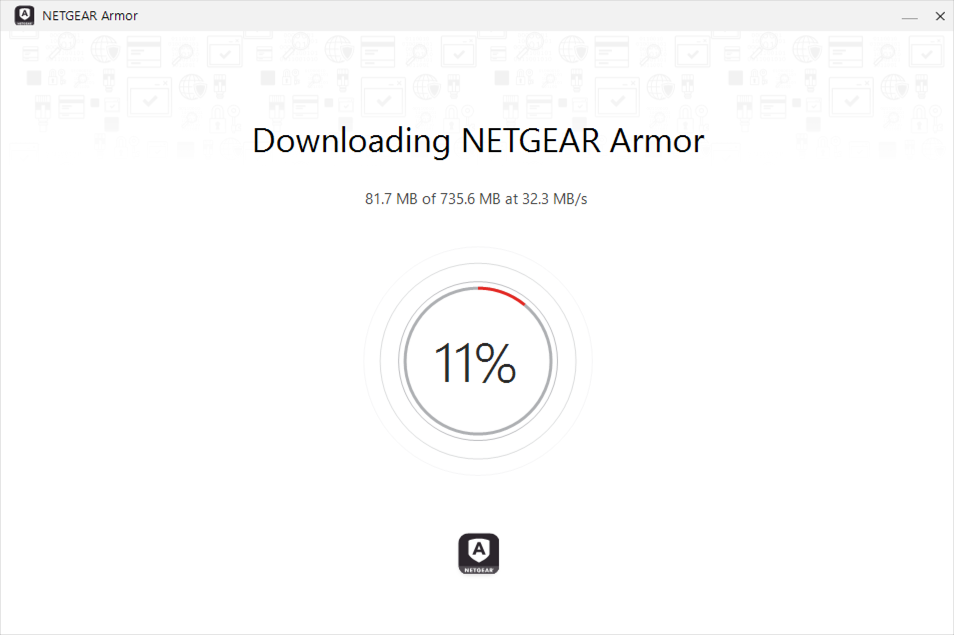
7. On the PC you want to protect, double-click the downloaded file to start the installation.
8. Choose Yes if presented with the User Account Control dialog box.

9. The NETGEAR installation package is being downloaded to your computer. This step may take a few minutes or longer, especially with slow internet connections.
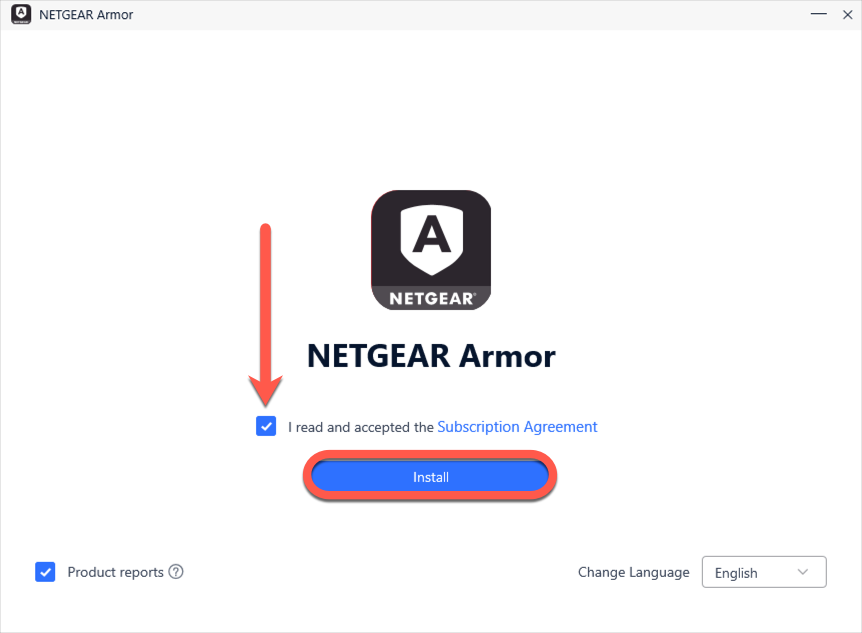
10. Once the download is complete, click the Install button after reading and accepting the subscription agreement.
- You can also select the app language using the Change Language menu in the bottom right corner of the same window.
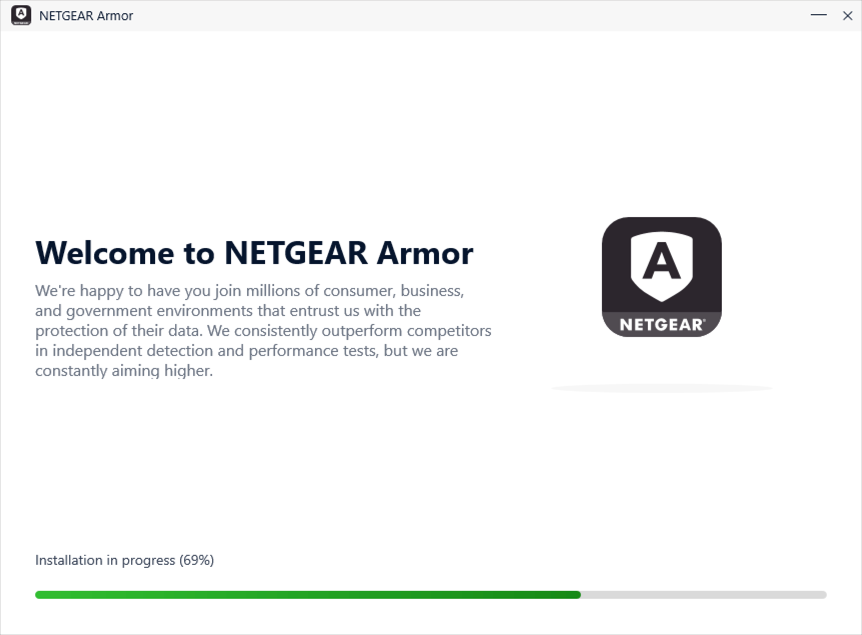
11. Please wait while NETGEAR Armor is being installed on Windows.
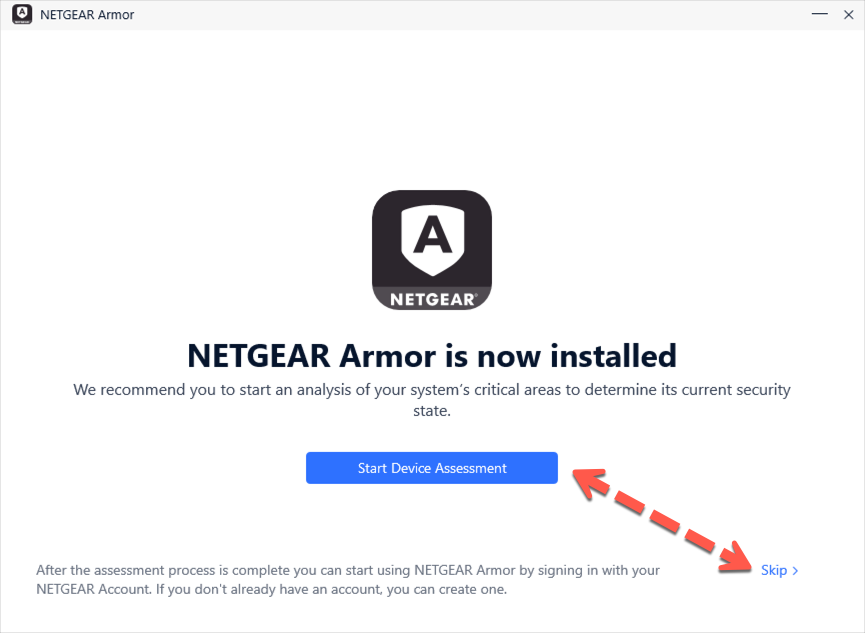
12. Once NETGEAR Armor is installed, you’ll get a recommendation to start a device assessment, which you can either proceed with or skip.
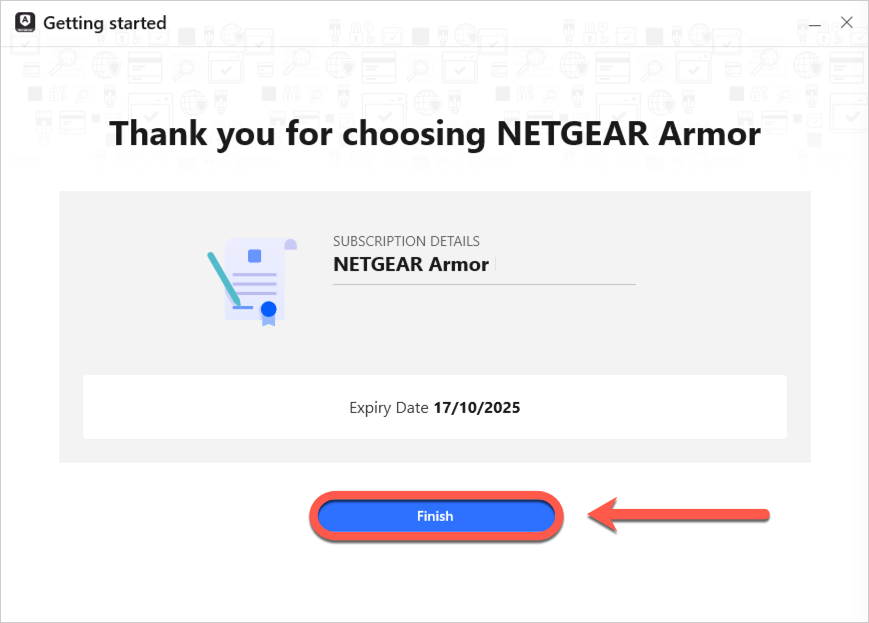
13. Click Finish on the screen that displays details of your subscription to open the NETGEAR Armor interface.
That’s it! You have successfully installed NETGEAR Armor by Bitdefender on Windows. To protect other devices, see – How to Install NETGEAR Armor & VPN on All Devices.