This article provides an in-depth, step-by-step guide on how to download, install, and configure Bitdefender Parental Control on your child’s macOS device. Installing the Bitdefender Parental Control app on your child’s Mac computer is a straightforward process that ensures you can manage and monitor their online activities effectively.
Step 1: Access Bitdefender Central
1. Visit https://central.bitdefender.com/ and sign in to your Bitdefender Central account.
2. Once logged in, click on “Parental Control” on the left-hand side menu.
Step 2: Create Child Profile
1. Upon accessing the Parental Control section, you’ll be prompted with a screen. Click on “Get started.”
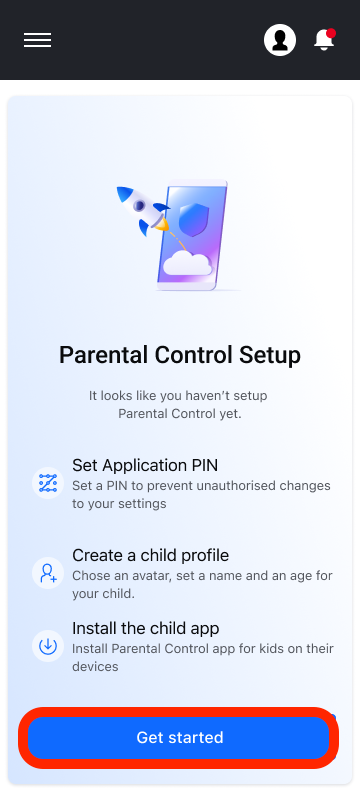
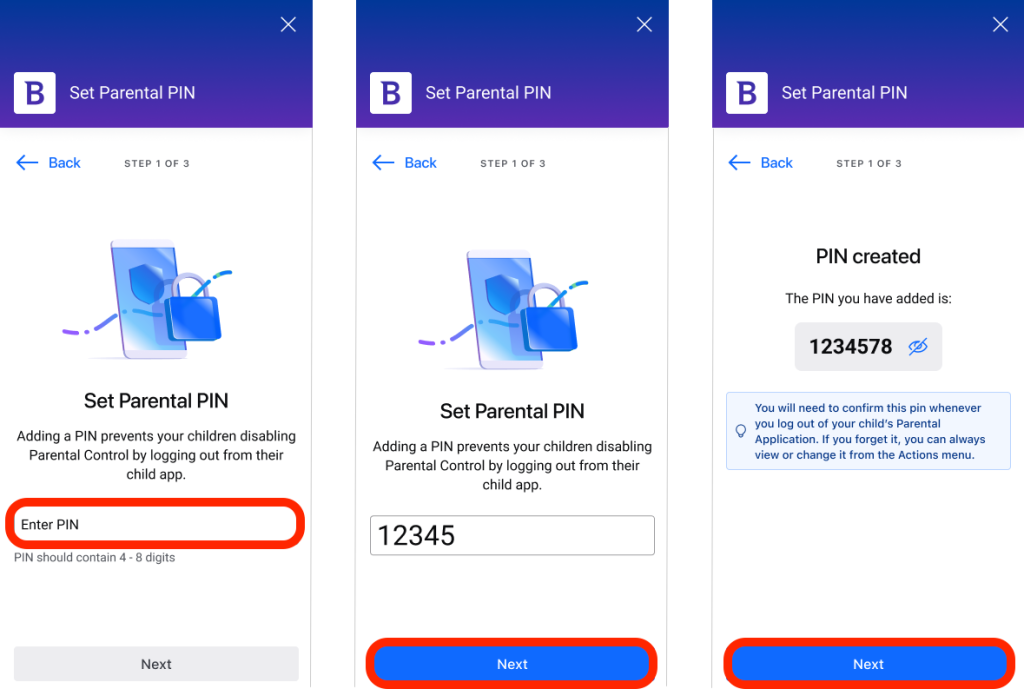
2. If you’re setting up Parental Control for the first time, you’ll need to create a PIN code. This PIN code serves as a barrier, preventing the child from logging out of the Parental Control app.
3. Next, create a profile for your child by entering their name, profile picture, and date of birth.
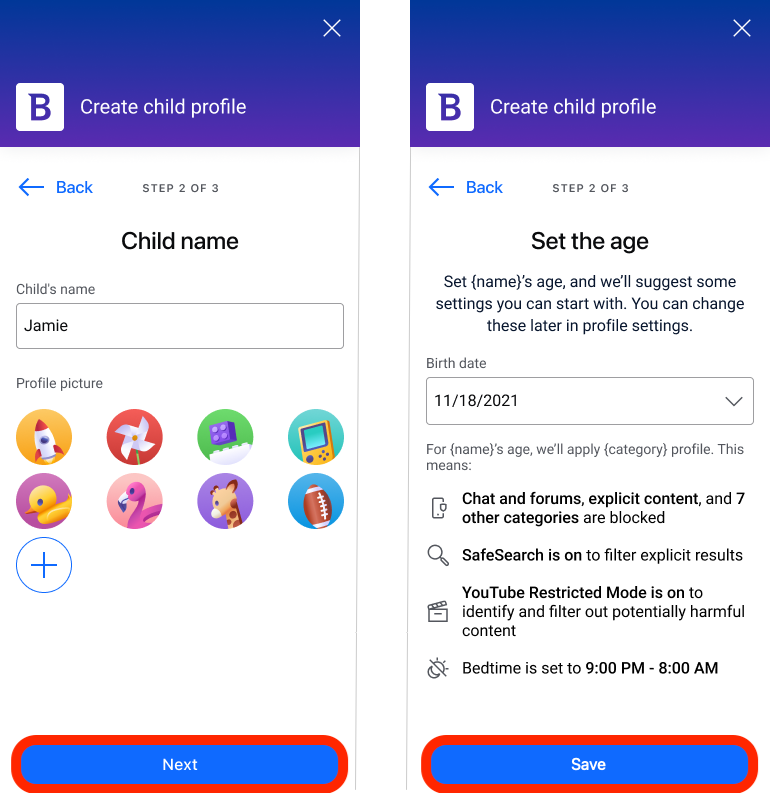
Based on the child’s age, Bitdefender automatically blocks certain categories such as chat, social networks, explicit content, and more.
4. After making any necessary adjustments, click “Save.”
Step 3: Install Bitdefender Parental Control App on Child’s Device
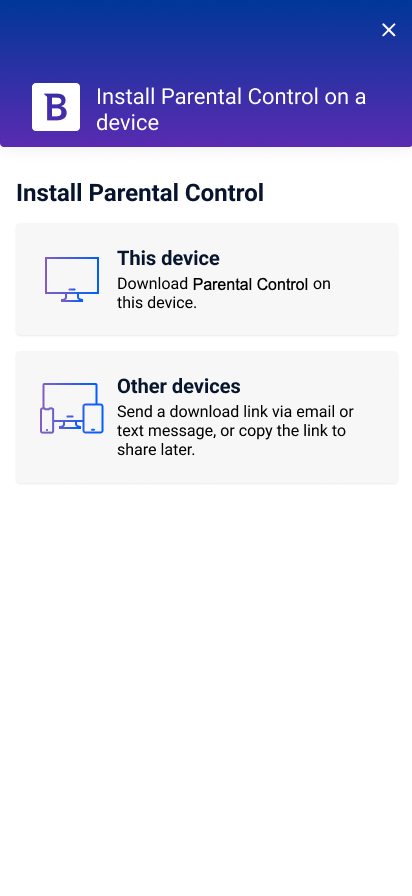 1. After saving the profile settings, indicate whether the Parental Control app is to be installed on the current device or another device.
If you select “Other devices” you’ll be presented with three installation options. Select the preferred method:
- Scan the QR code from the child’s device.
- Copy the provided link and open it in the child’s device browser.
- Send the installation link via email.
3. Save the Bitdefender installer to the child’s Mac.
4. Once the download is ready, double-click the Bitdefender file you’ve just saved to install Bitdefender Parental Control.
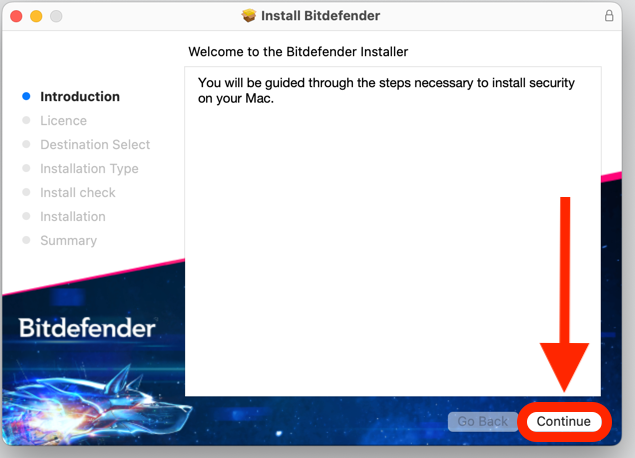
5. You will be guided through the steps necessary to install Bitdefender Parental Control for macOS. Click on “Allow” if prompted, then click on the “Continue” button two times in a row.
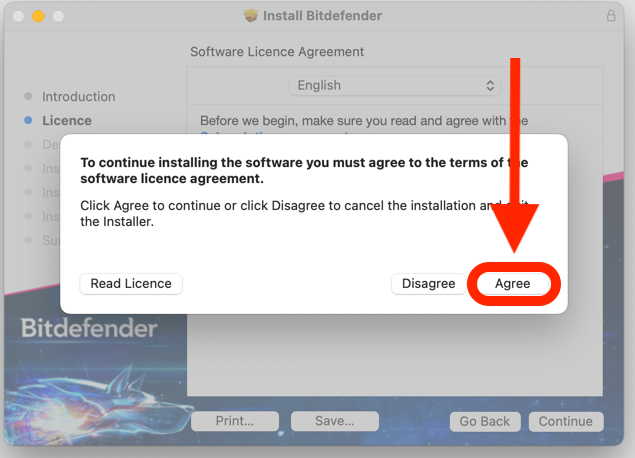
6. To continue the installation, you will have to agree to the terms of the software subscription agreement.
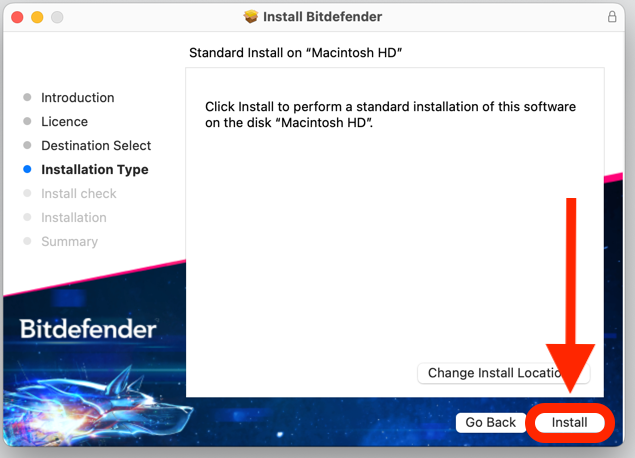
7. Click on “Continue”. After that, click on the “Install” button.
8. When prompted, input an administrator name and password, then press the “Install Software” button.
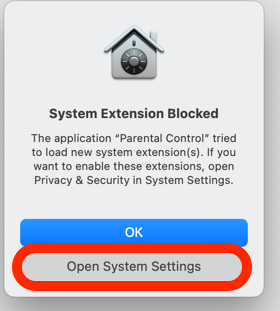
Wait until you receive a pop-up notification that a system extension has been blocked, and then continue with the setup process outlined below.
Step 4: Setup Process on Child’s Device
Once Bitdefender Parental Control is installed on macOS, you must allow the Parental Control system extension.
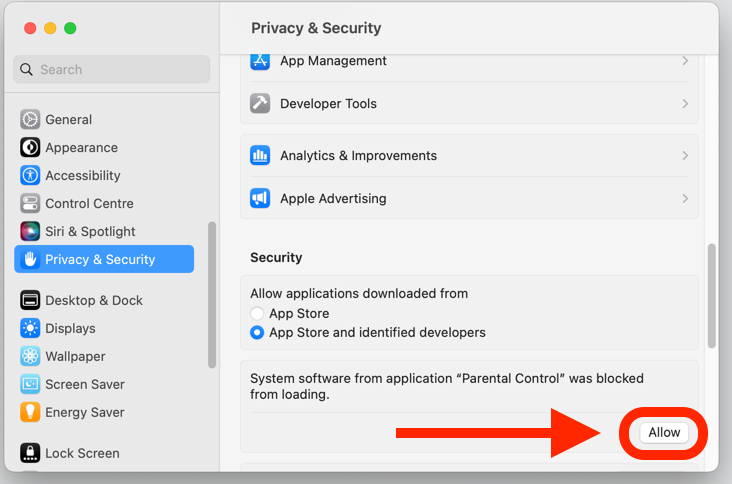
1. Click on the “Open System Settings” button (“Open Security Preferences” on earlier macOS versions) in the small pop-up.
2. Click the “Allow” button in the window that appears on the screen, then input an administrator name and password to unlock settings.
ⓘ On macOS 11 (Big Sur) and macOS 12 (Monterey), before you can click the “Allow” button you’ll need to first click the padlock icon in the bottom left corner of the “Security & Privacy” window, then input an administrator name and password to make changes.
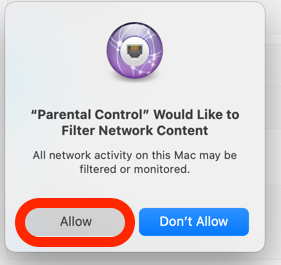
3. The “Filter Network Content” window will appear. Click the “Allow” button within this window.
4. Next, click on the “Open System Settings” button (“Open Security Preferences” on earlier macOS versions) in the small pop-up.
5. Now click one more time the “Allow” button.
After completing these steps on the child’s Mac computer, the setup is done. As a parent, you can now monitor your child’s online activities and view usage statistics through the Parental Control dashboard on the Bitdefender Central webpage.