In this article, we will show you how to deal with unresolved items in Time Machine Backups, Boot Camp, and Parallels. Click to view each of the sections below.
Dealing with threats in Time Machine backups
The system doesn’t allow the removal of infected backup content directly from Time Machine. It is safe to exclude your backups from scanning. In case you restore any infected files from a backup, Bitdefender Antivirus for Mac will detect them.
By default, Bitdefender is set not to scan content in backups, but there are certain situations in which you might need to exclude Time Machine from scanning.
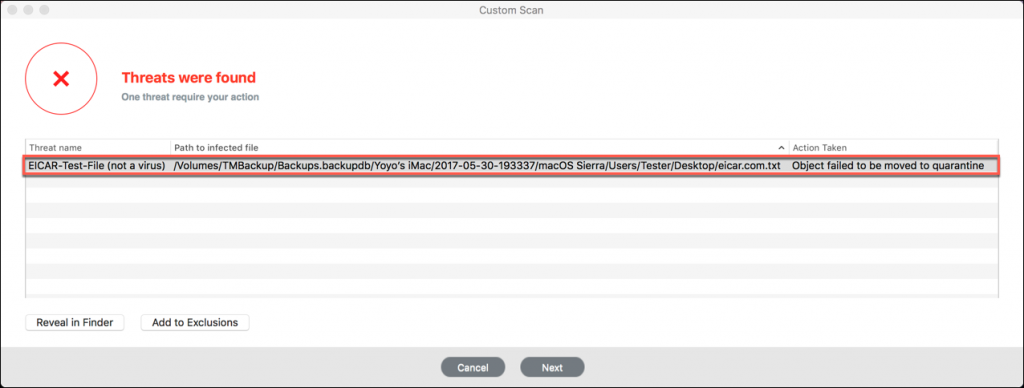
ⓘ Note: Right-click on the image and open it in a new tab to view it in full size.
How to exclude Time Machine backup disk from scanning
1. Open the main Bitdefender Antivirus for Mac window.
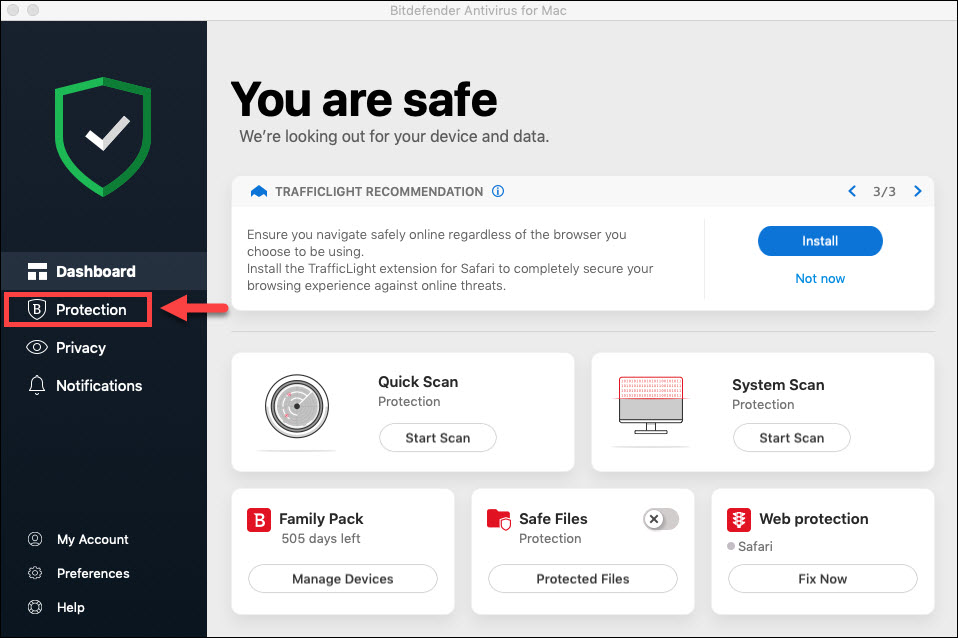
2. Click on Protection.
3. In the Antivirus tab, go to the Exceptions module and click on Open.
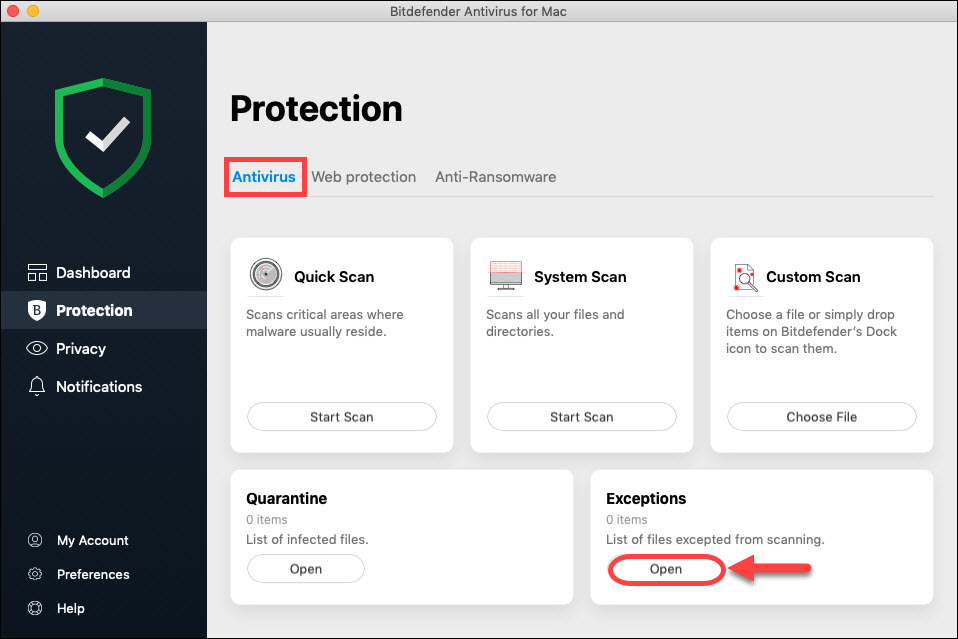
4. In the exclusions windows click on + button and navigate and choose your Time Machine backup disk. Alternatively you can drag the drive to the exclusions list.
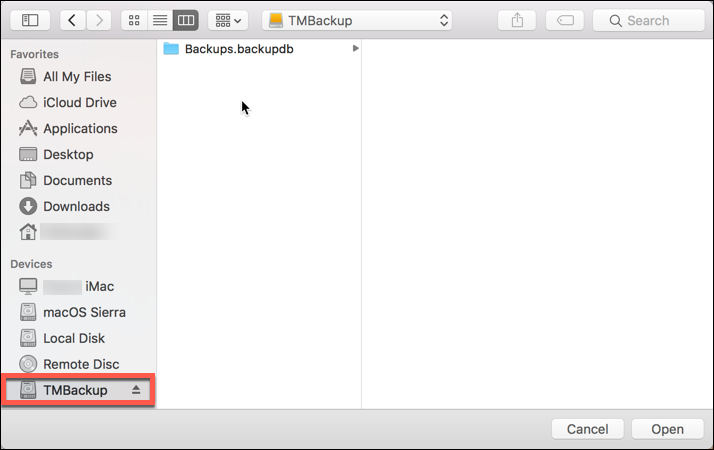
5. If prompted, please insert the administrator password; the drive will no longer be scanned.
ⓘ Note: If you use this volume for storage as well, then exclude only the folder with the backups, not the entire volume.
How to delete a Time Machine backup
To remove malware items from backups, you can use Time Machine:
ⓘ Note: Unlike older macOS versions, Big Sur (version 11.x) does not provide a method to delete Time Machine snapshots.
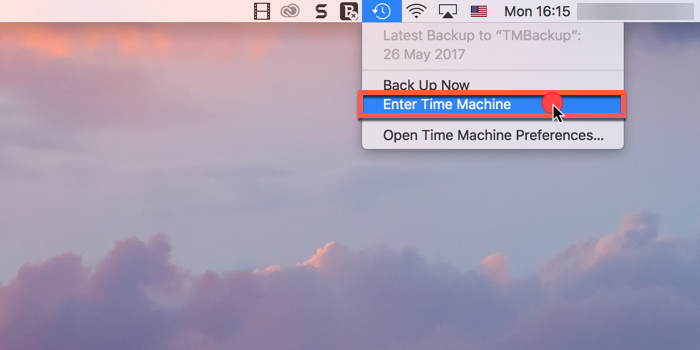
1. Click on the Time Machine icon in the upper menu bar and select Enter Time Machine. If the Time Machine menu is not shown in the menu bar, click on the Apple icon in the upper left corner and select System Preferences. Click on Time Machine, then select Show Time Machine in the menu bar.
2. Browse through the backups Time Machine created.
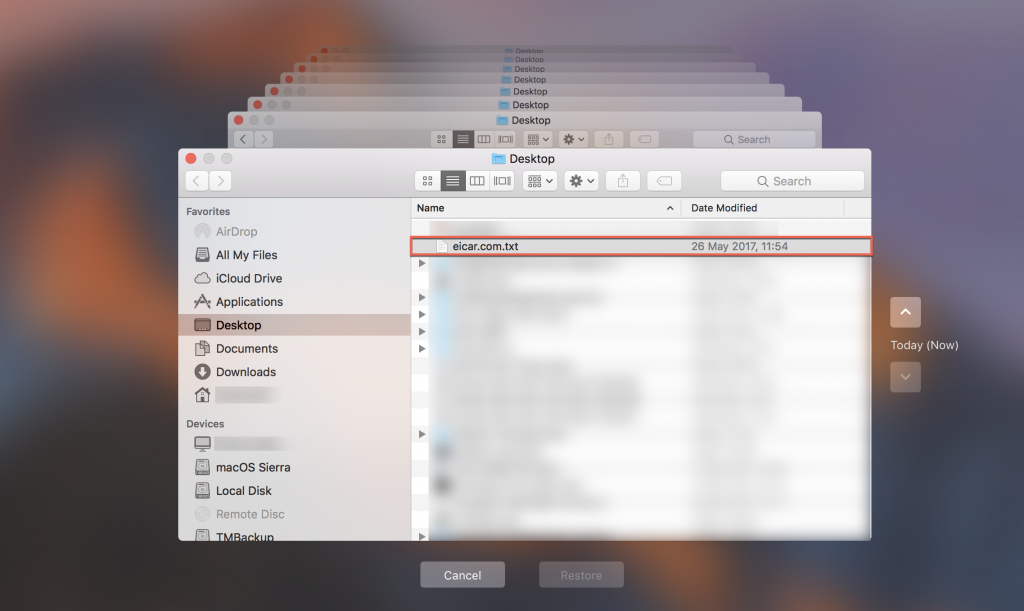
3. Select the item you want to delete, then click the Action menu button, represented by the ⚙︎ and choose Delete All Backups of [name of infected item].
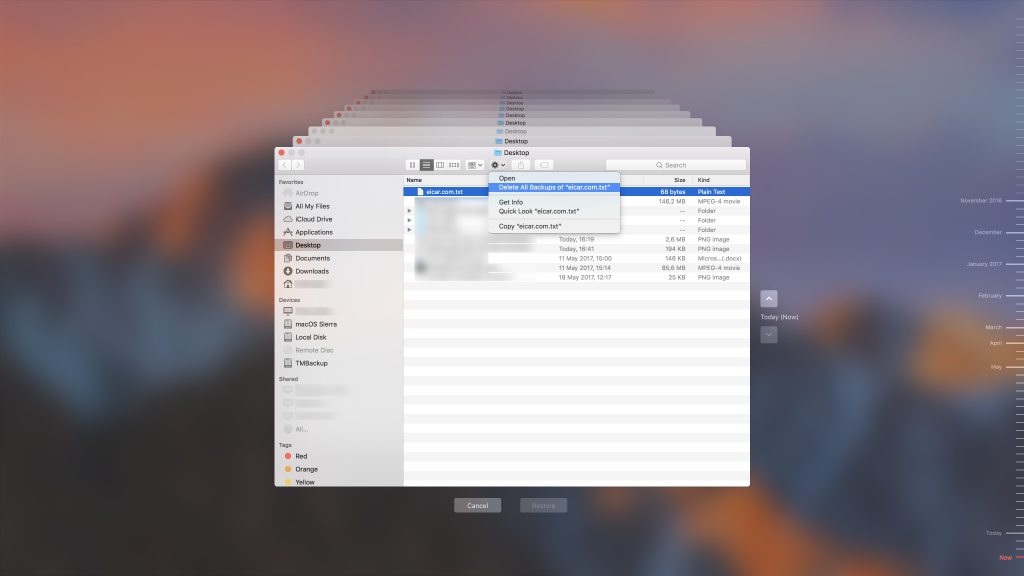
To find the exact path of the malicious item, check the Notifications section in Bitdefender Antivirus for Mac:
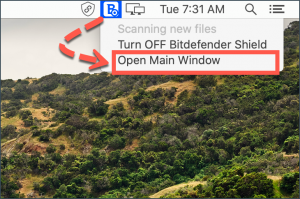
- Click on the Bitdefender icon in the top menu bar.
- Select Open Main Window.
- Access Notifications and in the Critical column you will see the full path of the file.
Time Machine local snapshots/MobileBackups/com.apple.TimeMachine.localsnapshots
Time Machine saves some of its backups to your startup drive, when your backup drive is not connected. These backups are called local snapshots. They are automatically enabled when you turn on Time Machine, and disabled when you turn Time Machine off.
With High Sierra, the macOS saves the Local Snapshots differently than the older OSX, and for this reason you should exclude them from being scanned by Bitdefender:
- Hold the Command+Shift buttons then press on the . (dot) button
- This will enable the option to view hidden files.
- Hold the Command key and press Space.
- This will open the Spotlight search window.
- Type /Volumes and press Enter.
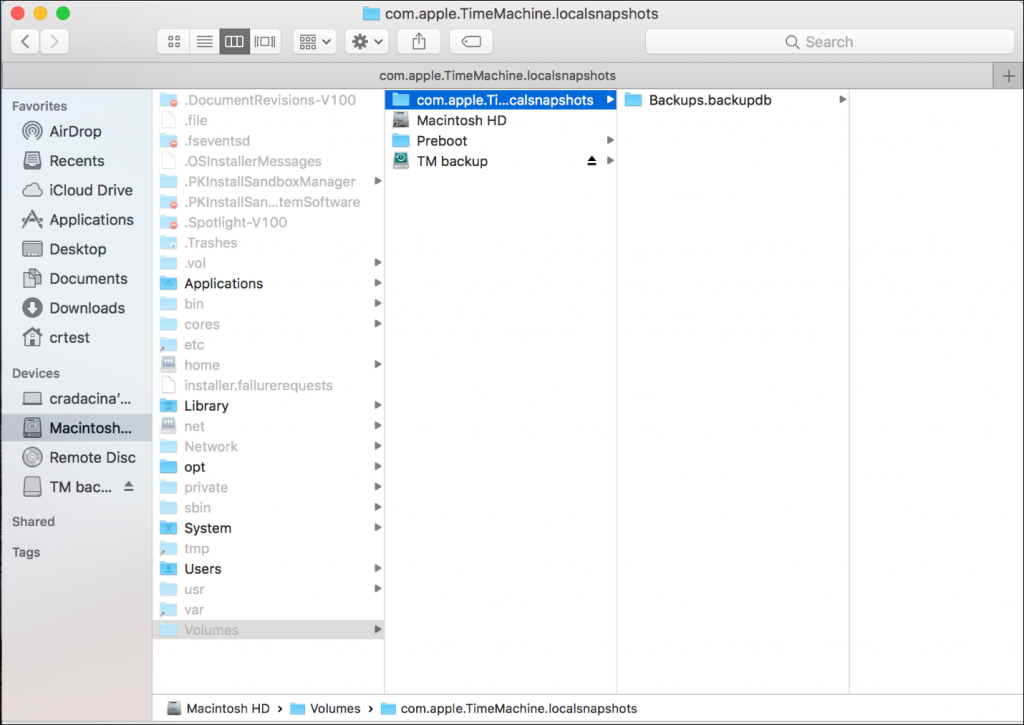
• Leave the new window open, for now.
• Open the main Bitdefender window and click on Protection.

• In the Antivirus tab, go to the Exceptions module and click on Open.

• From the Volumes window, drag and drop the file presented below over to the Bitdefender Exclusions window:
com.apple.TimeMachine.localsnapshots
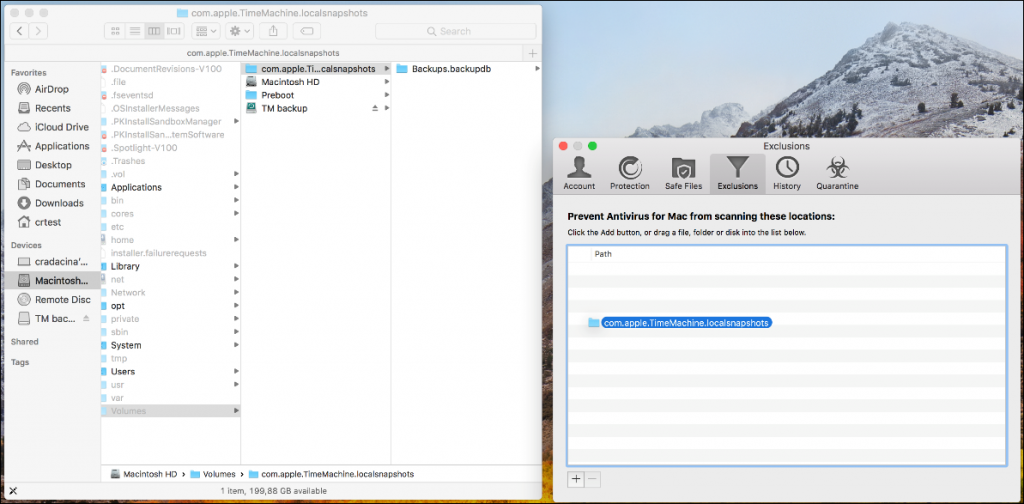
• You should be able to see a new entry in the Exclusions list.
• Hold the Command+Shift buttons and press on the . (dot) button once more to disable the option to view hidden files.
• Reboot the computer and check if the issue still persists.
For older OSX versions, these snapshots should be deleted, by following the steps detailed below:
1. Click on the Apple icon in the upper left corner of the screen.
2. Click on System Preferences.
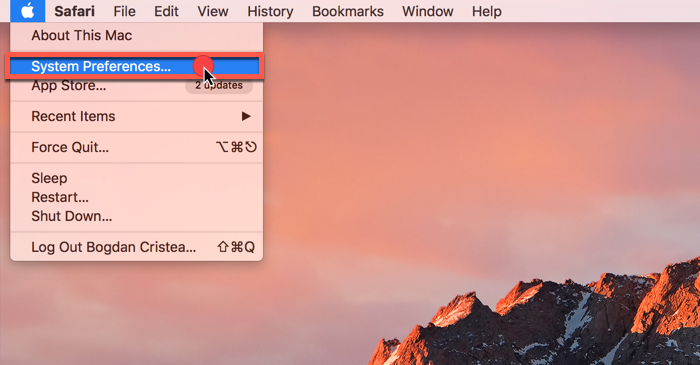
3. Select Time Machine.
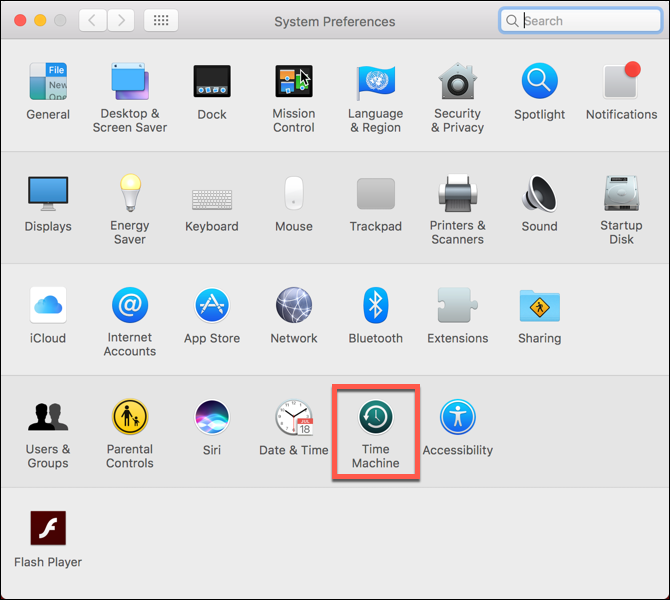
4. Uncheck the Back Up Automatically option (for Sierra) or turn OFF Time Machine (for older macOS versions).
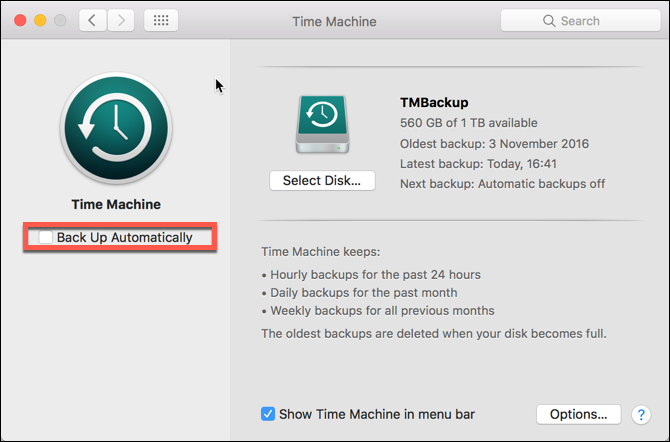
5. Reboot your system. After the reboot, all the local snapshots will be deleted.
6. Now reactivate Time Machine.
Dealing with threats in Boot Camp or Parallels
Bitdefender Antivirus for Mac cannot delete malware from Parallels or Boot Camp because it cannot modify files on NTFS drives.
It can scan NTFS drives, but it cannot take action regarding any files. To get rid of malware items, you’ll have to exclude Boot Camp and Parallels from scanning and install a Windows-compatible Bitdefender product on the infected systems.
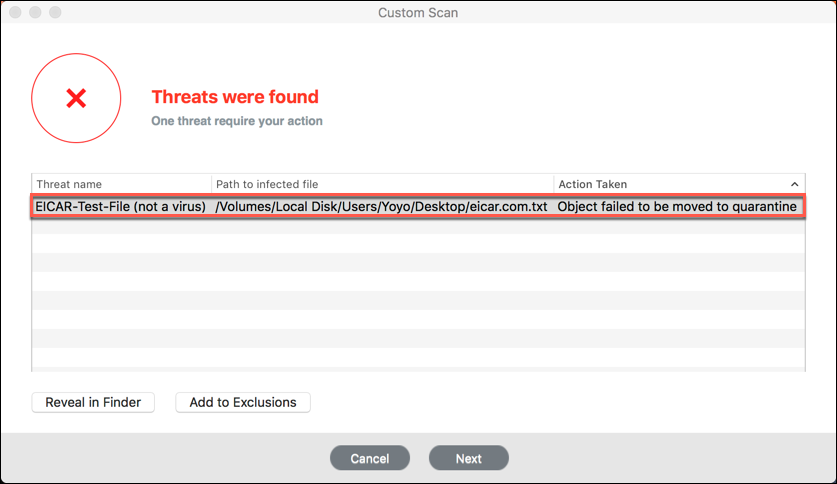
If you use Boot Camp/ Parallels for saving important documents or sending emails, we recommend you send us a Bdsys log from Windows OS as shown in this article, and samples from the Windows partition. Besides the Bdsys log and the samples, include pictures displaying the infected items and a Scan log from your Mac. We recommend you use a security solution also on your Windows partition.
If you use Boot Camp/Parallels for testing or for playing games, we recommend you exclude Boot Camp/Parallels from scanning by following the instructions below.
How to exclude Boot Camp from scanning
1. Open the main Bitdefender window and click on Protection.

2. In the Antivirus tab, go to the Exceptions module and click on Open.

3. In the exclusions windows click on “+” button and navigate and choose Boot Camp. Alternatively you can drag the drive to the exclusions list.
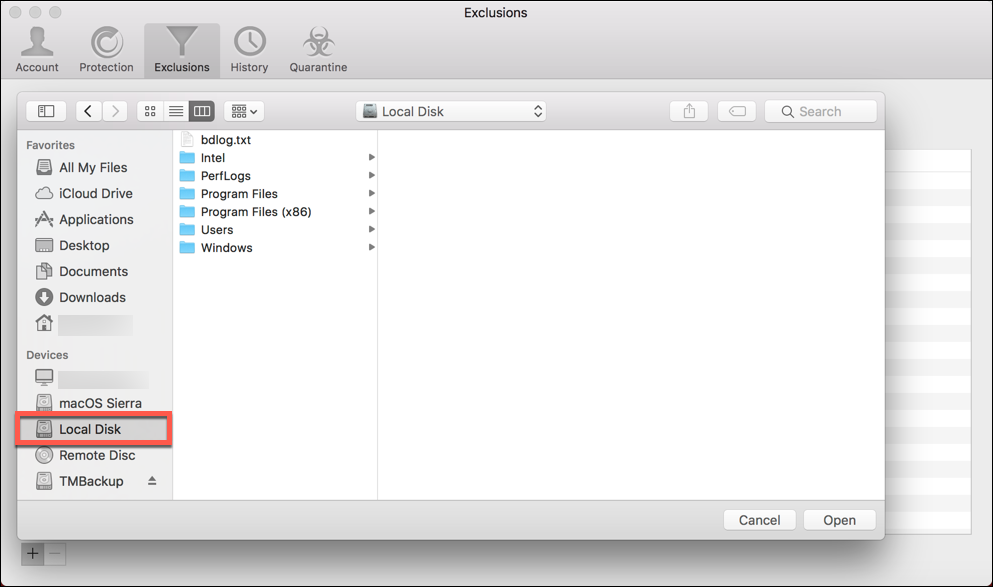
4. If prompted, please insert the administrator password; the drive will no longer be scanned.
How to exclude Parallels from scanning
1. Open the Parallels app installed on your Mac.
2. Click on the Settings button in the Control Center window.

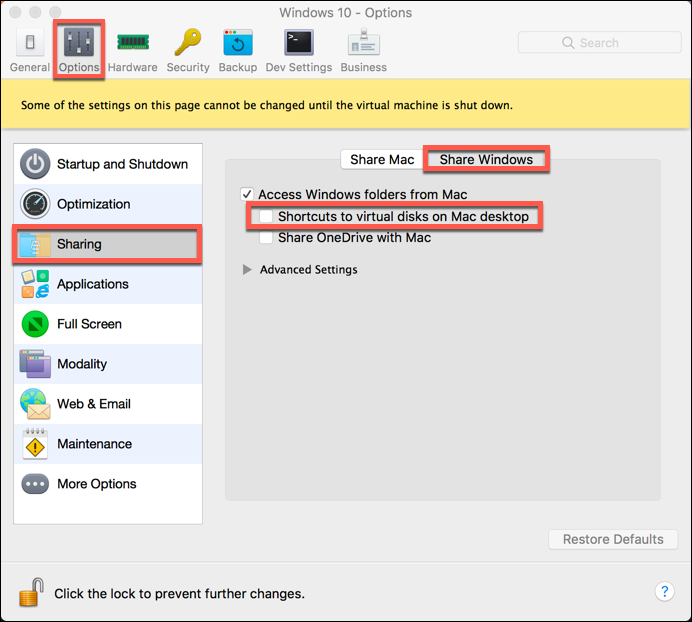
3. Select Options in the upper part of the window.
4. Click on Sharing, then select Share Windows on the right side.
5. Uncheck the Shortcuts to virtual disks on Mac desktop option.
