Bitdefender isolates suspicious or infected files that cannot be disinfected in a secure area named Quarantine. When a threat is in quarantine, it cannot do any harm because it cannot be executed or read. Uninstalling Bitdefender won’t restore the quarantined items back to their original location. They remain isolated unless you choose to manually restore them.
If you suspect that Bitdefender mistakenly flagged a legitimate file as a threat (a false positive alert) you can send the file that you think is not infected to Bitdefender labs for analysis. Once confirmed, false positives are corrected within hours via automatic update.
You can also restore a file from quarantine if you think it’s legitimate and not a real infection.
How to restore a legitimate file from Bitdefender Quarantine
If you want to examine or recover data from quarantined files, follow the steps below. Caution should be exercised when managing quarantined files to prevent accidental malware infection.
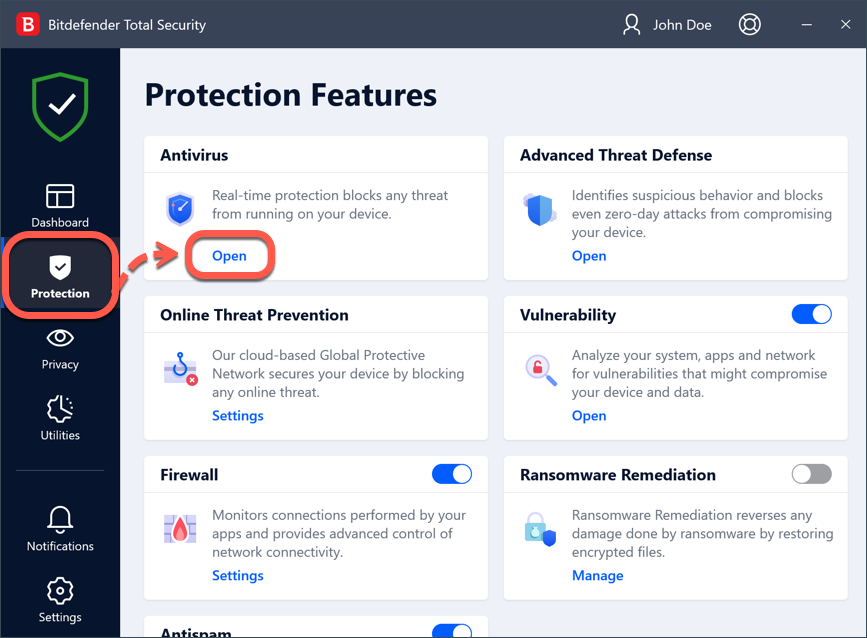
1. Open the Bitdefender interface and select ‘Protection’ on the navigation menu.
ⓘ Note
You must be signed in to Windows with an administrator account to restore quarantined files back to folders with administrator-level access.
To provide administrator permissions to Bitdefender, right-click the Bitdefender shortcut ![]() on your computer Desktop and then select the “Run as administrator” option in the menu.
on your computer Desktop and then select the “Run as administrator” option in the menu.
2. In the Antivirus pane, click ‘Open’.
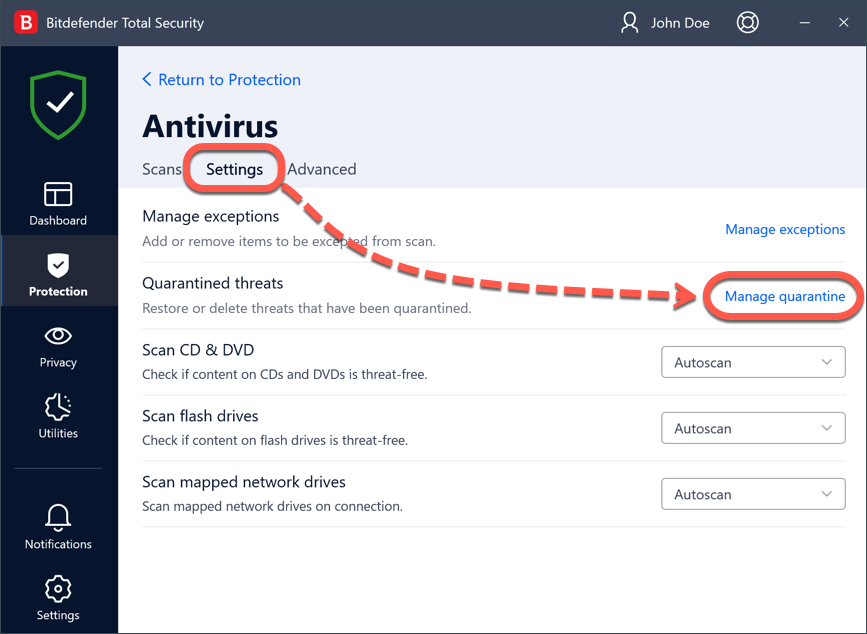
3. Go to the ‘Settings’ tab and click ‘Manage quarantine’ next to Quarantine threats.
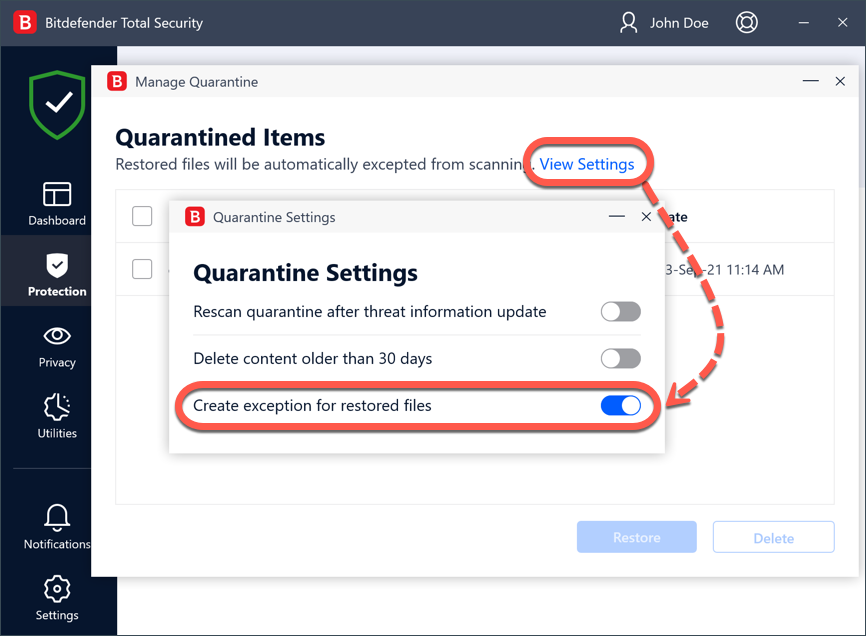
4. Access ‘View Settings’ and then toggle ‘Create exception for the restored files’ to the on position if it’s off. With this option enabled, the files you restore from quarantine are automatically whitelisted from future scanning to prevent subsequent quarantine.
Close the Quarantine Settings window to return to the quarantine.
5. Here you can view the name of each quarantined file, the name of the detected threat, its original location, and the date the file was quarantined. To restore a quarantined file to its original location, select the particular file name and click on the ‘Restore’ button.
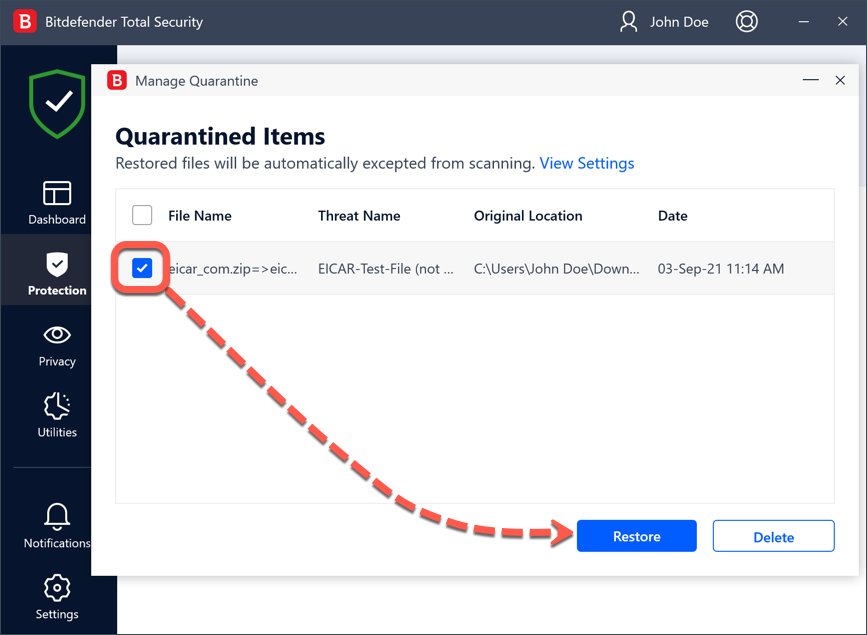
Once you have done that, you can find the file in the original folder.
You have now successfully retrieved the item from the Bitdefender quarantine.
How to change Bitdefender quarantine settings
Quarantined files are managed automatically by Bitdefender according to the default quarantine settings. Though not recommended, you can adjust the quarantine settings according to your preferences by clicking ‘View Settings’.
Click the switches to turn on or off:
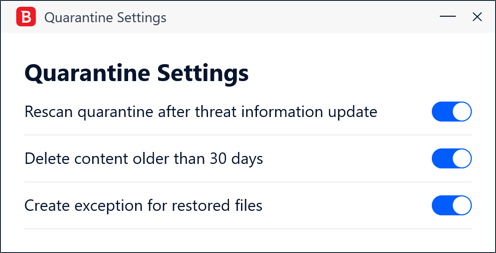
Rescan quarantine after threat information update
It is advisable to keep this option active to automatically scan quarantined files after each threat information database is updated. Cleaned files are automatically moved back to their original location.
Delete content older than 30 days
If no further action is taken, files that have been quarantined for more than 30 days will be permanently deleted from the disk with no recovery option.
Create exceptions for restored files
With this option on, the files you restore from quarantine are moved back to their original folder without being repaired and are automatically whitelisted from future Bitdefender scans.