This article helps you export and move your Wallet data into the new Bitdefender Password Manager app.
ⓘ Important: You just have to export your Wallet database once and import it into Bitdefender Password Manager. From then on, Password Manager will automatically synchronize your passwords across all your devices. You won’t have to go through these steps again whenever you install Bitdefender Password Manager or update your passwords.
To get started, choose the step you need help with:
Step 1 - Export saved passwords from Wallet to a CSV file
We’re going to walk you first through the process of exporting your passwords from the Wallet. All you have to do is run the export tool, then import the comma-separated values (CSV) file it generates into Bitdefender Password Manager.
Before You Start
- Please note that transferring your Wallet data to Bitdefender Password Manager is only possible by following the steps in this guide. CSV files generated using the Bitdefender antivirus interface fail to import into the new Password Manager app.
- The option to export Wallet data to a CSV file compatible with Bitdefender Password Manager only becomes available upon updating your Bitdefender security solution to version 26.0.7.36 or higher. Previous build versions do not include the possibility to move your Wallet data to the Password Manager application. To learn more about updating and checking the build version, see – How do I update Bitdefender to the latest version? You will need to reboot your computer to complete the update: go to Windows Start ⊞ menu, click the power button ⏻ and then select Restart.
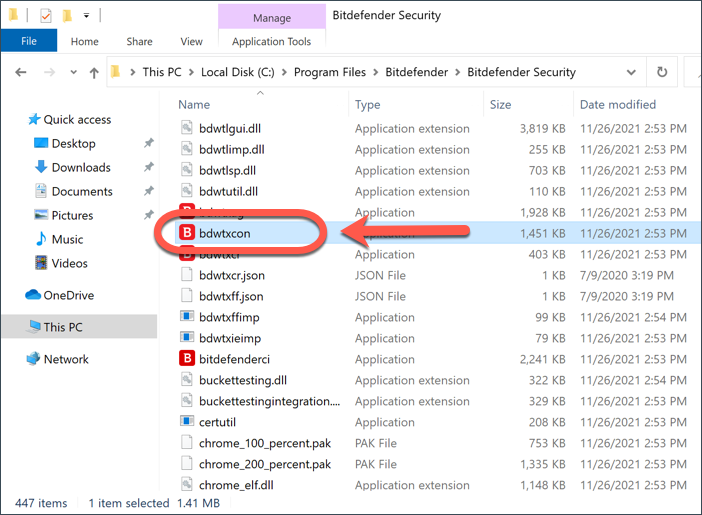
1. After updating your Bitdefender product to the latest version and restarting Windows, go to the C:\Program Files\Bitdefender\Bitdefender Security App folder.
Then double-click the bdwtxcon file there.
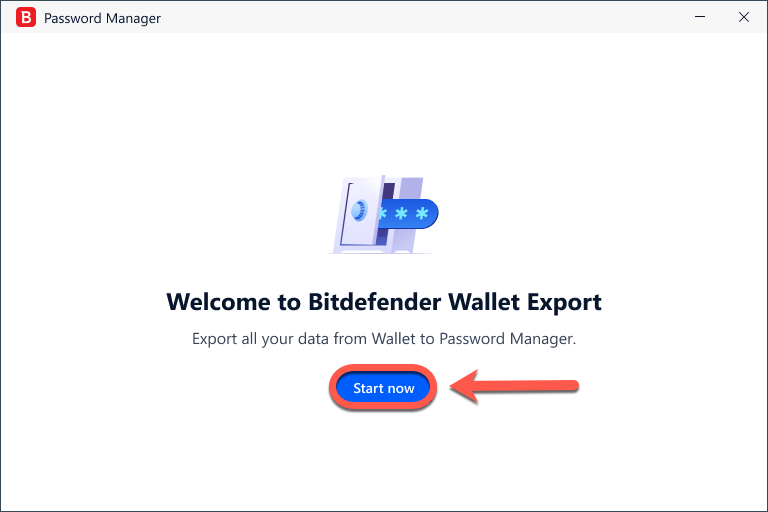
2. Next, click the Start Now button on the welcome screen.
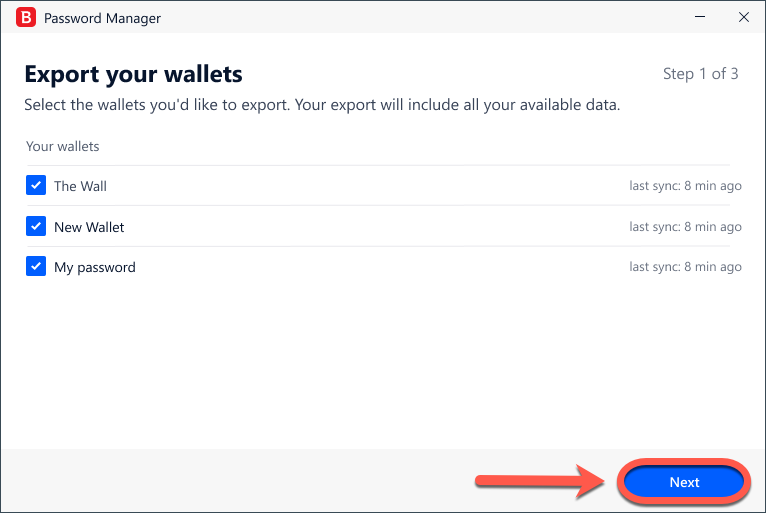
3. Check the box next to the name of the wallet you wish to export, and click the Next button. If multiple wallets are selected, all of their passwords will be merged into a single file.
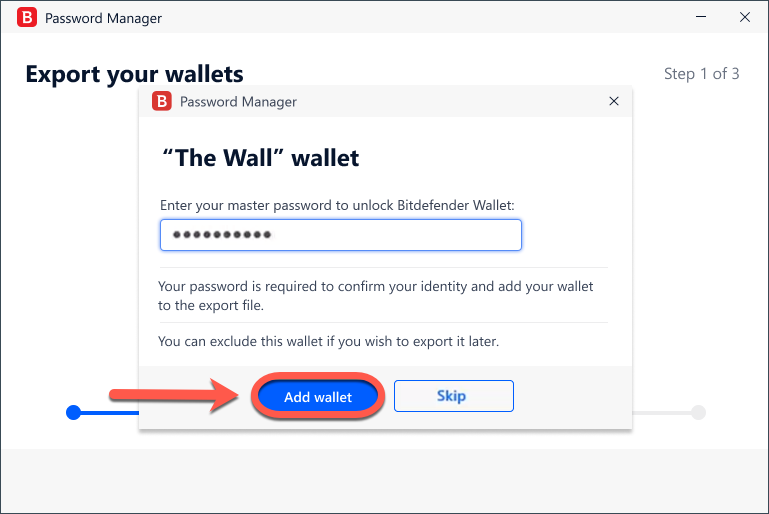
4. Input your master password to unlock the wallet selected in the previous step, then press the Add Wallet button.
The tool will start collecting data from the selected wallets. A progress bar indicates at all times the status of the database export process. If your Wallet is saved in the Cloud and not locally, an Internet connection is required to download the database from Bitdefender servers.
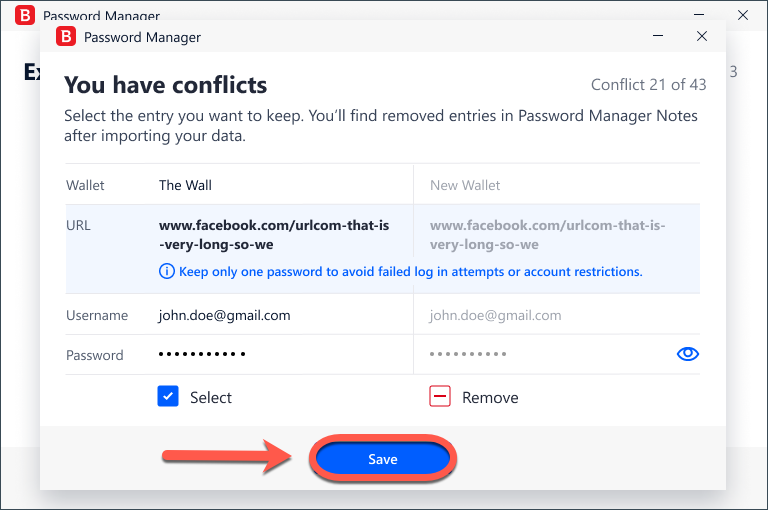
Note: If there are inconsistencies between the passwords of the same account shared across multiple wallets, you will see this message: You have conflicts. Use the eye icon to view and compare passwords, and select to keep only the correct entry. Press the “Save” button when you’re done. Don’t worry about losing any passwords, credit cards, or other login information stored in Wallet. Entries that were deleted or could not be imported will appear in the “Notes” section of Bitdefender Password Manager. You can easily retrieve them from there.
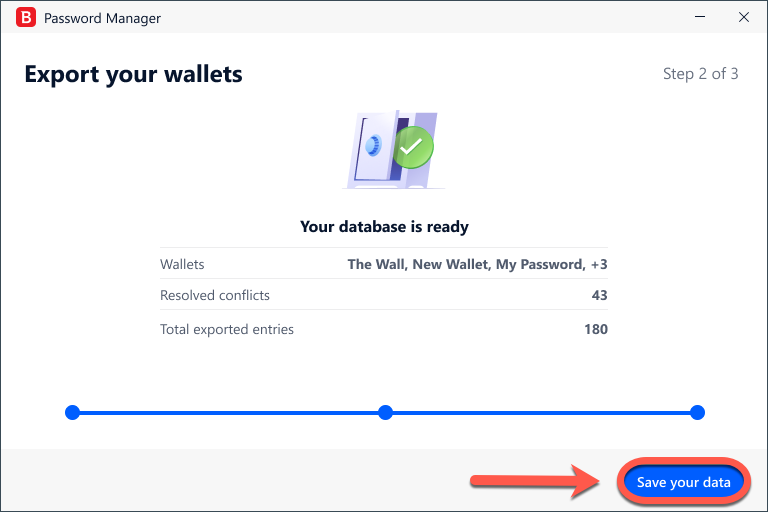
5. Once the database is ready, a summary of the accounts exported from the Wallet is displayed. Click the Save your data button.
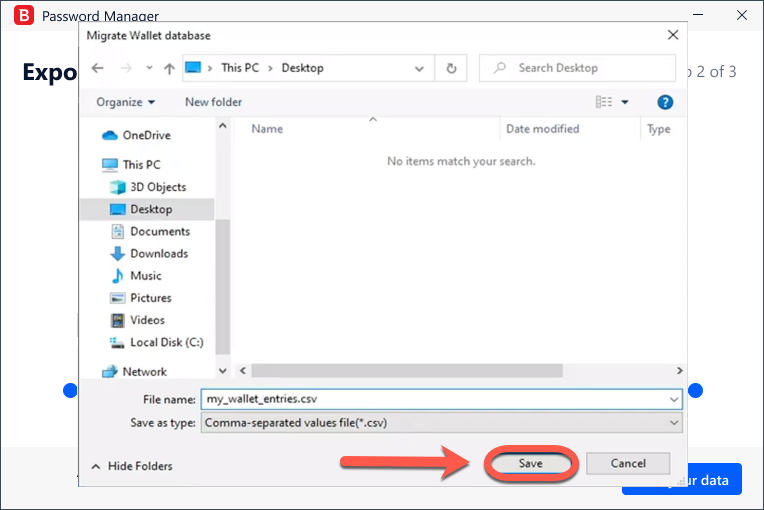
6. When prompted, choose a name for the CSV file and save it somewhere easily found – like your Desktop, for example. Bitdefender will export all your saved login data to that file.
Now, let’s see how to import the CSV file into Bitdefender Password Manager using the “Import Data” feature.
Step 2 - Import the CSV file exported from Wallet into Password Manager
After exporting your Wallet data, you are now ready to import that newly created CSV file into the Bitdefender Password Manager app.
1. Click the Password Manager icon ![]() in your web browser toolbar, or launch the Password Manager app on your smartphone. Enter your master password if prompted.
in your web browser toolbar, or launch the Password Manager app on your smartphone. Enter your master password if prompted.
2. Open the Password Manager menu ≡ to expand the sidebar menu on the left and click the ⚙︎ Settings menu item.
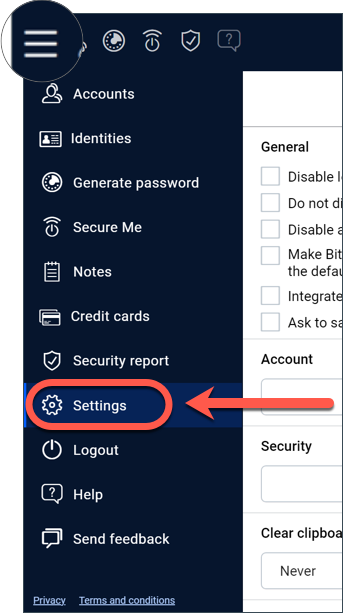
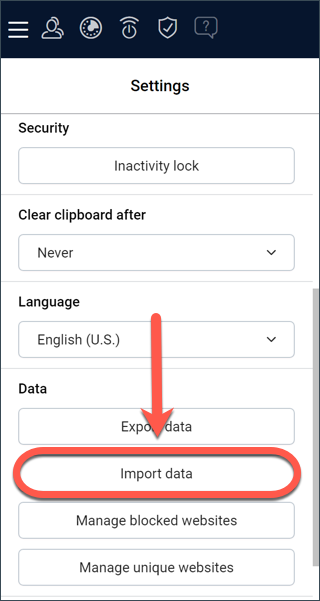
3. Scroll down to the Data section and click on the Import data option.
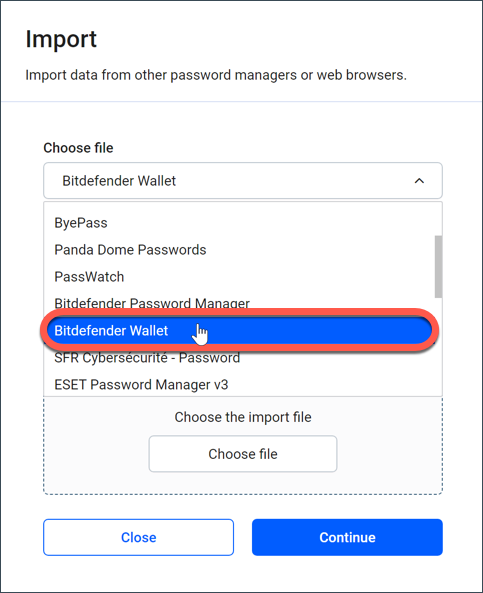
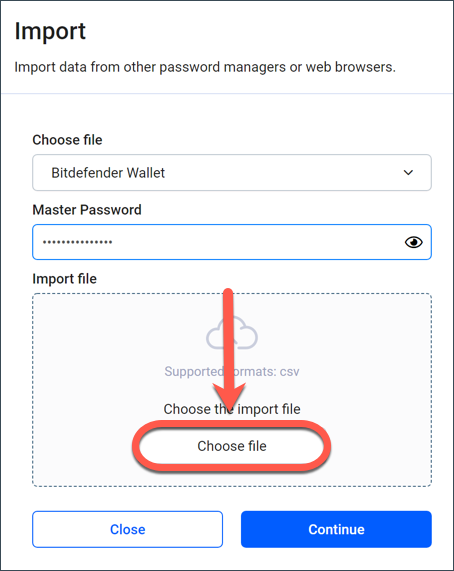
4. Select Bitdefender Wallet from the list of password managers, input your Master Password in the corresponding field, then click on Choose File.
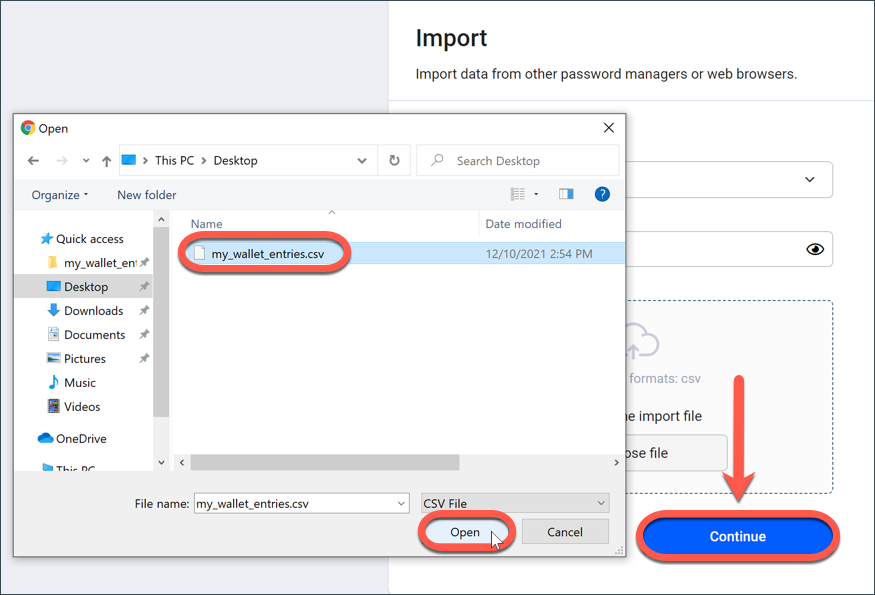
5. Select the CSV file containing your usernames and passwords exported from the Wallet, then press the Continue button.
Your Wallet passwords are now accessible on all devices where the Bitdefender Password Manager application or browser extension is installed.
Now that you have moved all your passwords to Bitdefender Password Manager, it’s time to delete the CSV file exported from Wallet securely.
Step 3 - Delete the CSV file exported from Wallet
After migrating to Bitdefender Password Manager, it is recommended to delete the CSV file in a secure manner. Otherwise, your usernames and passwords will remain in plaintext on your PC. Anyone with access to the device can read them. Moreover, deleting the CSV file and emptying the Recycle Bin is insufficient because in the event of an identity theft attack all data can be recovered and exploited to your disadvantage.
Here’s how to safely delete the CSV file exported from Wallet:
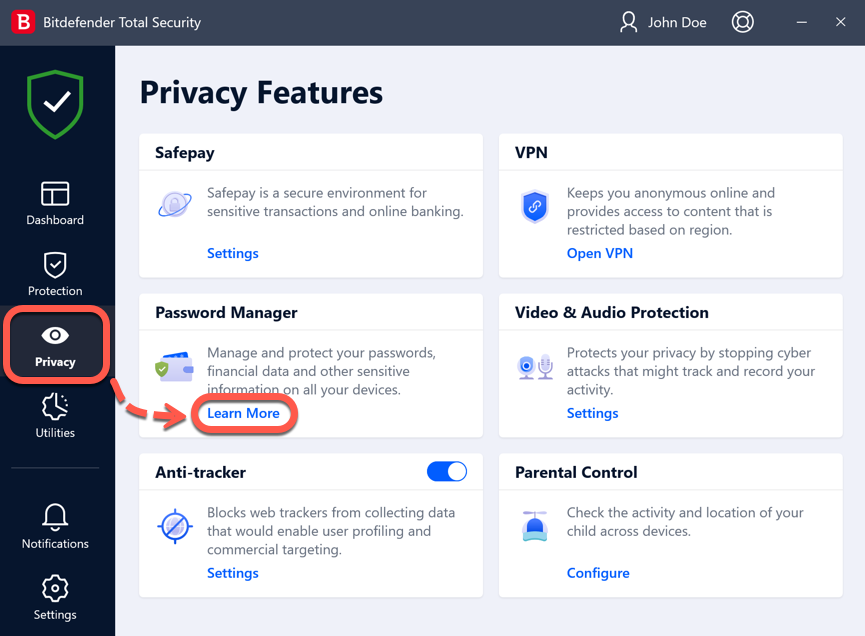
1. Bring up your Bitdefender security solution and go to Privacy on the left-hand side of the interface.
2. In the Password Manager pane click on Learn more.
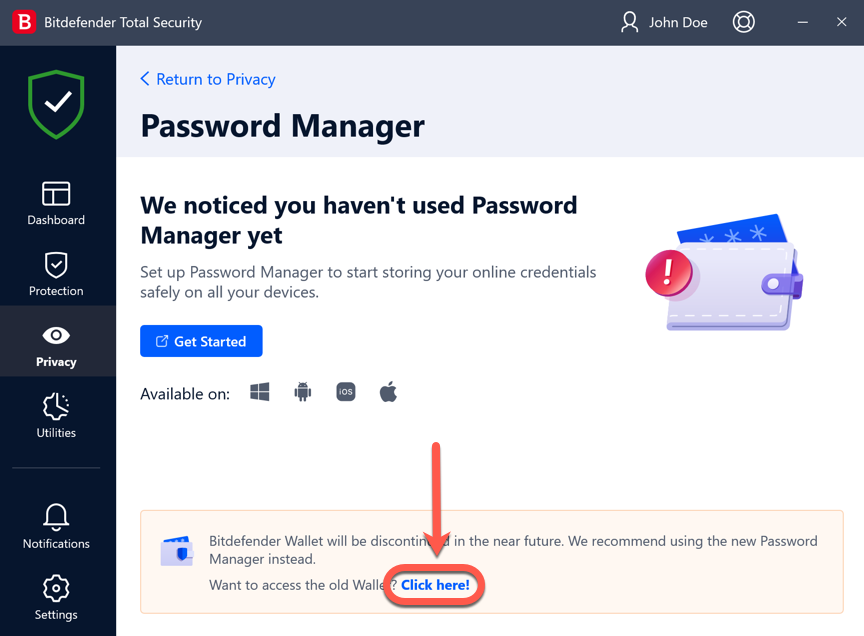
3. Press the “Click here” link in the orange box at the bottom of the Password Manager window.
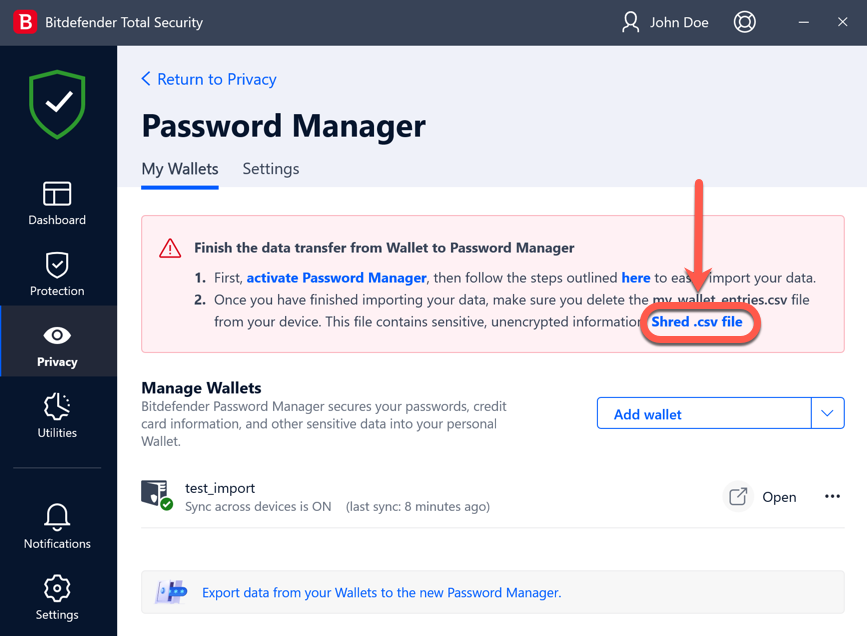
4. Open the tab labeled My Wallets, then click the Shred .csv file button.
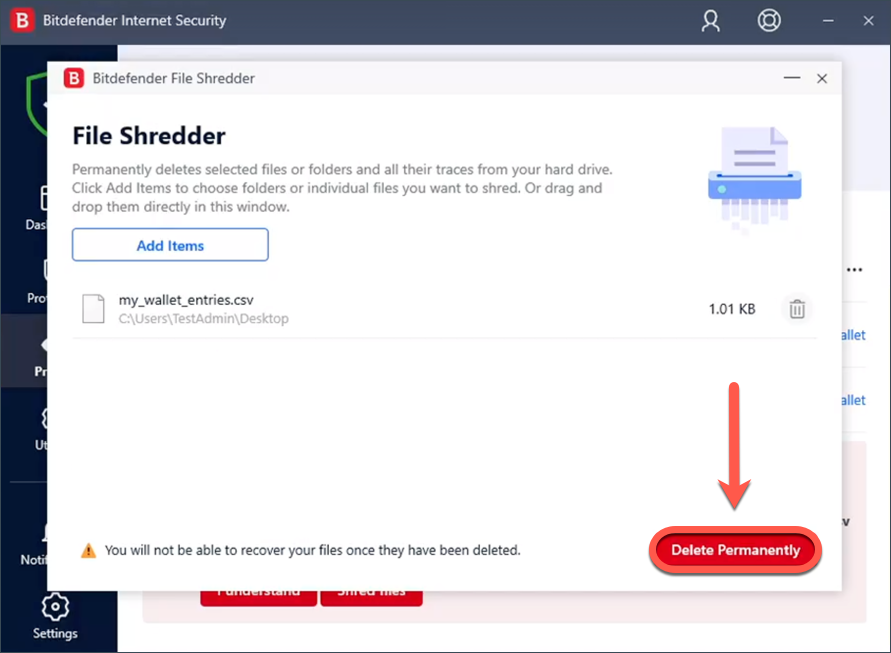
5. In the File Shredder screen, press the Delete Permanently button and confirm the action.
That’s it, you are done!