This article provides step-by-step instructions for installing and activating Bitdefender Premium VPN.
Let’s get started based on your device’s operating system:
Windows
ⓘ Note: If you already have Bitdefender Total Security, Internet Security, Antivirus Plus, or another Bitdefender security solution installed on your computer, go directly to the Activation section. Bitdefender VPN is automatically included with these products.
Installation
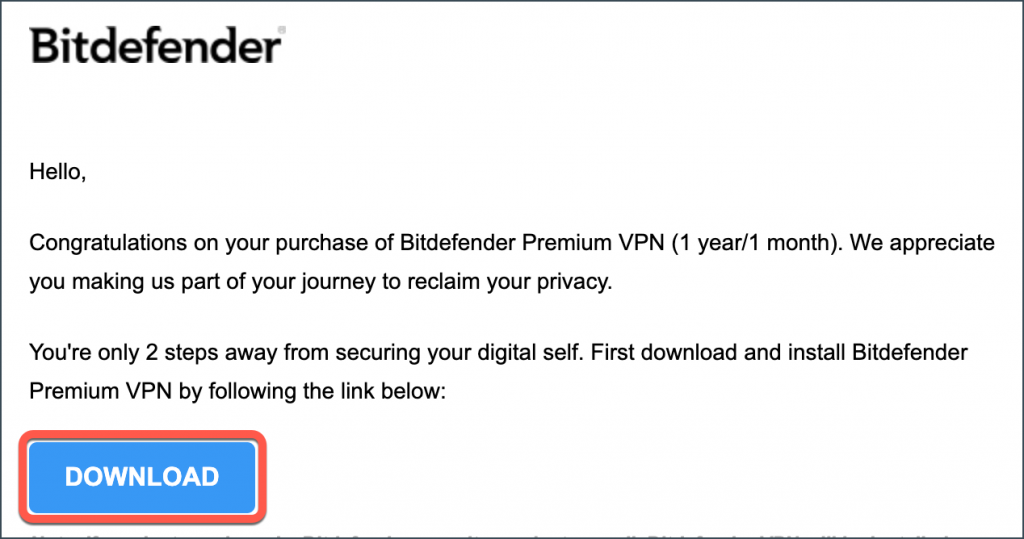
1. To install Bitdefender VPN on a Windows PC, begin by downloading the installation kit. You can find it here or in the email you received after purchasing Bitdefender Premium VPN.
2. After the download is ready, double-click the bitdefender_vpn file you’ve just saved to begin the installation.
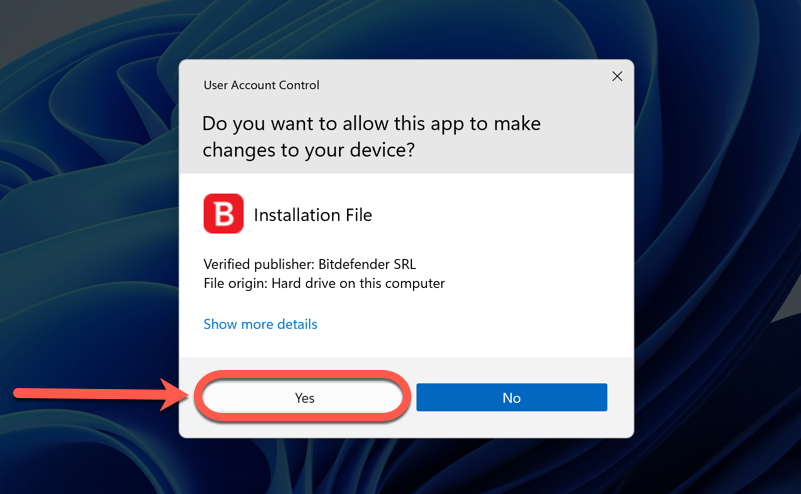
3. Click Yes if presented with the User Account Control dialog box.
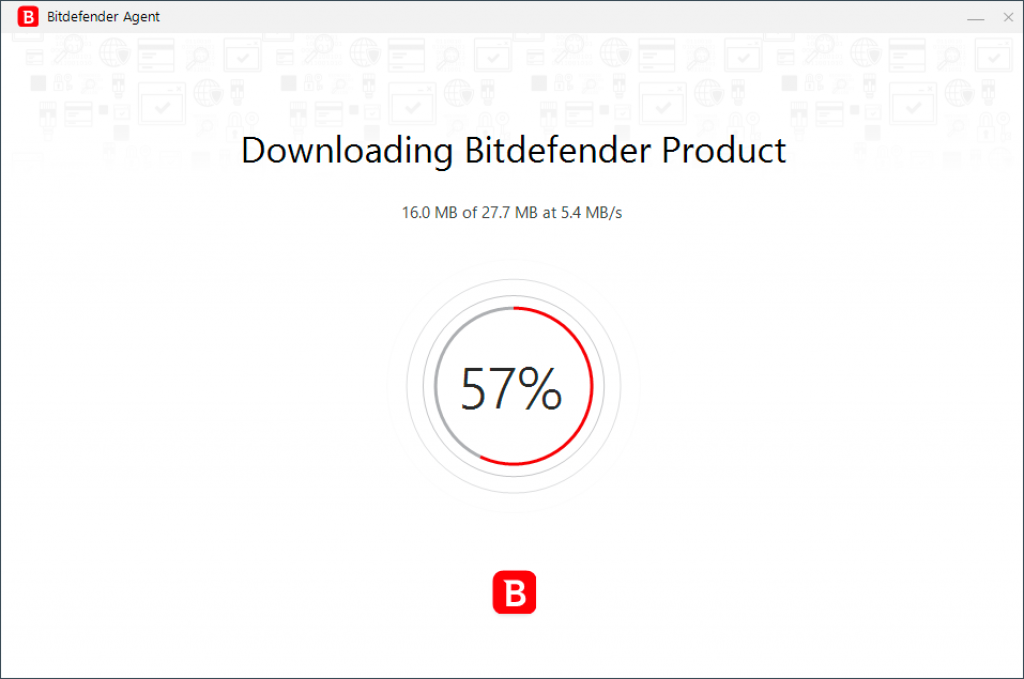
4. Wait while Bitdefender VPN downloads the necessary files.
5. Once the download completes, use the drop-down menu in the installer to select your preferred language.
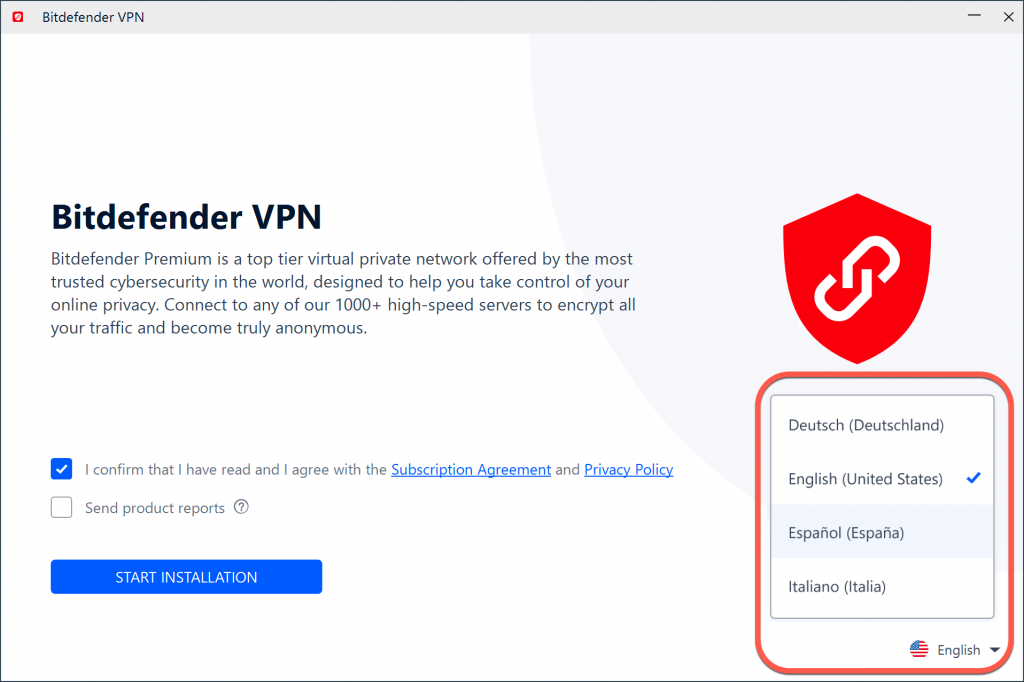
6. Check the box confirming your agreement to the Subscription Agreement and Privacy Policy, then click START INSTALLATION.
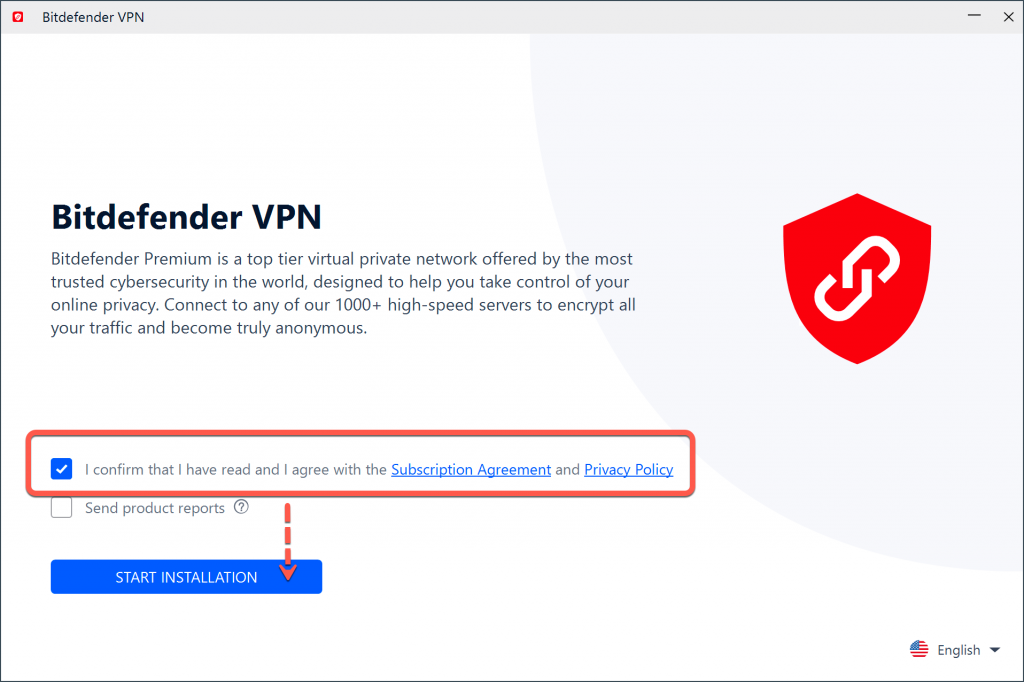
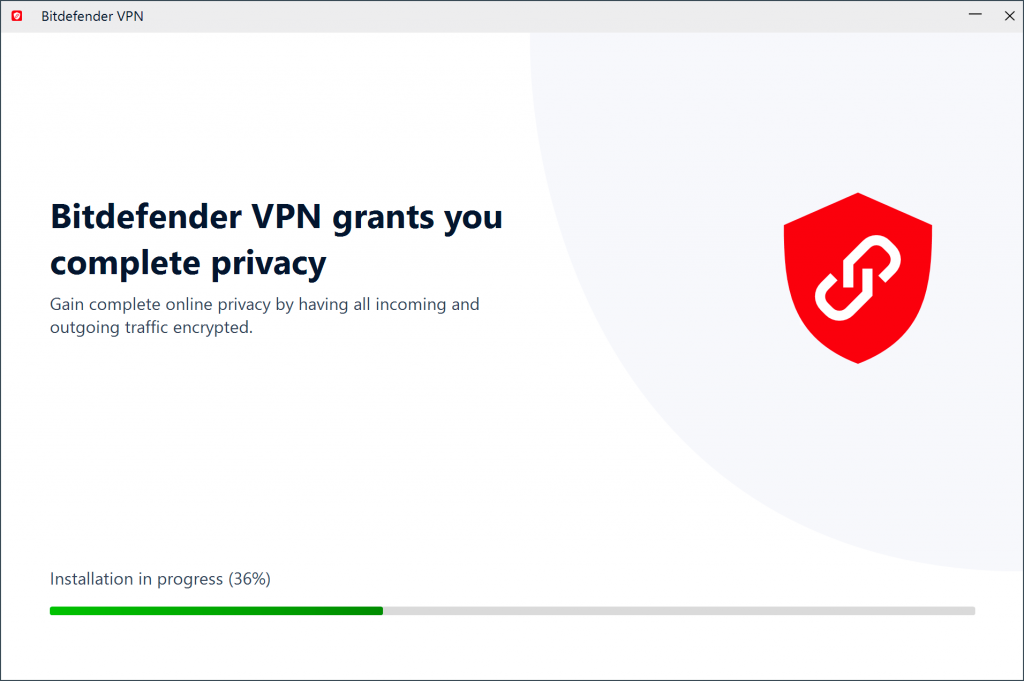
7. Wait until Bitdefender VPN finishes installing on the computer.
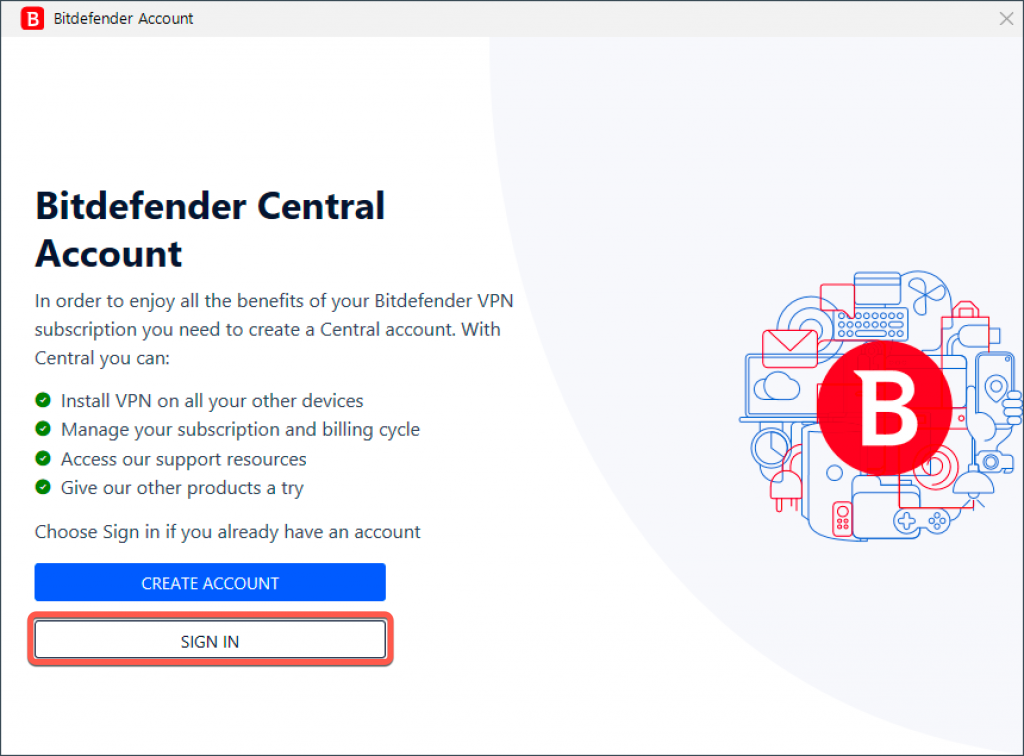
8. Sign in with your Bitdefender account. If you don’t have an account, you can also sign up directly within the app.
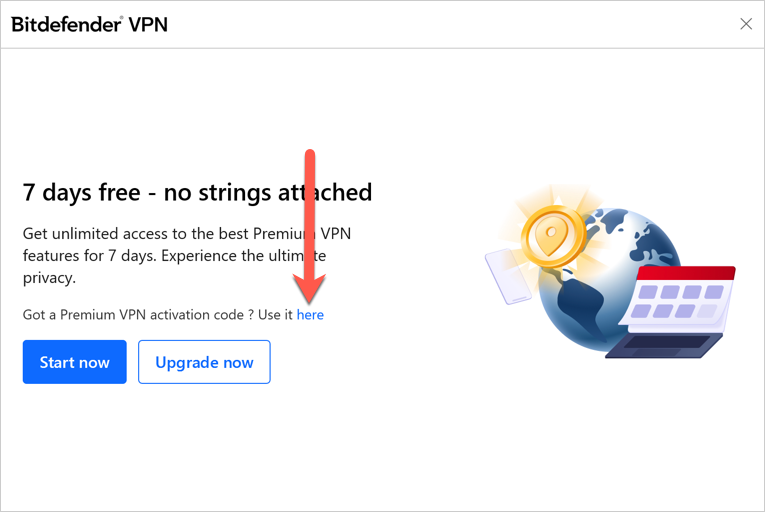
9. At this point, if you don’t have a Bitdefender Premium VPN subscription active in your Bitdefender account, you have two options:
- A. You can tap on Start now to begin a 7-day trial of Bitdefender VPN that gives you access to all the premium features.
- B. Alternatively, you can tap on Use it here > enter the code you got in your purchase email > tap on Activate code to start using your Bitdefender Premium VPN subscription.
After a short wait, Bitdefender VPN is installed and ready to be used.
Activation
To activate the subscription after you’ve installed Bitdefender VPN, just go to the email you received after buying Bitdefender Premium VPN and click on the ACTIVATE SUBSCRIPTION button.

Alternatively, you can activate the subscription directly from the VPN interface:
- Click Settings at the top of the Bitdefender VPN window.
- Next, select My Account on the left hand side menu and click on Have an activation code?
- Enter the activation code from the email, and then click the Activate code button.
Congratulations! Bitdefender VPN is now successfully installed and activated on your Windows PC.
macOS
ⓘ Note: If you already have Bitdefender Antivirus for Mac installed on your device, go directly to the Activation section. Bitdefender VPN is automatically included with this app.
Installation
1. To install Bitdefender VPN on your Mac, begin by downloading the installation kit. You can find it here or in the email you received after purchasing Bitdefender Premium VPN.
2. The installer will be saved on the Mac. In the Downloads folder, double-click the Bitdefender package file.
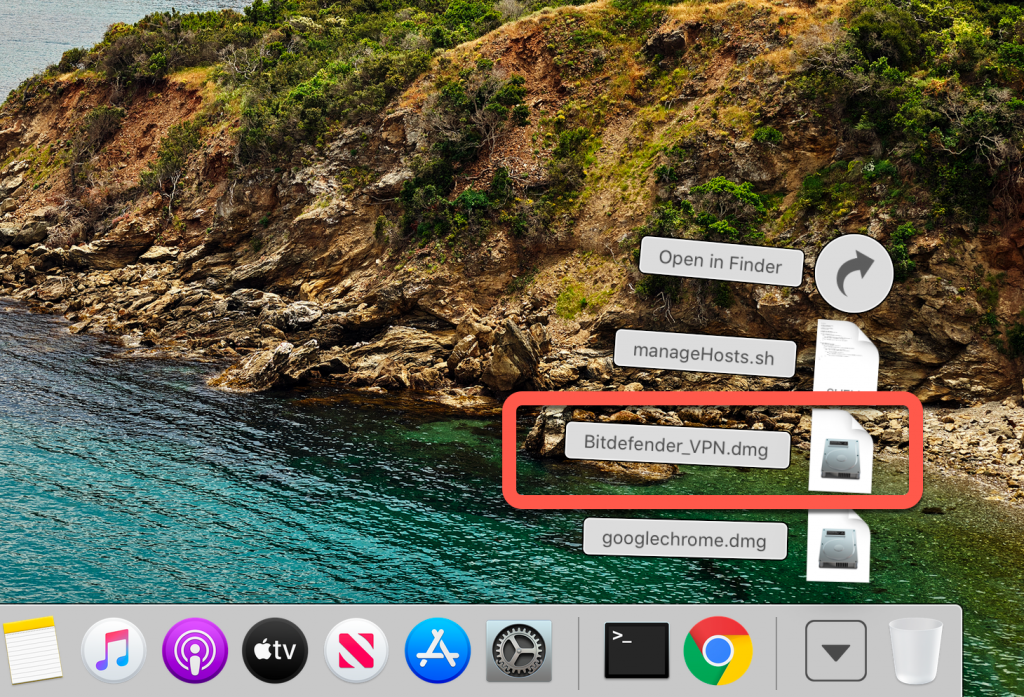
3. Follow the on-screen instructions. Choose Continue.
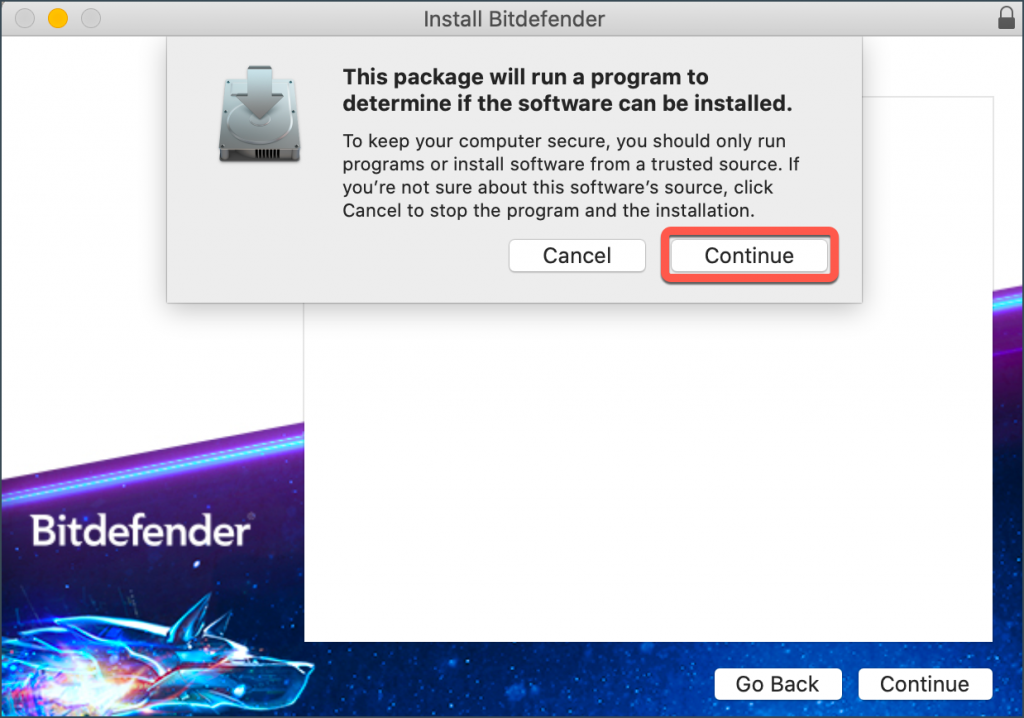
4. You will be guided through the steps necessary to install Bitdefender VPN on your Mac. Click twice the Continue button.
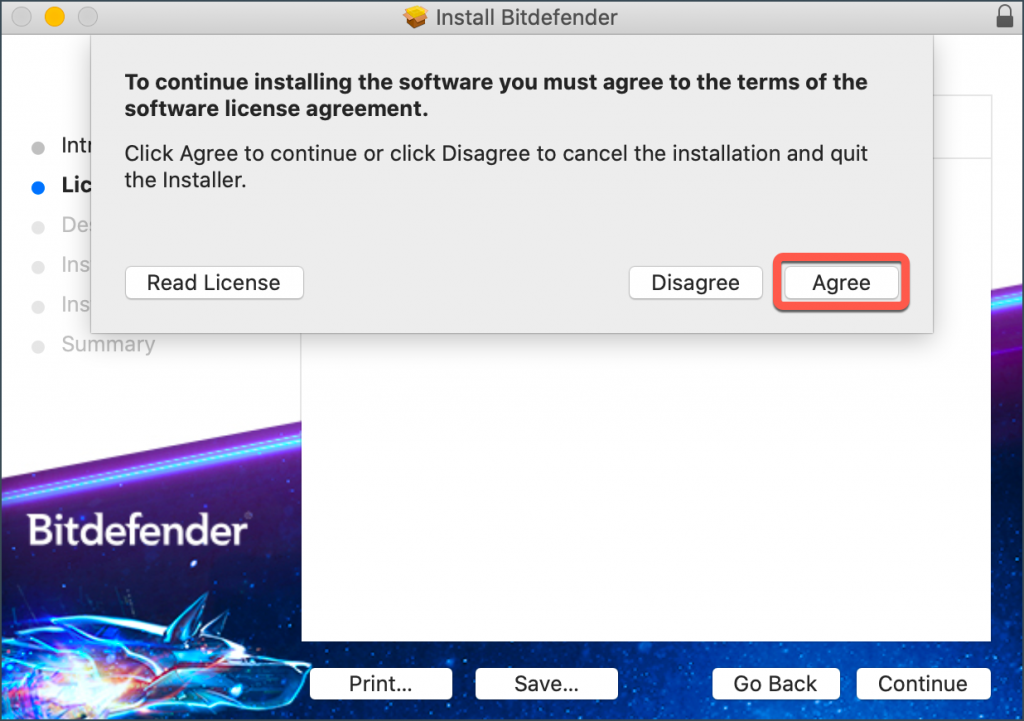
5. Click Agree, after you read & agree to the terms of the software license agreement.
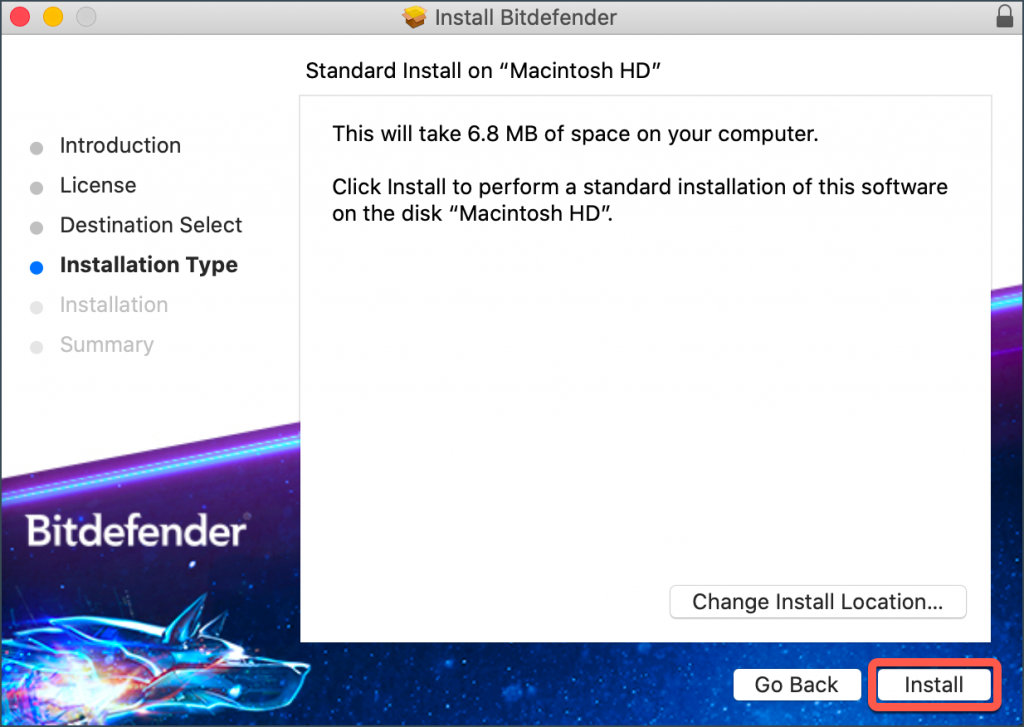
6. Click Install.
7. Enter an administrator username and password, then click Install Software.
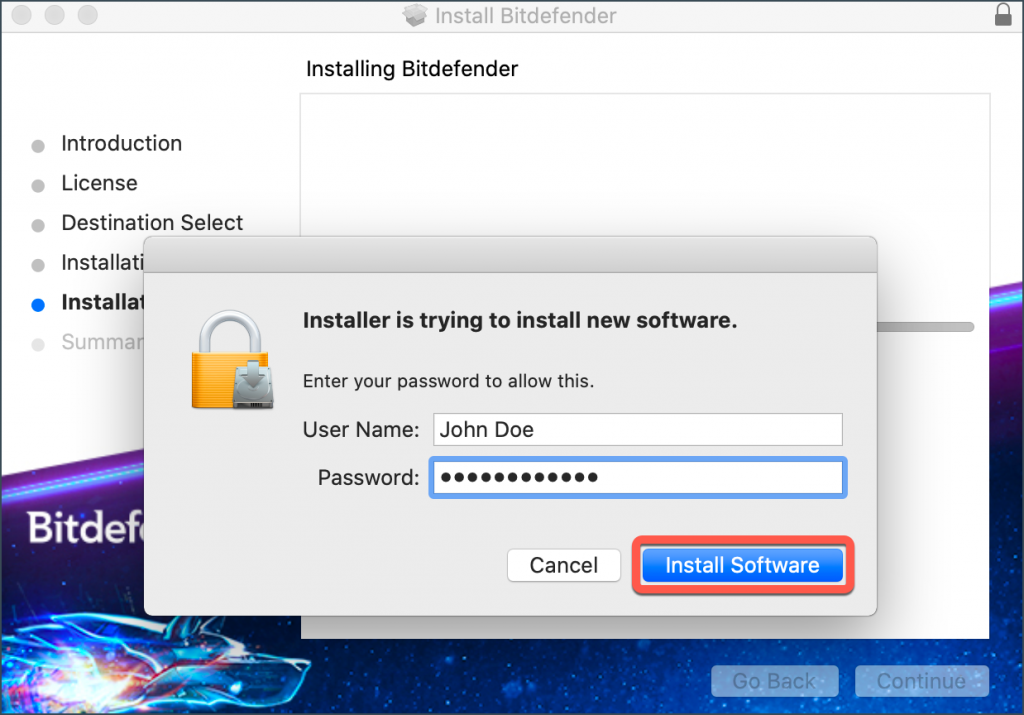
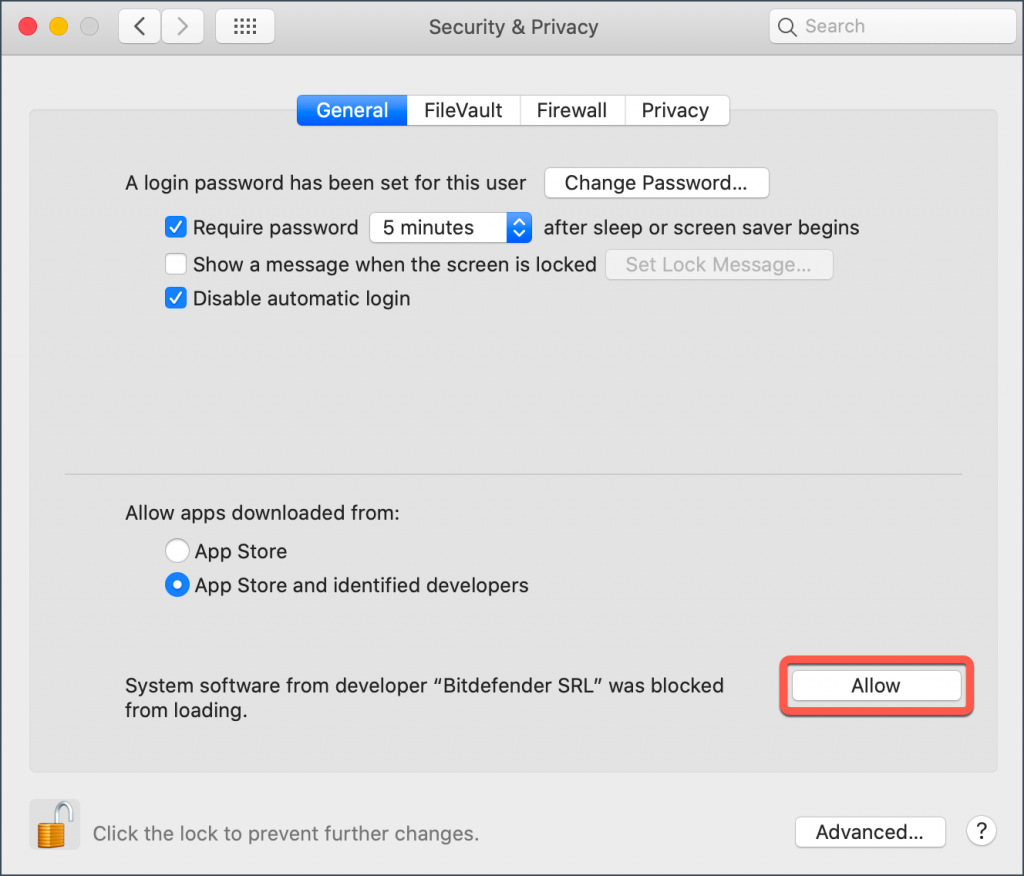
8. You will be notified that a system extension signed by Bitdefender has been blocked. This is not an error, only a security check. Click Open Security Preferences.
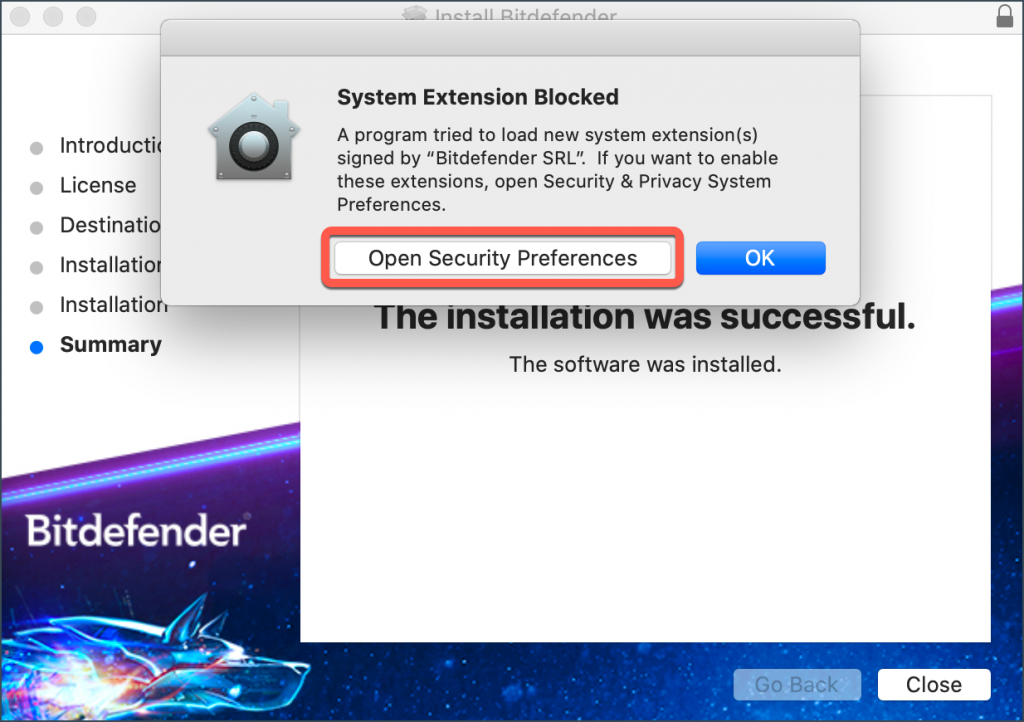
9. Click the lock icon to unlock it.
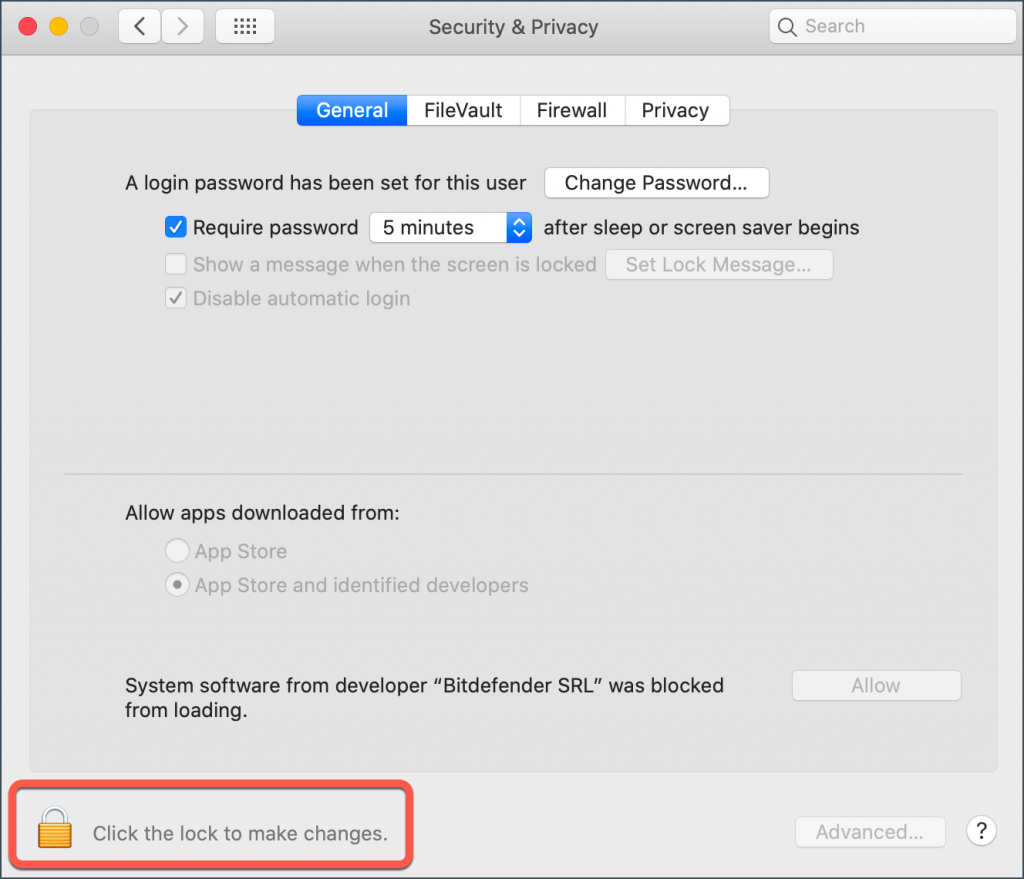
10. Enter an administrator name and password, then press Unlock.
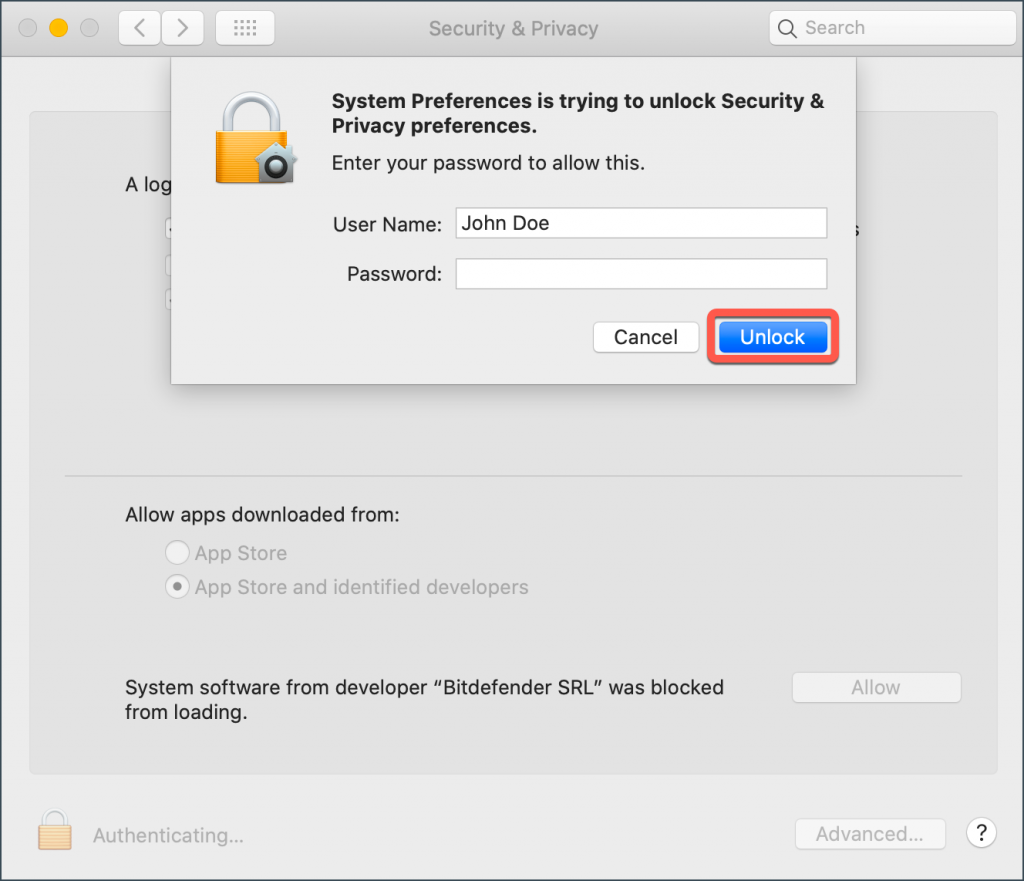
11. Click Allow to load Bitdefender’s system extension. Then close the Security & Privacy window and the Bitdefender installer.
12. Launch Bitdefender VPN using the small shield icon ![]() in the upper-right corner of your Mac’s screen, then Sign In with your Bitdefender account.
in the upper-right corner of your Mac’s screen, then Sign In with your Bitdefender account.
- If you don’t have an account, you can also sign up directly within the app.

13. At this point, if you don’t have a Bitdefender Premium VPN subscription active in your Bitdefender account, you have two options:
- A. You can tap on Start now to begin a 7-day trial of Bitdefender VPN that gives you access to all the premium features.
- B. Alternatively, you can tap on Use it here > enter the code you got in your purchase email > tap on Activate code to start using your Bitdefender Premium VPN subscription.

After a short wait, Bitdefender VPN is installed and ready to be used.
Activation
To activate the subscription after you’ve installed Bitdefender VPN, just go to the email you received after buying Bitdefender Premium VPN and click on the ACTIVATE SUBSCRIPTION button.

Alternatively, you can activate the subscription directly from the VPN interface:
- Click Settings at the top of the Bitdefender VPN window.
- Next, select My Account on the left hand side menu and click on Have an activation code?
- Enter the activation code from the email, and then click the Activate code button.
Congratulations! Bitdefender VPN is now successfully installed and activated on your Mac.
Android
Installation
1. Open the  Google Play Store app on your Android smartphone or tablet.
2. In the search bar at the top, type bitdefender vpn and tap Enter or the search icon.
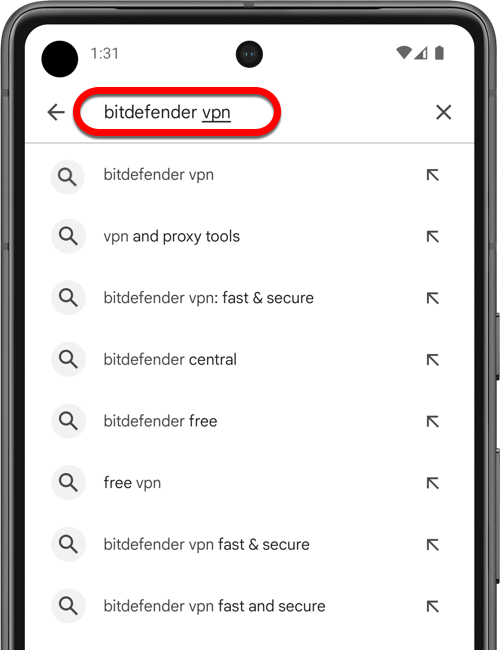
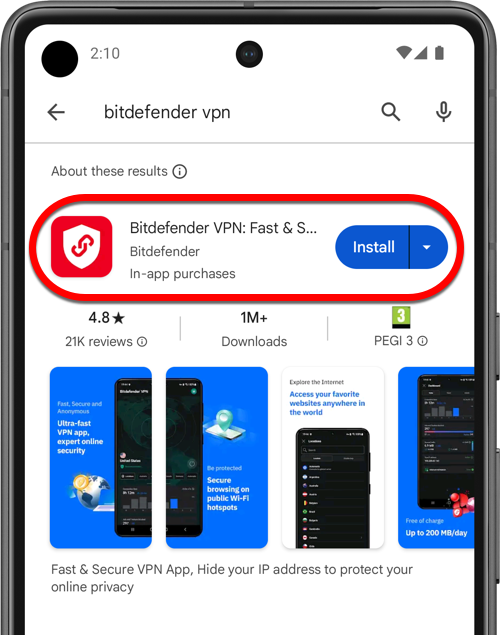
3. Tap on the Bitdefender VPN app in the search results. It should be published by “Bitdefender”.
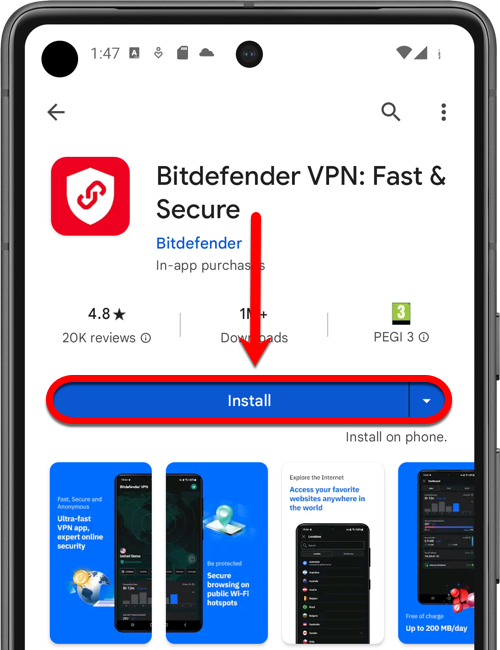
4. On the app’s details page, tap the Install button. The app will start downloading and installing.
5. Once the installation is complete, you’ll see an Open button. Tap on it to launch the Bitdefender VPN app.
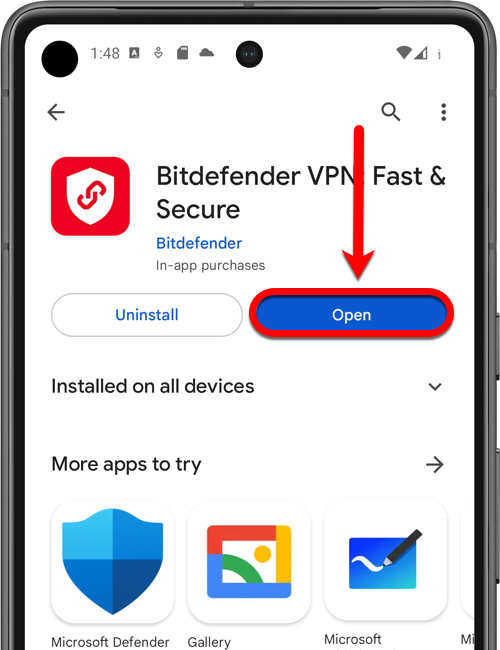
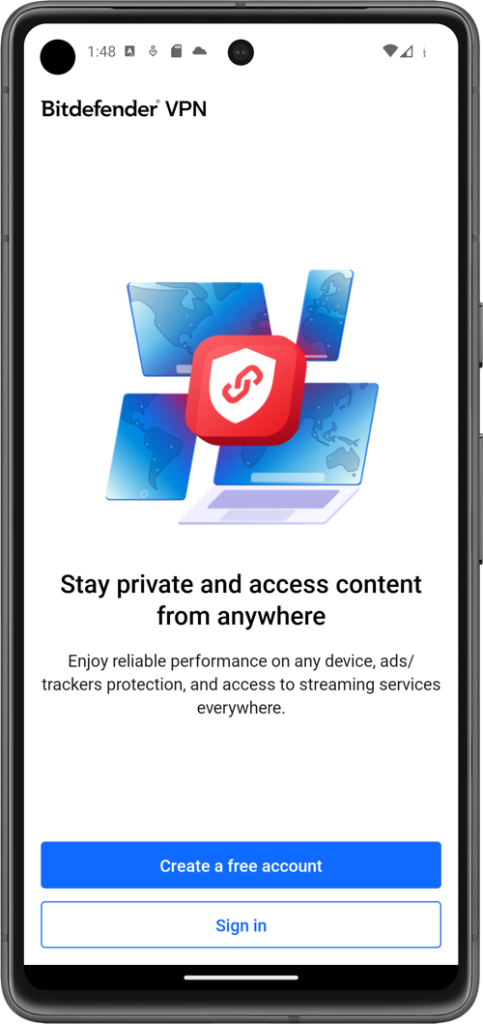
6. When you open the app for the first time, you’ll need to sign in or create a Bitdefender account if you don’t have one.
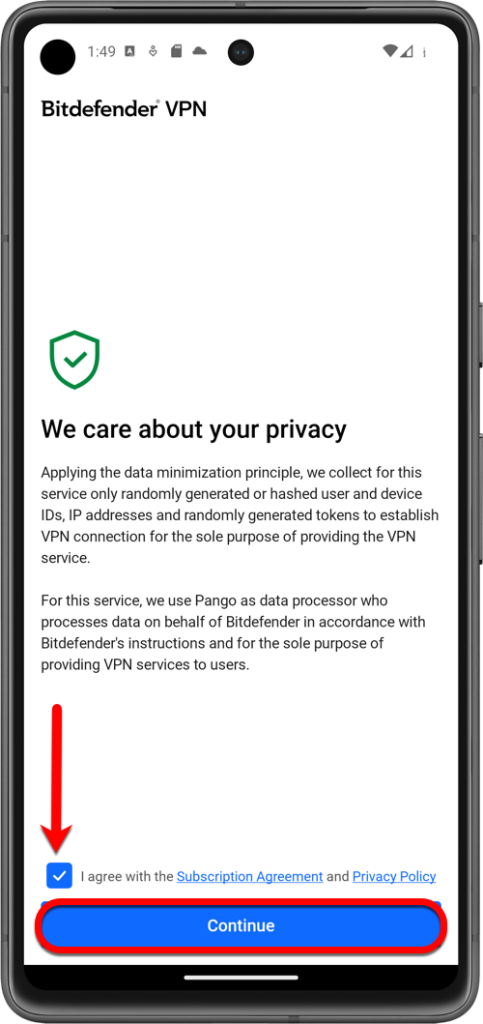
7. Check the small box and tap Continue after you read and agree with the subscription agreement & privacy policy.
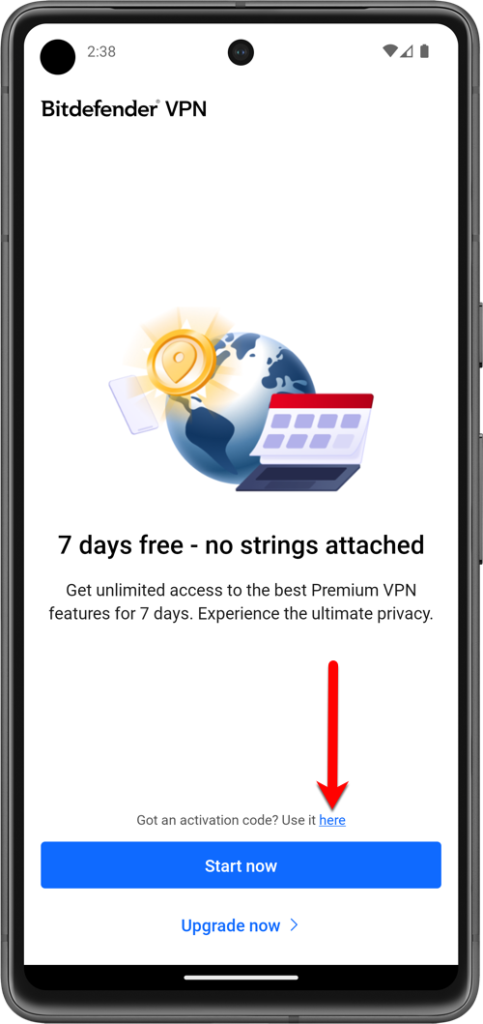
8. At this point, if you don’t have a Bitdefender Premium VPN subscription active in your Bitdefender account, you have two options:
- A. You can tap on Start now to begin a 7-day trial of Bitdefender VPN that gives you access to all the premium features.
- B. Alternatively, you can tap on Use it here > enter the code you got in your purchase email > tap on Activate code to start using your Bitdefender Premium VPN subscription.
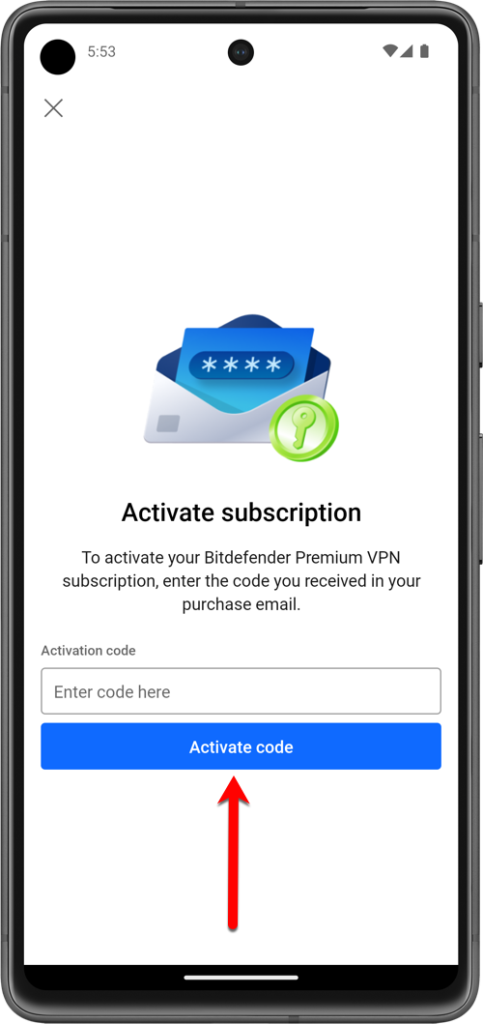
After a short wait, Bitdefender VPN is installed and ready to be used.
Activation
To activate the subscription after you’ve installed Bitdefender VPN, just go to the email you received after buying Bitdefender Premium VPN and click on the ACTIVATE SUBSCRIPTION button.

Alternatively, you can activate the subscription directly from the VPN interface:
- Tap your username in the top right corner of the Bitdefender VPN app.
- Next, tap your email and then tap Have an activation code?
- Enter the activation code from the purchase email, and then click the Activate code button.
Congratulations! Bitdefender VPN is now successfully installed and activated on your Android device.
iOS
Installation
1. Open the  App Store app on your iPhone or iPad.
2. In the search bar at the top, type bitdefender vpn and then tap the search key.
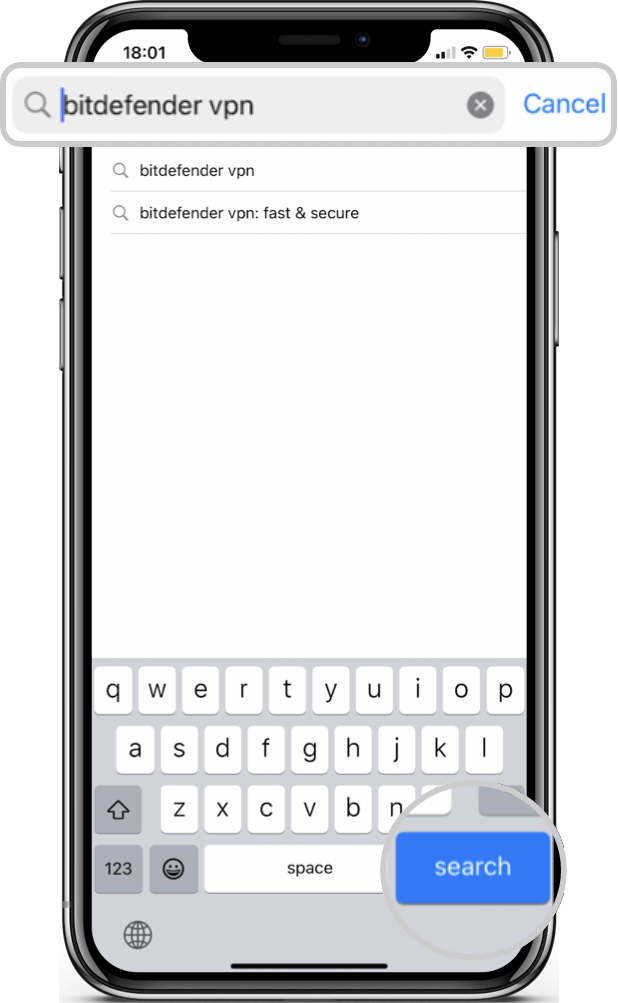
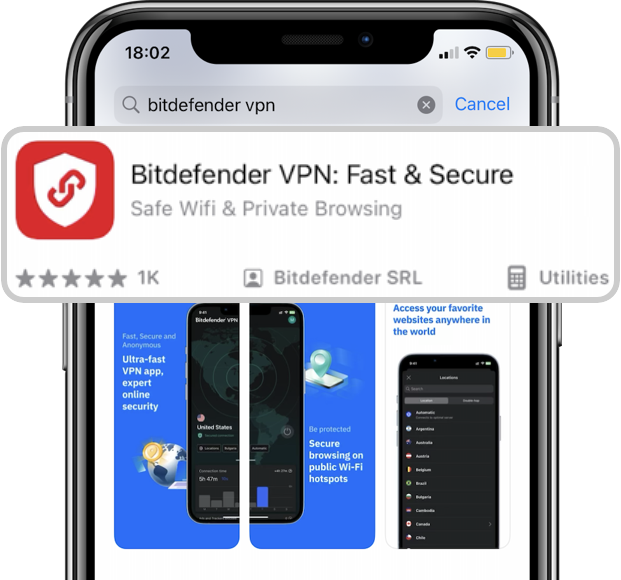
3. Tap on the Bitdefender VPN app in the search results. It should be published by “Bitdefender SRL”.
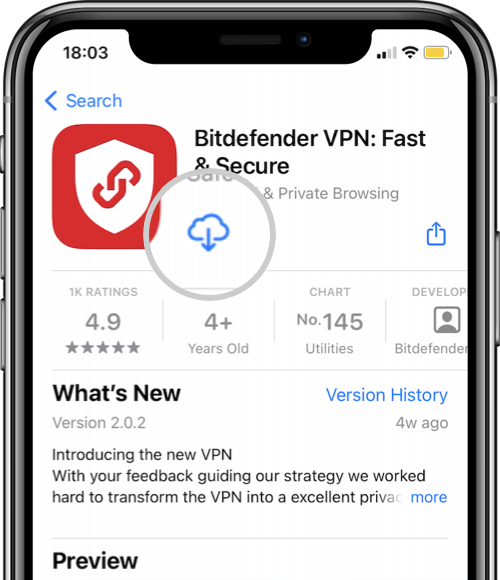
4. On the app’s details page, tap the cloud icon with an arrow pointing down. The app will start downloading and installing.
5. Once the installation is complete, you’ll see an Open button. Tap on it to launch the Bitdefender VPN app.
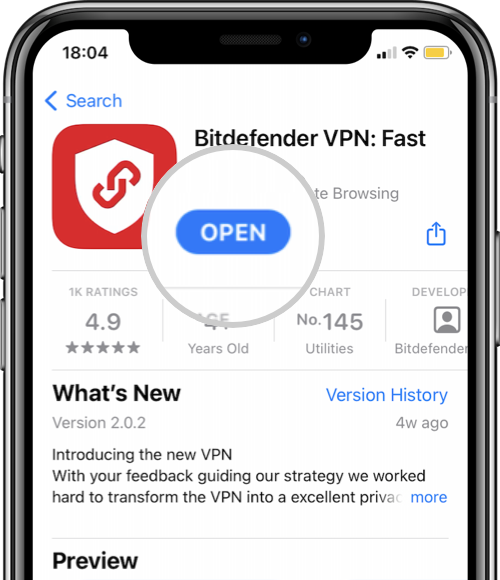
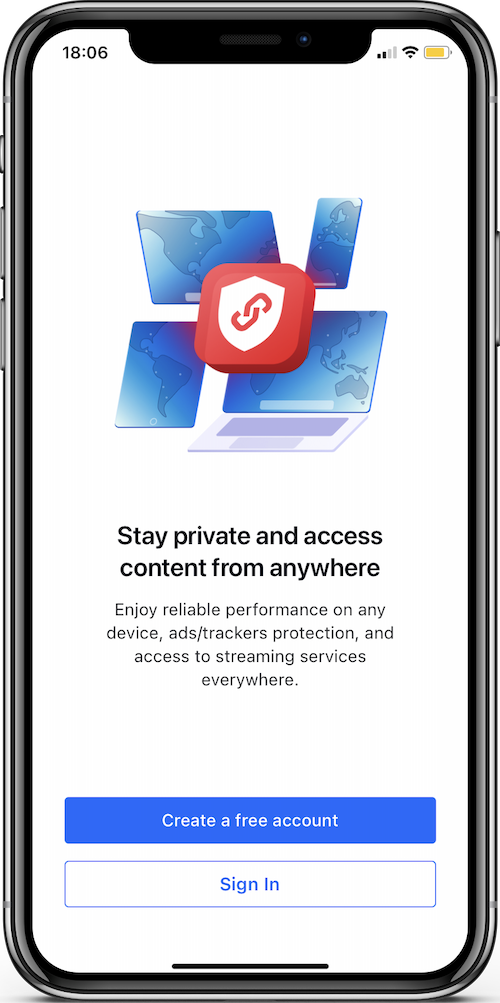
6. When you open the app for the first time, you’ll need to sign in or create a Bitdefender account if you don’t have one.
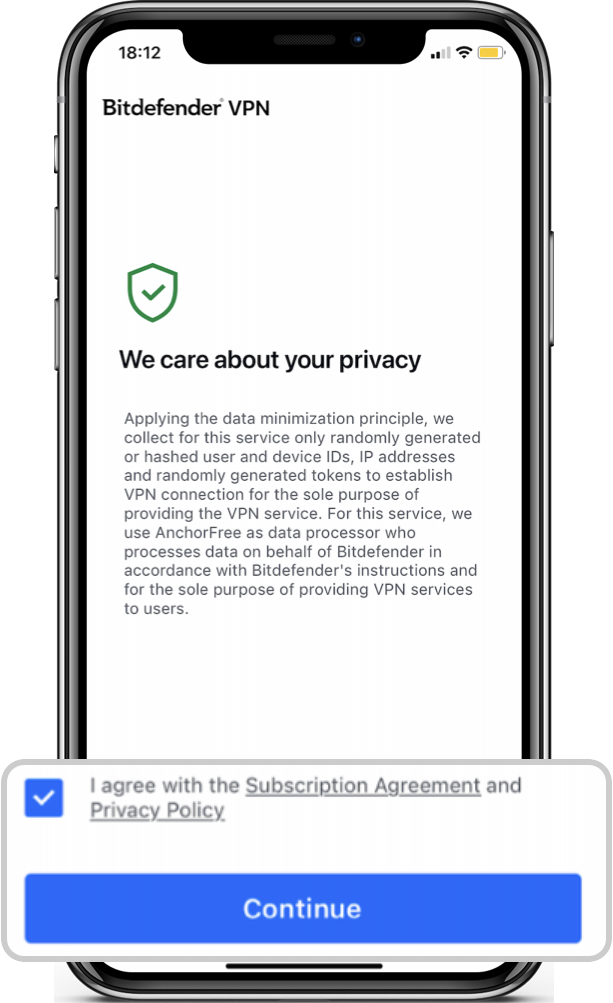
7. Check the small box and tap Continue after you read and agree with the subscription agreement & privacy policy.
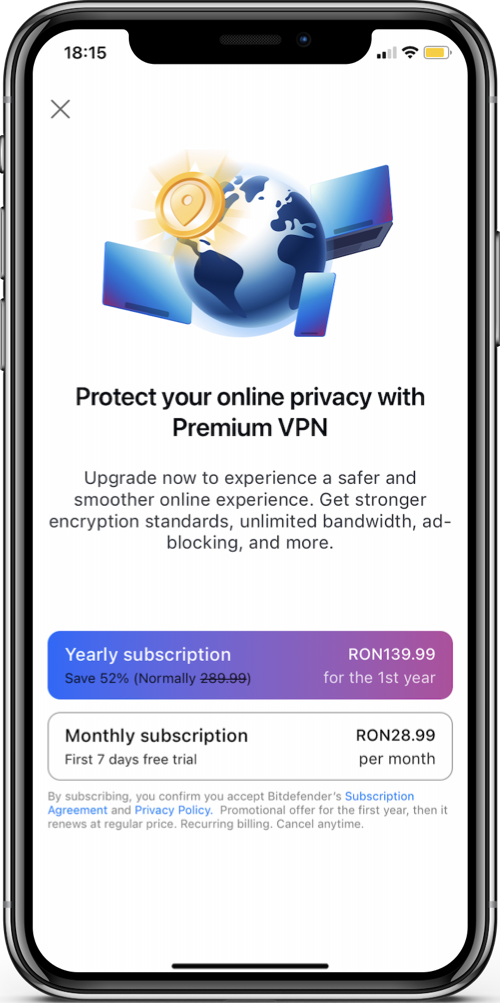
8. At this point, if the Bitdefender Premium VPN subscription isn’t already active in your Bitdefender account, tap on ‘x’ in the top left corner.
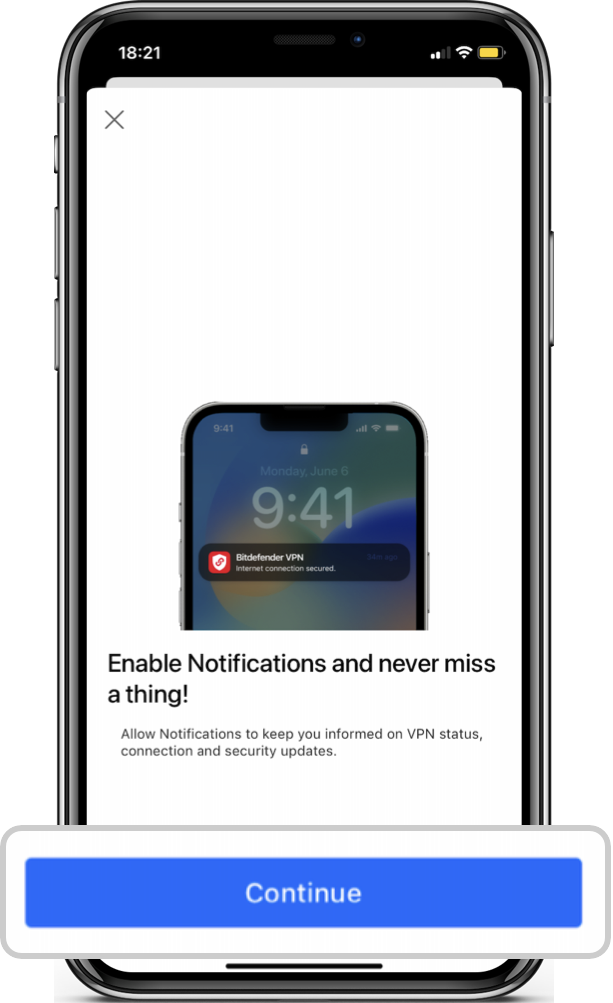
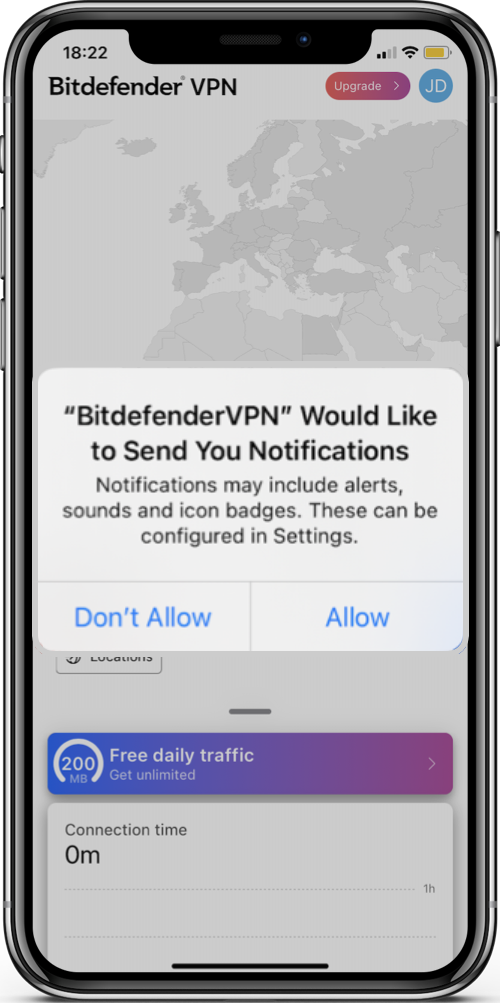
9. Tap Continue, then choose whether or not you want to receive Bitdefender VPN notifications.
Bitdefender VPN is now installed on your iPhone / iPad.
Activation
To activate the subscription after you’ve installed Bitdefender VPN, just go to the email you received after buying Bitdefender Premium VPN and click on the ACTIVATE SUBSCRIPTION button.

Congratulations! Bitdefender VPN is now successfully installed and activated on your iOS device.
