In this guide, we’ll walk you through the steps to change DNS on iPhone and iPad. DNS stands for Domain Name System. Think of DNS as a phone book for the internet that translates domain names (like “bitdefender.com”) into numeric IP addresses (like “101.18.169.222”), allowing you to visit websites without having to remember their IP. By changing the DNS server on your iPhone or iPad, you direct your internet connection to use a more reliable DNS server. This can improve internet speed, privacy, and security.
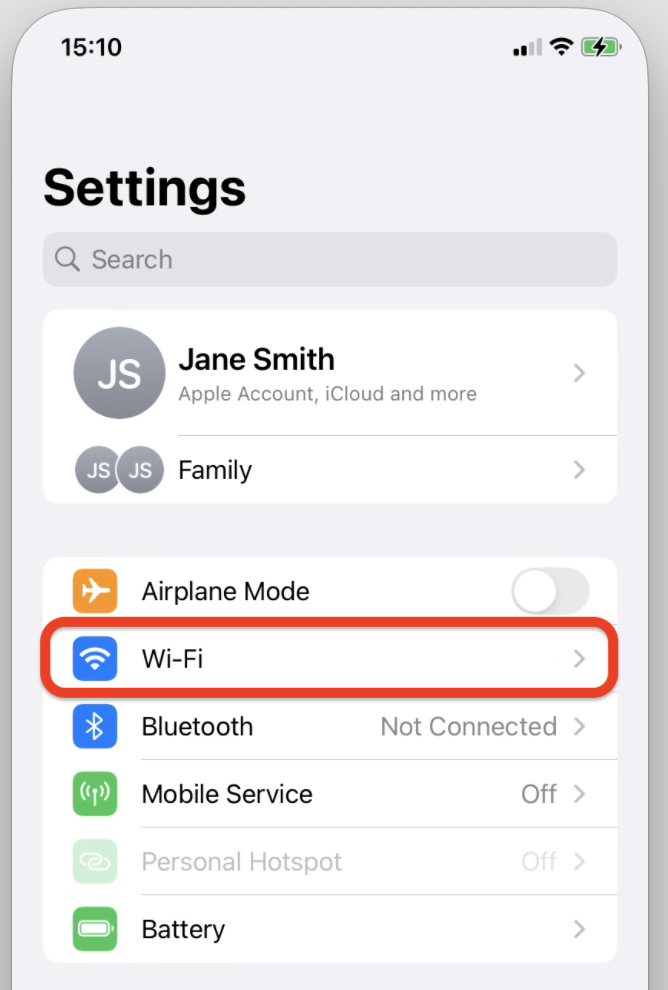
1. Tap the Settings app  on your iPhone or iPad.
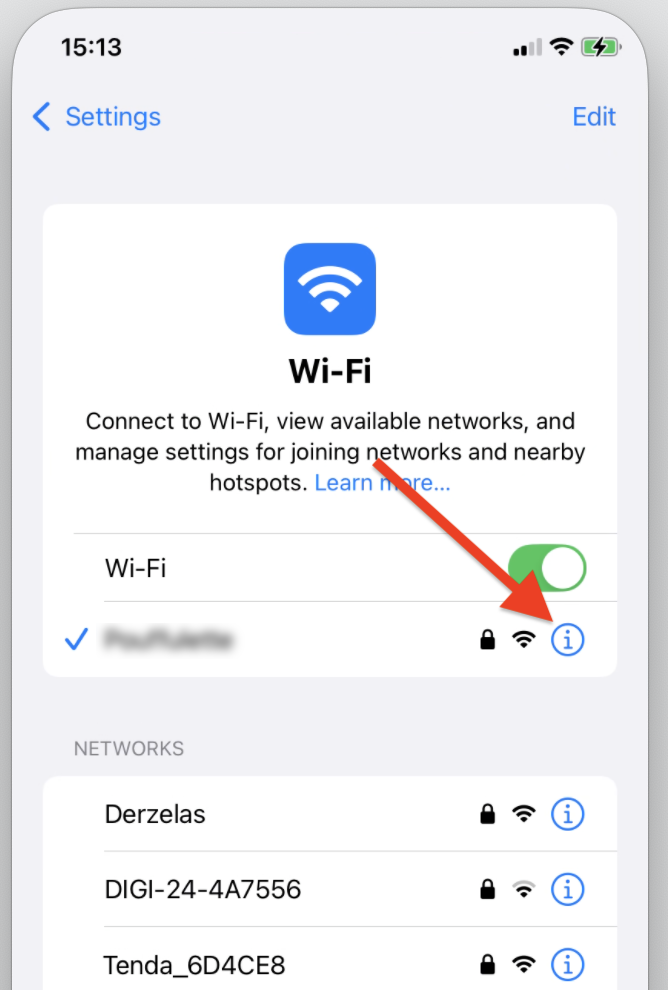
2. Select Wi-Fi, then tap the info icon ⓘ next to your connected Wi-Fi network.
- Note: iOS does not have a built-in option to change DNS settings for cellular data.
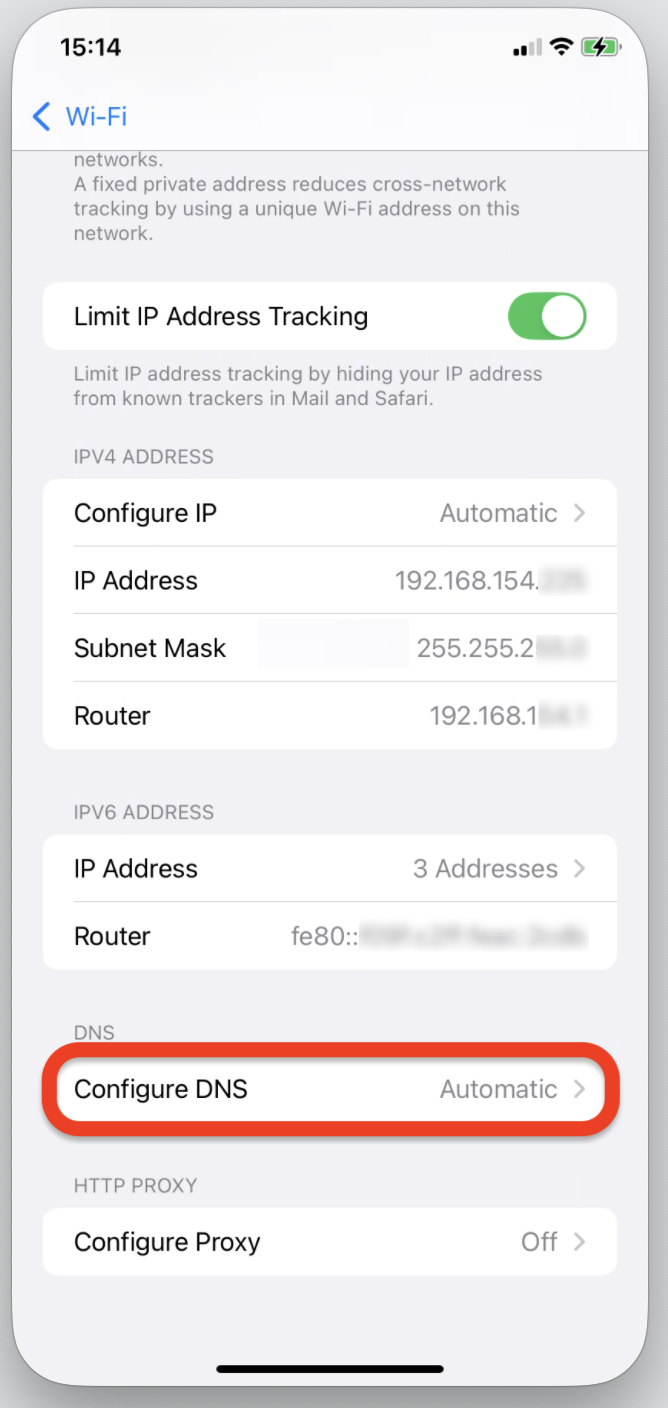
3. Scroll down and tap Configure DNS.
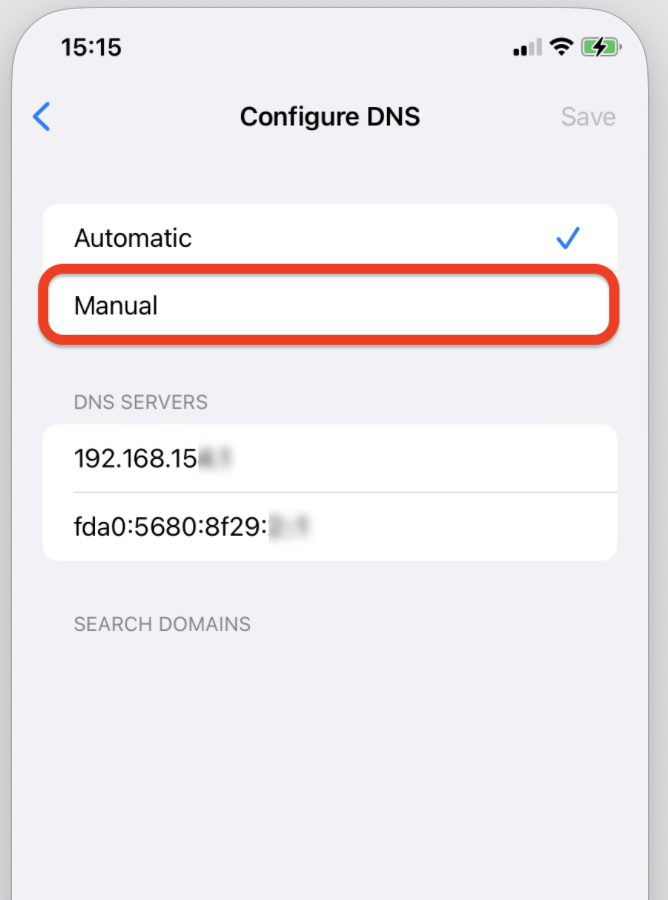
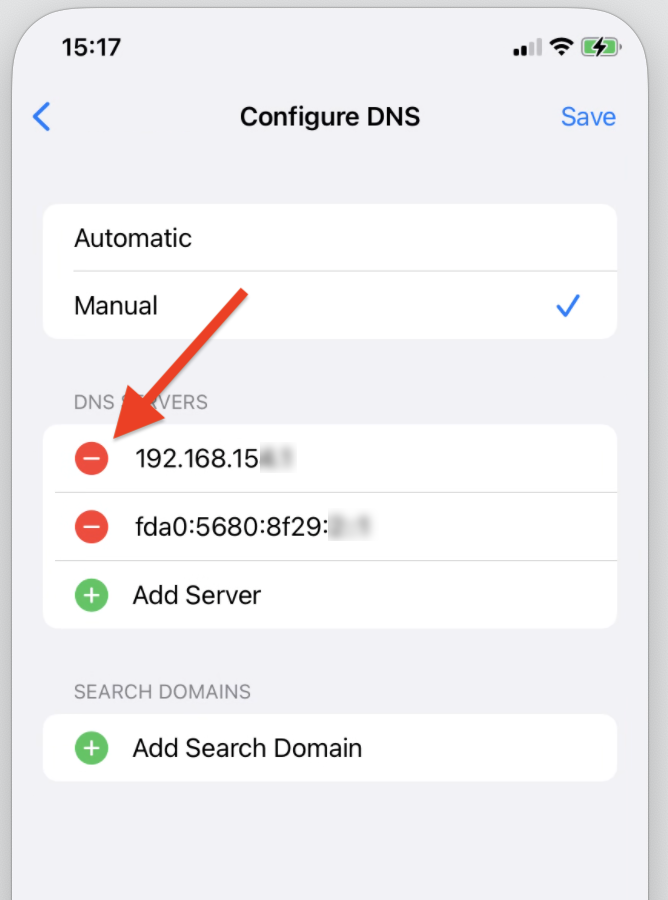
4. Choose Manual instead of Automatic.
- To reset DNS changes back to default, select Automatic at any time.
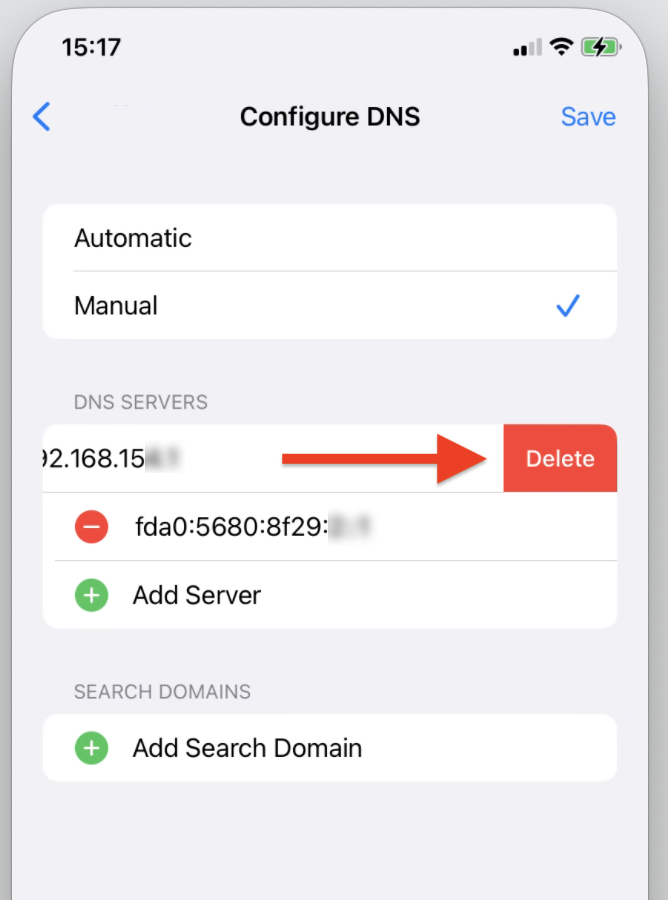
5. Delete any existing DNS entries: tap the minus (-) icon and then tap Delete.
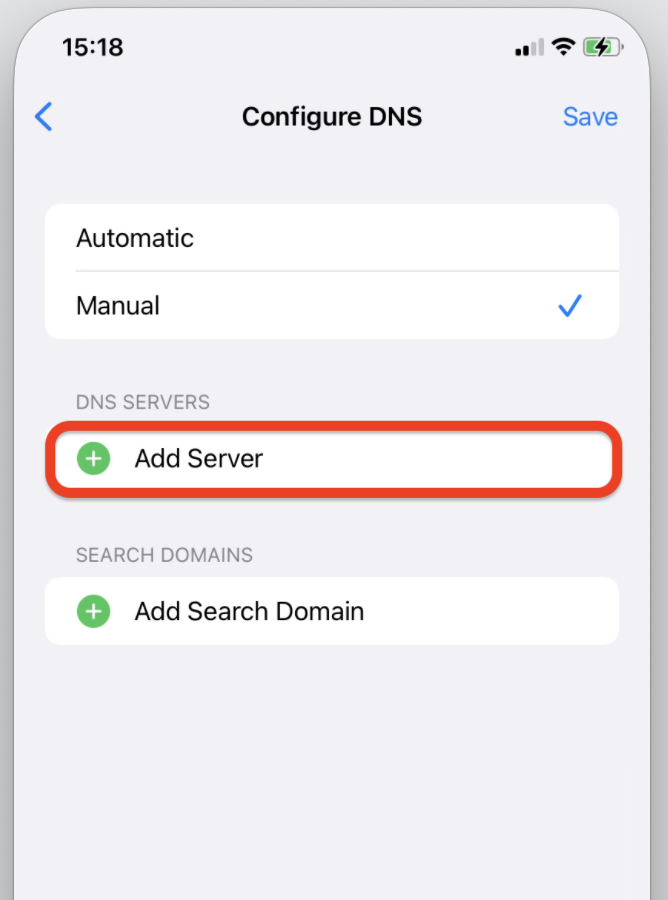
6. Tap Add Server and enter the preferred DNS server address. For example:
- Google DNS: Enter 8.8.8.8
- Cloudflare DNS: Enter 1.1.1.1

7. Tap Save in the top right corner to apply the changes.

That’s it! You’ve successfully changed the DNS for the selected Wi-Fi network on your iPhone or iPad. Your iOS device will now use the new DNS server whenever connected to this network.