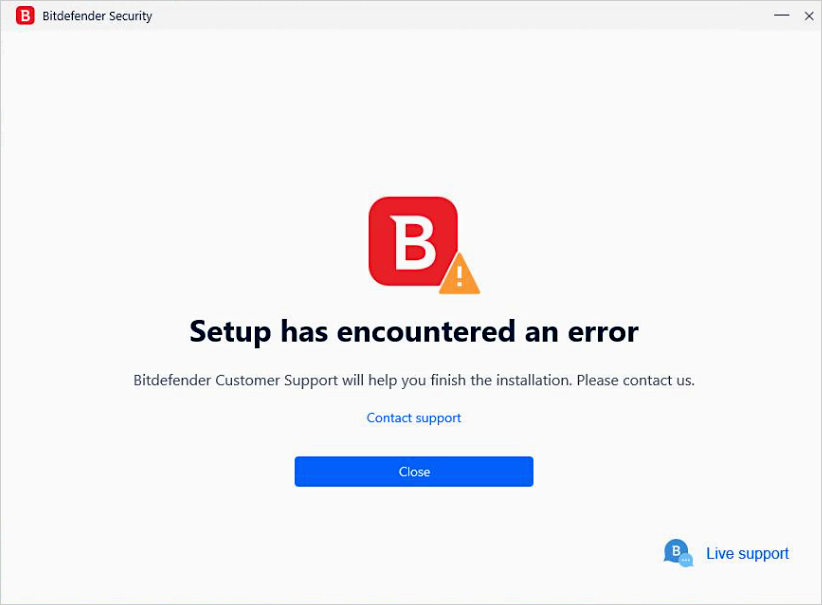
If you receive one of the error messages “Bitdefender Installation failed” or “Setup has encountered an error” while trying to install Bitdefender on a Windows computer, follow the troubleshooting steps below.
1. Remove Old Bitdefender Versions
Use the Bitdefender uninstall tool to remove any trace of previous Bitdefender versions from your PC:
- Download the Bitdefender uninstall tool from this page.
- Run the tool corresponding to your Bitdefender version and follow the on-screen instructions.
- Restart your computer once the tool completes its process.
2. Remove Other Security Solutions
- To uninstall any other antivirus or security software, follow the steps outlined in the article How to uninstall or remove apps and programs in Windows.
- Afterward, restart your computer.
- If the uninstall encounters errors, use the dedicated removal tool available here – Uninstall tools for major Antivirus software.
3. Clean Up System Files
- Run Disk Cleanup to clean unnecessary files and the remains of previous security software – How to run Disk Cleanup.
4. Retry the Bitdefender installation
- Now download and install the latest version of Bitdefender from your Bitdefender account – How to install your Bitdefender security solution on Windows.
5. Use System File Checker (SFC)
- If the installation error persists, use the Microsoft System File Checker tool (SFC) to repair missing or corrupted files – How to run System File Checker.
6. Check Disk Integrity
- Use the Check Disk tool to check the integrity of disks and correct certain types of common errors – How to run a Disk Check.
7. Update Windows
- To ensure optimal performance and security, install all available Windows updates, including the latest Service Pack – How to check for Windows updates.
8. Set Permissions for Bitdefender folders
Follow the steps below to manually set permissions for Bitdefender installation folders:
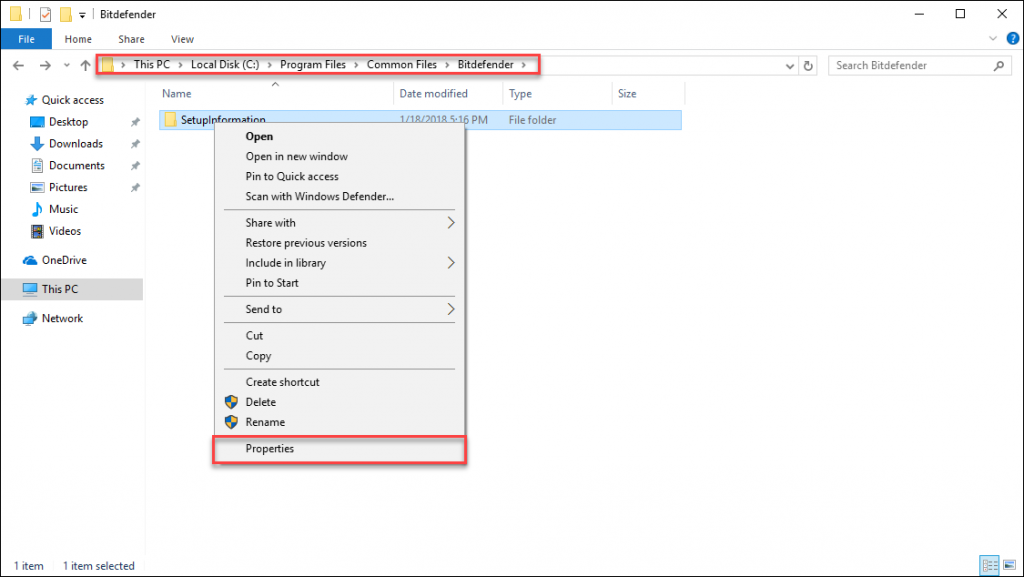
- C:\Program Files\Common Files\Bitdefender\SetupInformation
- C:\Program Files\Common Files\Bitdefender
- C:\Program Files\Bitdefender
Create Required Folder:
-
- Open the folder C:\Program Files\Common Files\
- If the Bitdefender folder doesn’t exist, create it:
- Right-click inside the Common Files folder, select New > Folder, and name it Bitdefender
- Inside the Bitdefender folder, create another folder named SetupInformation
- Now you will have the folder C:\Program Files\Common Files\Bitdefender\SetupInformation
Set Folder Permissions:
-
- Right-click on the SetupInformation folder and select Properties.
-
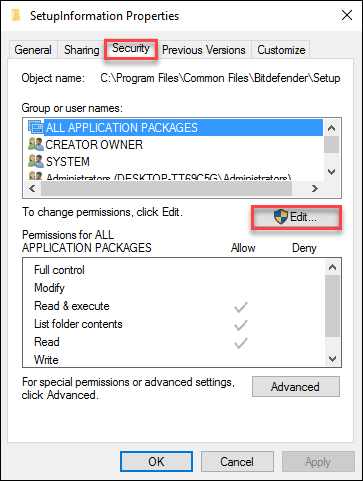
- Go to the Security tab and click the Edit button.
-
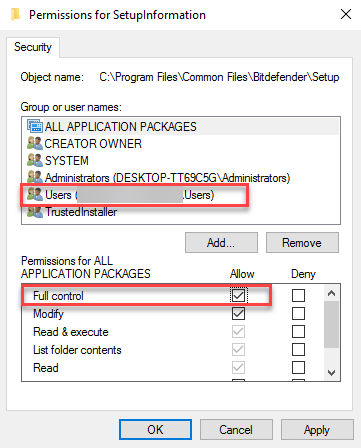
- In the Group or user names section, select your Windows username.
- After selecting your username, check the Allow box next to Full control. This will set the correct Windows permissions for the C:\Program Files\Common Files\Bitdefender\SetupInformation folder.
Repeat for these Bitdefender folders:
-
- Also set permissions for these two Bitdefender folders:
- C:\Program Files\Common Files\Bitdefender
- C:\Program Files\Bitdefender (create this folder manually if it doesn’t exist)
- Also set permissions for these two Bitdefender folders:
-
- Right-click on each Bitdefender folder within the specified folders, choose Properties, and follow the same steps above to allow full control to your Windows username.
.
Once you’ve granted full permissions on all these folders, restart your computer, run the Bitdefender installer again and check if the issue is resolved.