Mac computers running macOS 11 (Big Sur) and newer versions already equipped with Bitdefender Parental Control will automatically receive the upgraded version. This article provides a step-by-step guide to uninstall the old version of Parental Control and grant necessary permissions for the new Parental Control to run on macOS.
Step 1: Uninstall old Parental Control
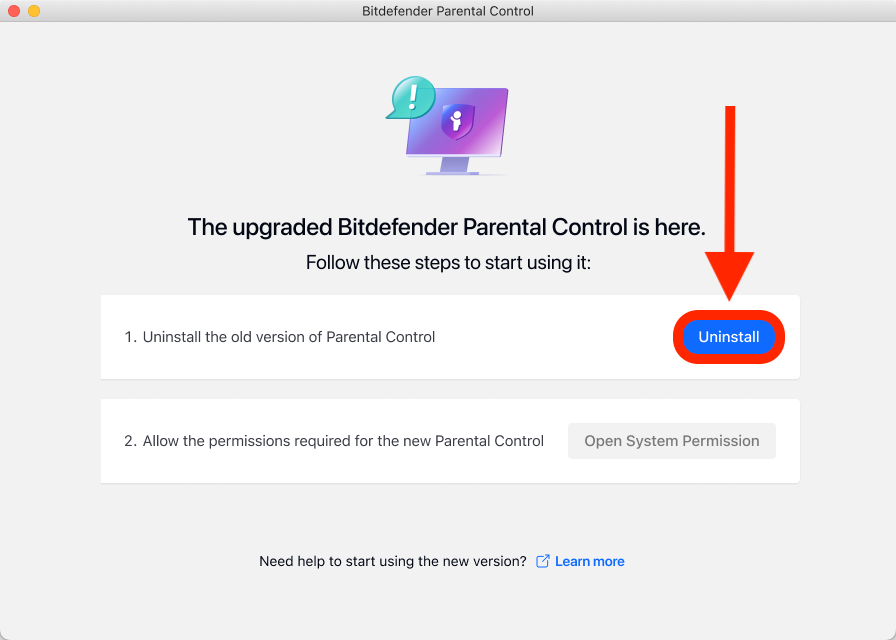
In the window informing you that the upgrade to Bitdefender Parental Control is available, click on the “Uninstall” button.
ⓘ If the upgrade window does not appear, simply uninstall the old Parental Control app (refer to the article – How to Uninstall Bitdefender Parental Control on macOS) and then install the new Parental Control app (refer to the article – How to Install & Set Up the New Bitdefender Parental Control on your Child’s macOS Device).
Step 2: Confirm Uninstallation
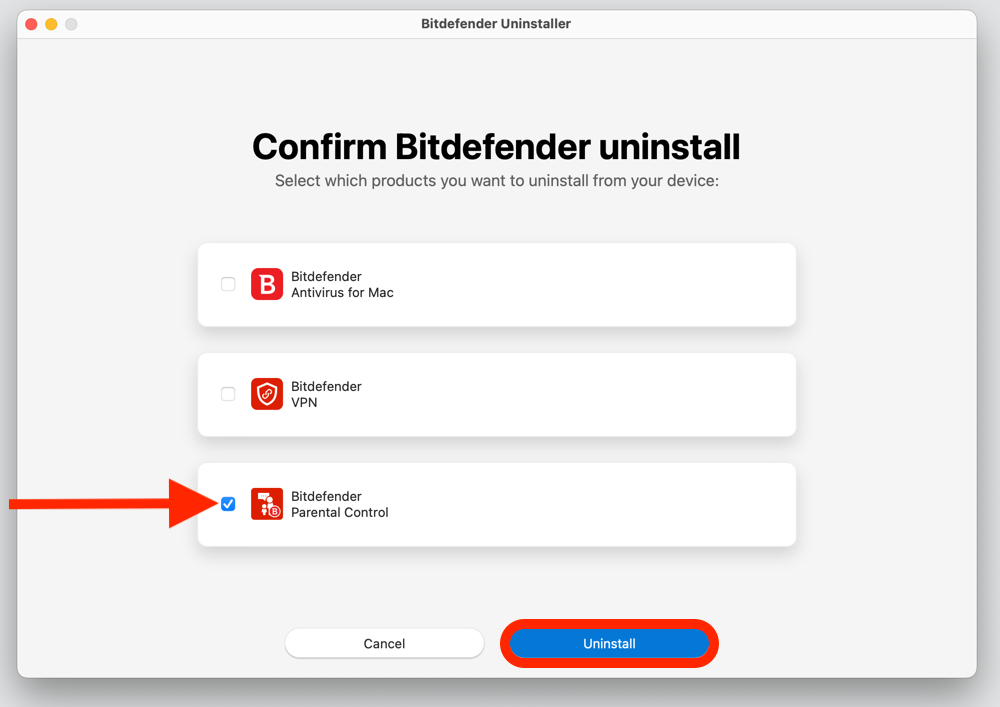
A confirmation window will pop up. Check the Bitdefender Parental Control box, then click the “Uninstall” button at the bottom of the window.
Step 3: Provide Administrator Credentials
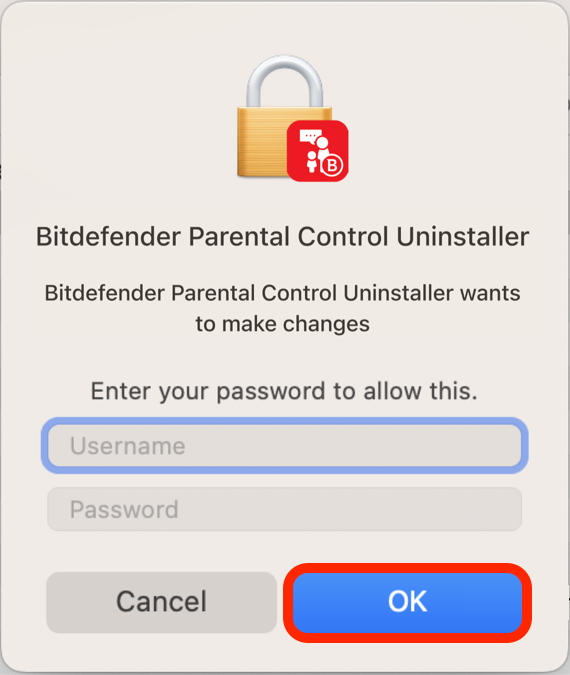
Enter your Mac administrator name and password when prompted to allow the uninstallation, then click the OK button.
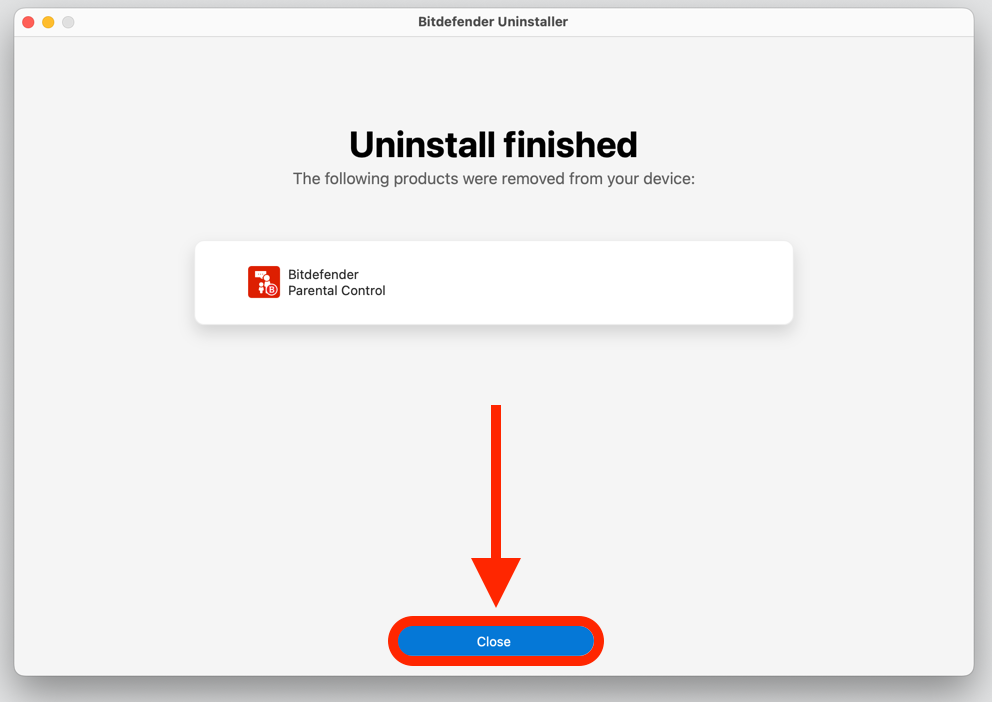
Step 4: Wait for Uninstallation
Wait for the Parental Control uninstallation process to complete, and then click the “Close” button.
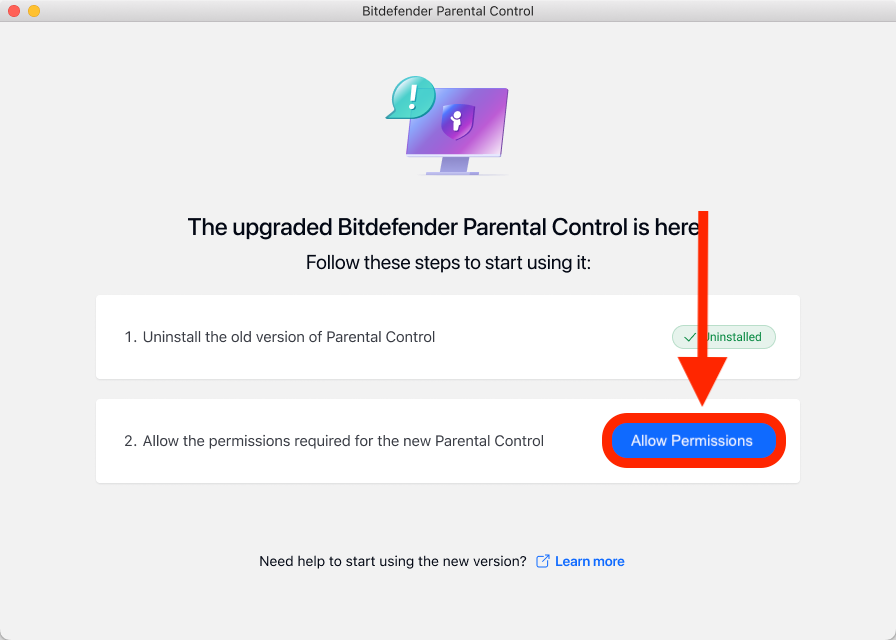
Step 5: Allow Permissions
Return to the window announcing that the upgraded Bitdefender Parental Control is here, and click on the “Allow Permissions” button to grant permissions required for the new Parental Control application.
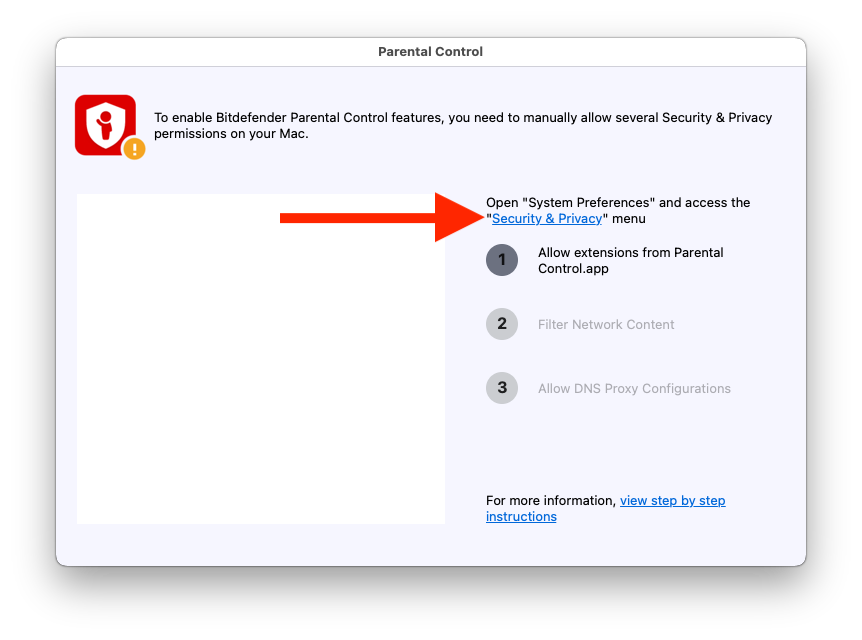
Step 6: Access Security & Privacy
A new window will pop up, showing the necessary steps to set up Bitdefender Parental Control correctly. Click on the “Security & Privacy” link.
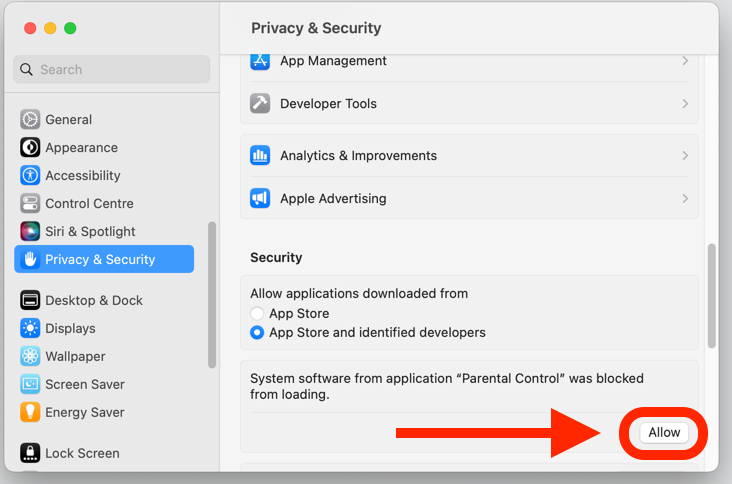
Step 7: Allow Parental Control
Click on the “Allow” button in the window that appears on the screen, then input an administrator name and password to unlock settings.
ⓘ On macOS 11 (Big Sur) and macOS 12 (Monterey), before you can click the “Allow” button, you’ll need to first click the padlock icon in the bottom left corner of the “Security & Privacy” window, enter your macOS administrator password, and then click the “Unlock” button.
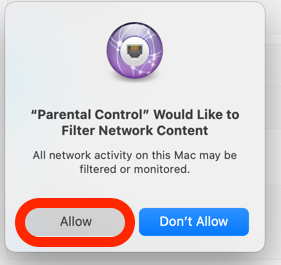
Step 8: Grant Network Content Filtering
The “Filter Network Content” window will appear. Click the “Allow” button within this window.
Step 9: Allow DNS Proxy Configurations
As a final step, you’ll need to allow DNS Proxy Configurations on macOS:
- Click on the “Open System Settings” button (“Open Security Preferences” on earlier macOS versions) in the small pop-up.
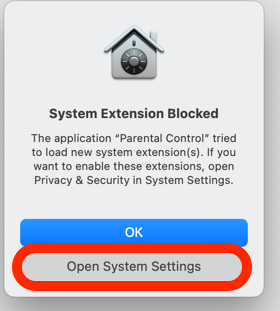
- Now click one more time on the “Allow” button.
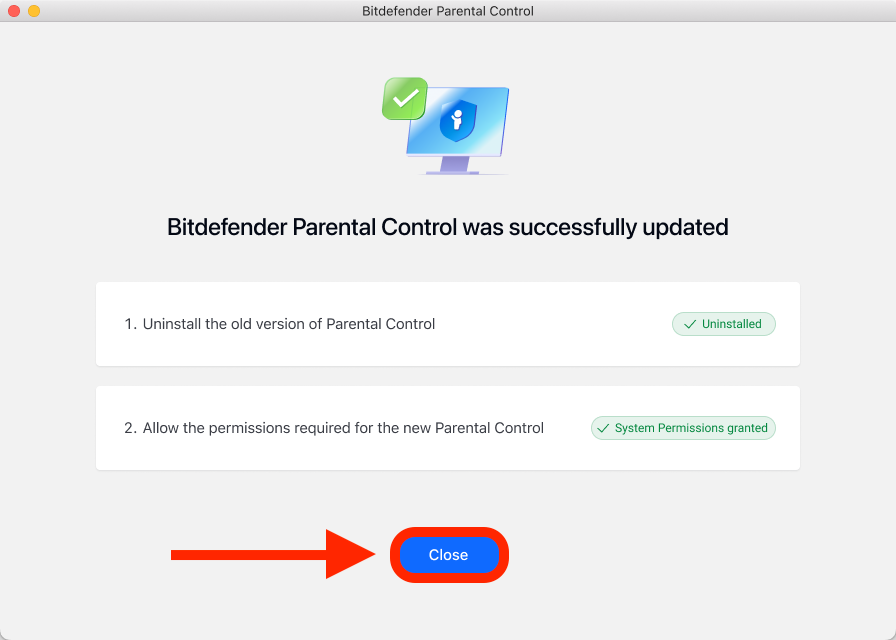
After following the above steps, all required permissions for upgrading to the new Bitdefender Parental Control will be marked as complete with green checkmarks. A confirmation message indicating successful update of Parental Control will appear. You can then close the upgrade guidance window.