Installing Bitdefender Parental Control on your child’s iPhone or iPad involves a few steps to ensure Apple Family Control and Screen Time are set up correctly. Here’s a step-by-step tutorial to guide you through the process:
Create a Child Account Using Apple’s Family Sharing
Step 1: Open Settings
On the parent’s iPhone or iPad, open the  Settings app. It’s usually located on your home screen.
Alternatively, on a Mac choose “System Preferences” (or “System Settings”) from your Apple menu at the top left of the screen, click on your Apple ID name, then access “Family Sharing”.
ⓘ To use Family Sharing, the parent needs an Apple ID signed in on an Apple device. If you don’t have an Apple ID, visit appleid.apple.com on any internet-connected device to create one. Once you have an Apple ID sign in on the child’s iPhone or iPad, set up Family Sharing and the child’s Apple ID as outlined below, then sign out and sign back in with the child’s Apple ID.
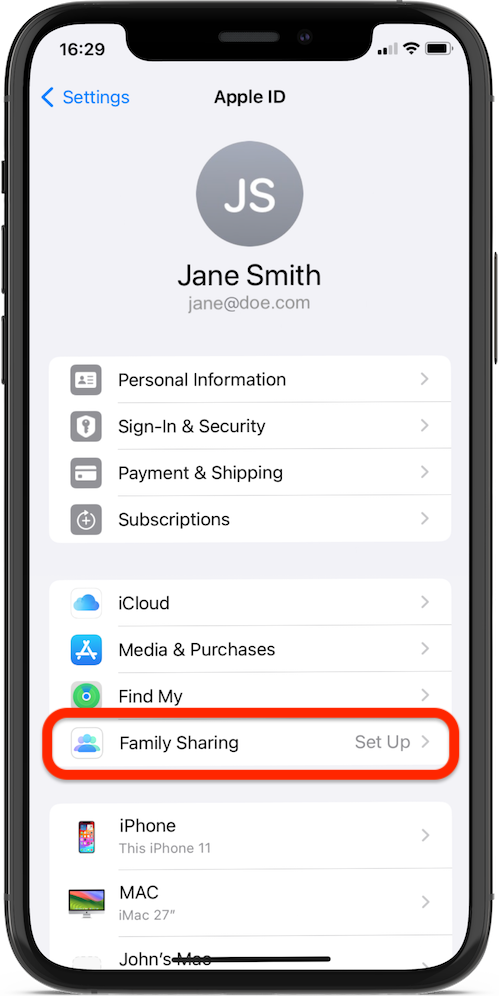
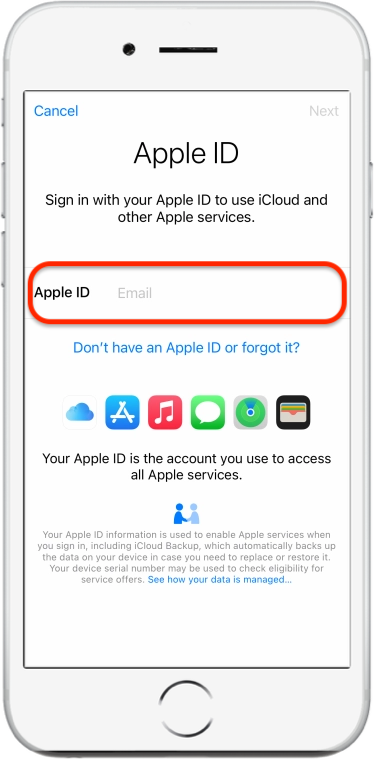
Step 2: Tap on your Apple ID
In the Settings menu, tap on your name at the top. This will open your Apple ID settings.

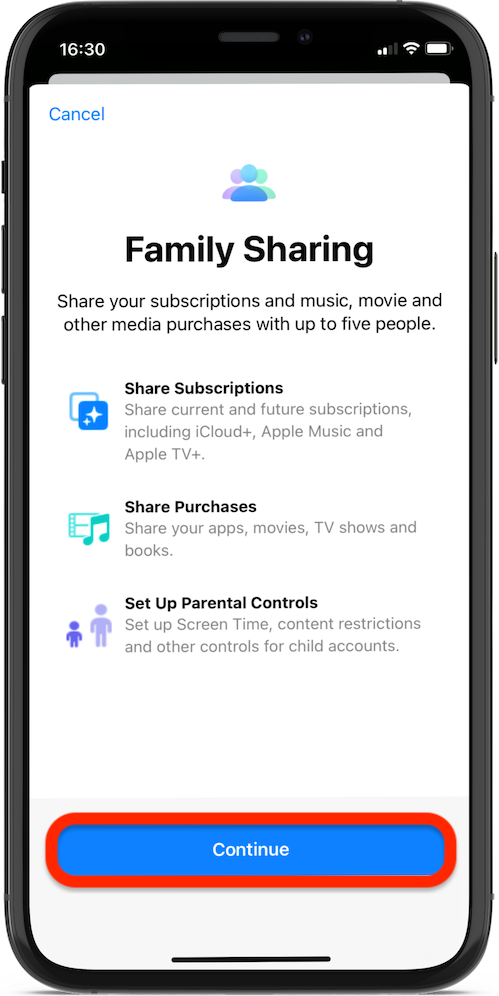
Step 3: Access Family Sharing
Access the “Family Sharing” option. If this is your first time setting up Family Sharing, you’ll also need to tap on “Continue” to proceed with the setup process.
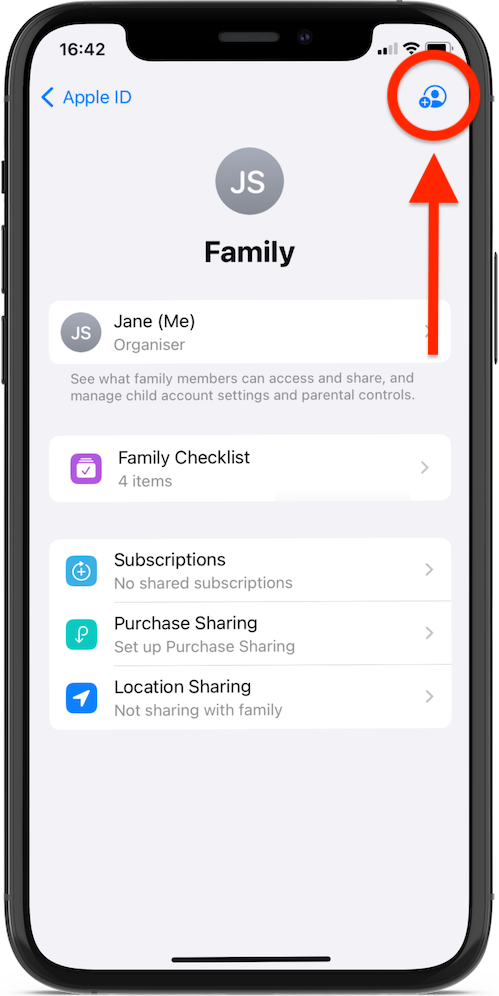
Step 4: Invite Family Members
In the Family section, tap the + symbol in the top right corner or tap “Add Member” on iOS 15 or earlier. This will allow you to add a family member to your Family Sharing group, which includes setting up an Apple ID for your child.
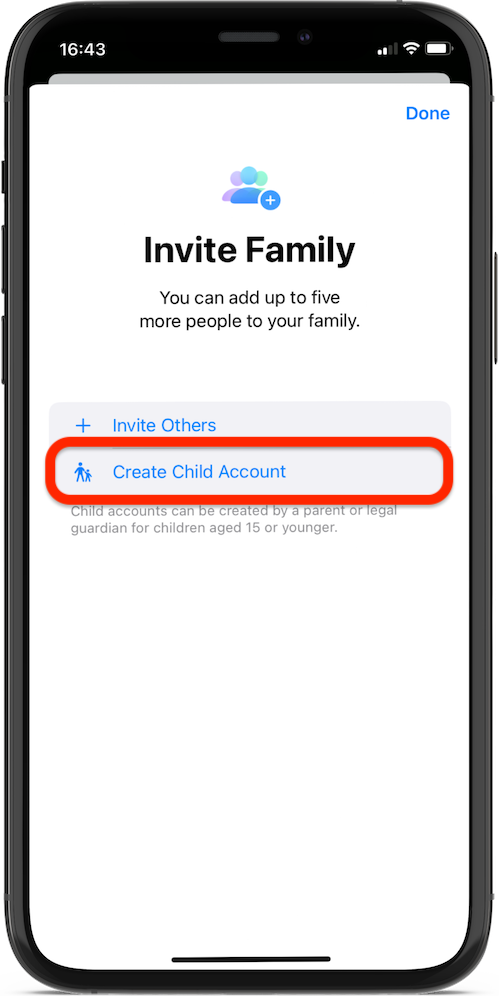
Step 5: Create a Child Account
You’ll be presented with 2 options: to invite someone to join Family Sharing or to create an account for a child. Choose the option “Create Child Account”.
ⓘ The steps below might differ slightly based on your iOS version. Follow the on-screen instructions to set up your child’s Apple ID and turn on Screen Time.
Step 6: Enter Child’s Name & Birthday
Enter the child’s name and birthday, then tap the “Verify You Are an Adult” button.

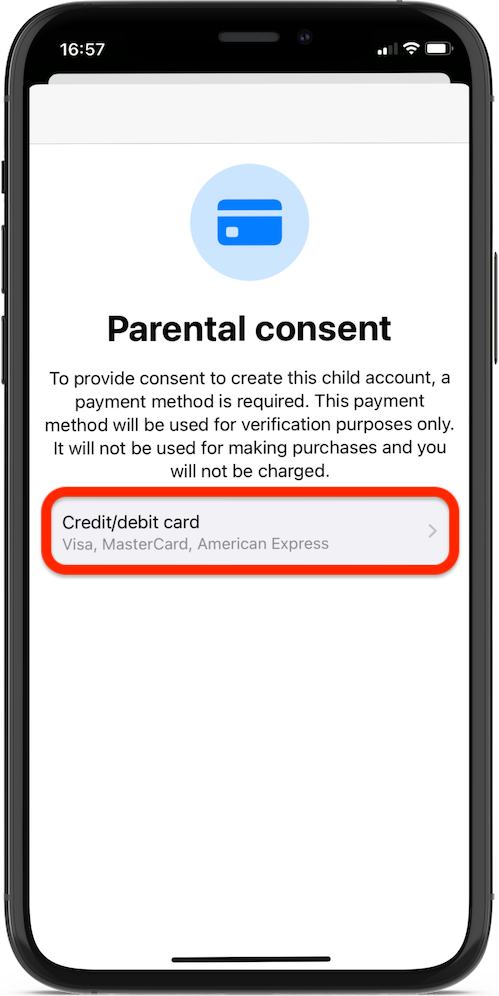
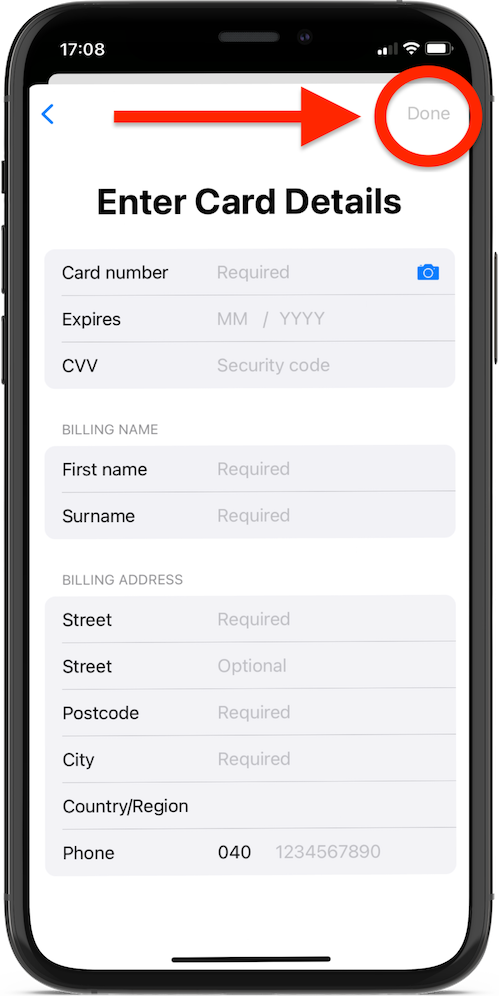
Step 7: Confirm your payment method
To verify you’re an adult tap on “Credit/debit card” and enter the requested card details. Then tap on “Done”. Your card won’t be charged.
Step 8: Review the Terms & Conditions
Tap “Agree” after you review the Parent Privacy Disclosure as well as the Terms & Conditions.


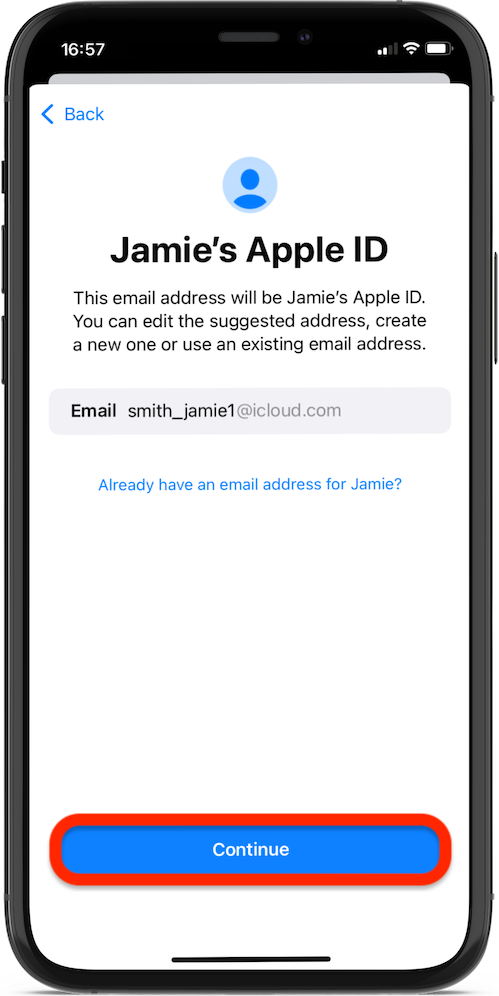
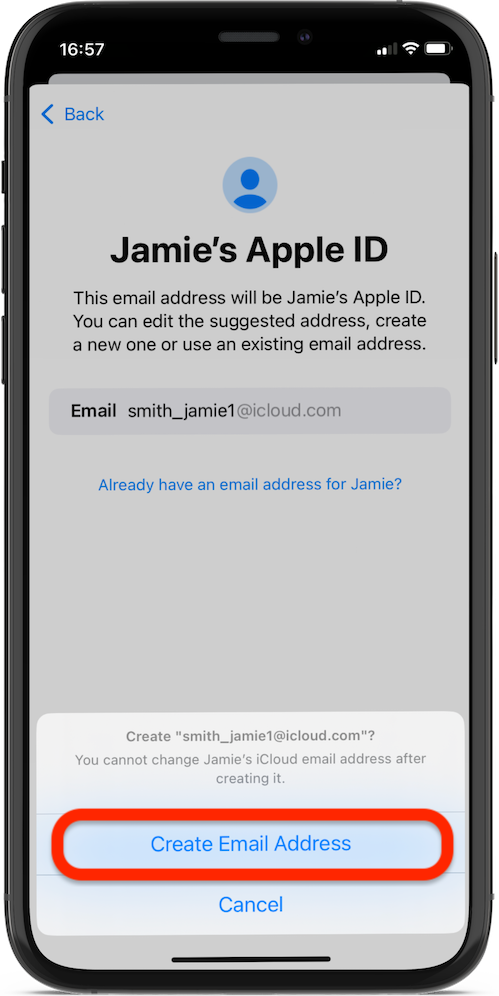
Step 9: Create Child’s Apple ID
Create an email address for the child’s new Apple ID, or use their existing email. Once you’re satisfied, tap on “Continue”, then tap on “Create Email Address”.
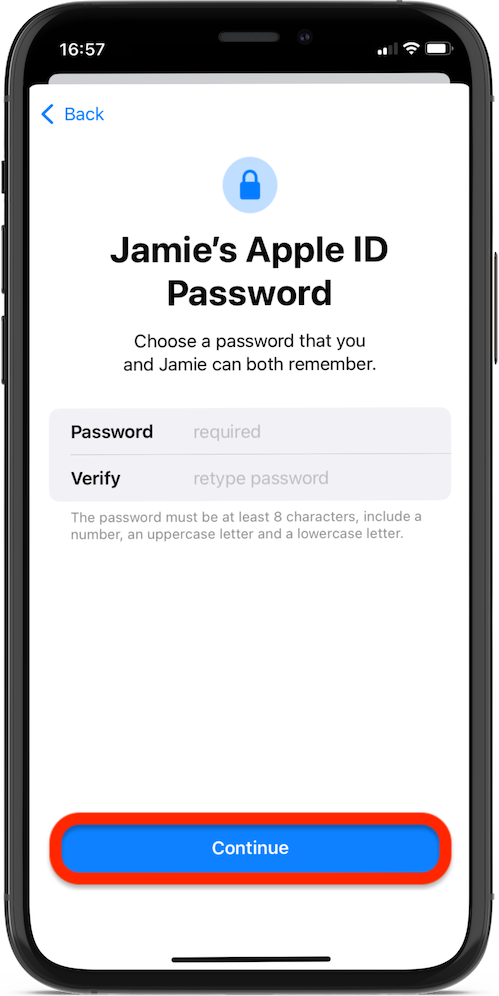
Step 10: Choose a Password
If you opt to create a new email address for your child’s Apple ID, you will be asked to choose a password. Then tap on “Continue”.
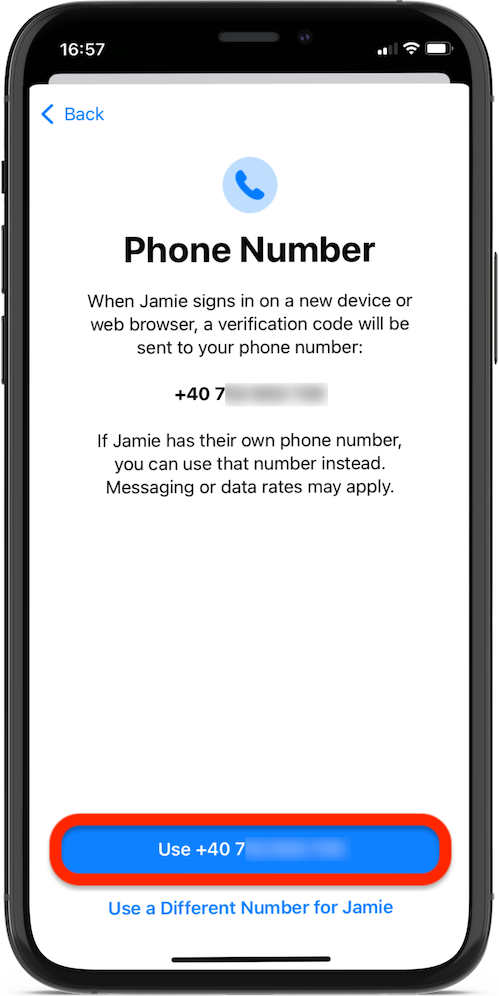
Step 11: Use your Phone Number
Next, use your personal phone number and make sure it’s correct, as it will receive a verification code the next time the child logs into a new device.
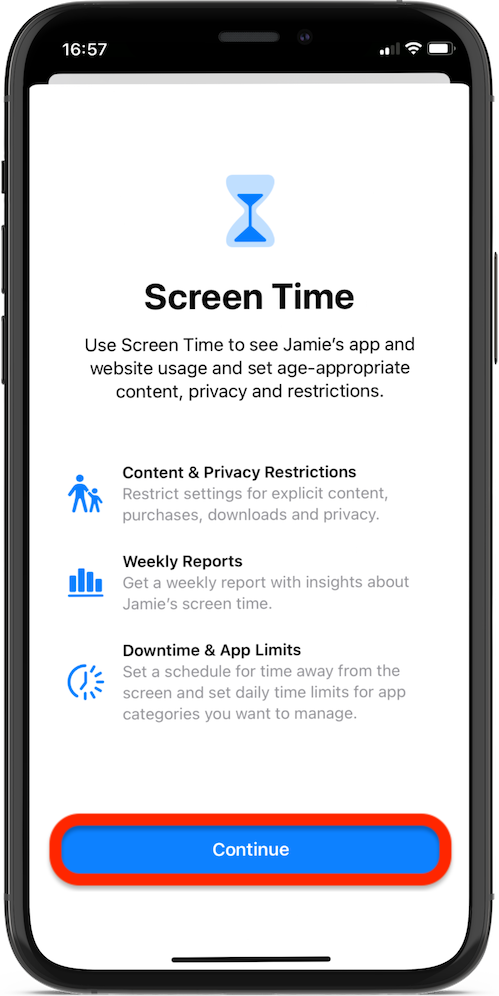
Step 12: Turn on Screen Time
After creating the child’s account, tap “Continue” to enable Screen Time for any device signed in with the child’s Apple ID.
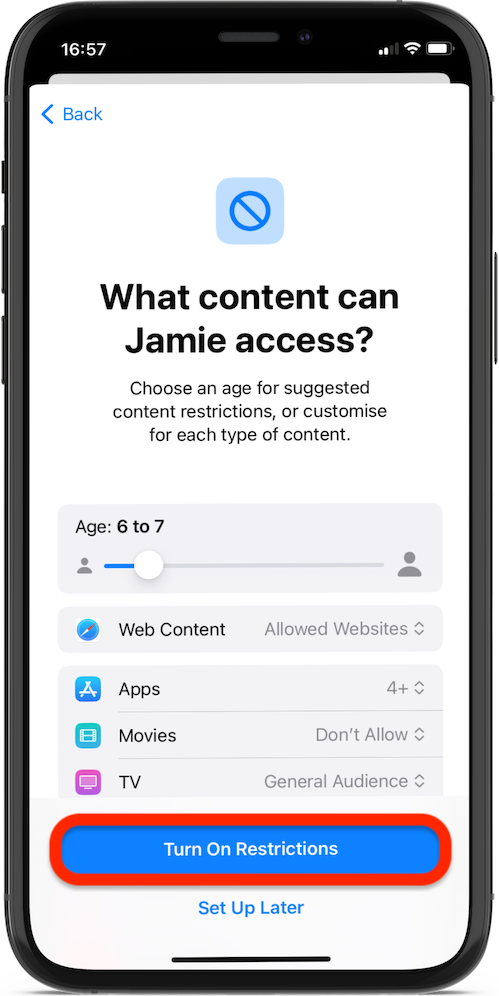
Step 13: Enable Restrictions
Next, tap “Turn on Restrictions” to use the suggested content restrictions that are based on the age of your child.
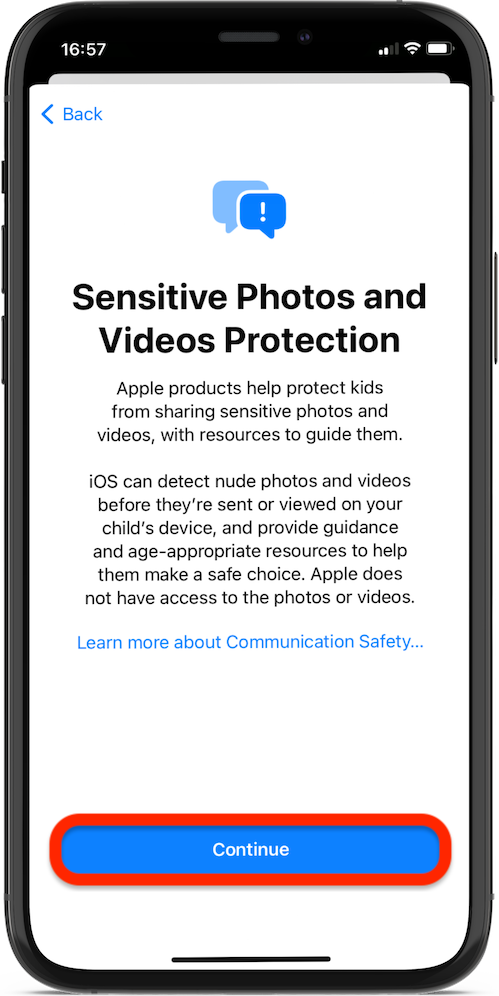
Step 14: Communication Safety
Next, tap “Continue” to protect your child from viewing sensitive photos and videos.
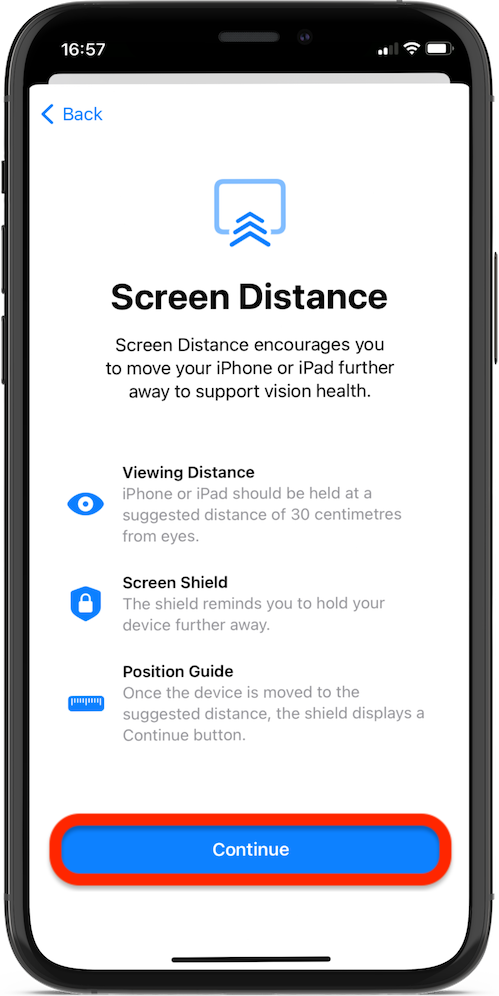
Step 15: Screen Distance
Tap “Continue” on the Screen Distance screen. This feature encourages your child to move their iOS device further away to support vision health.
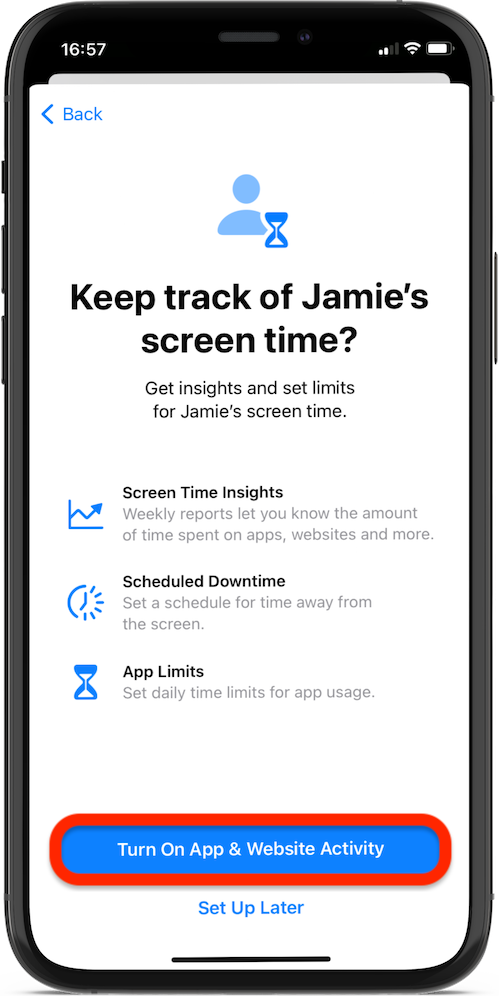
Step 16: Keep Track of Screen Time
Tap “Turn On App & Website Activity” to restrict access to certain websites and content.
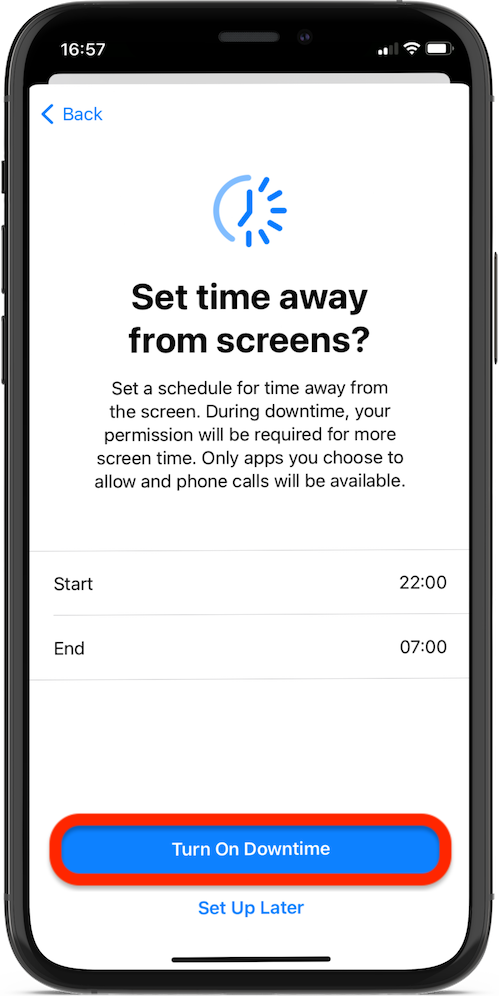
Step 17: Set Time Away from Screens
Tap “Turn on Downtime” to set a schedule for time away from the screen.
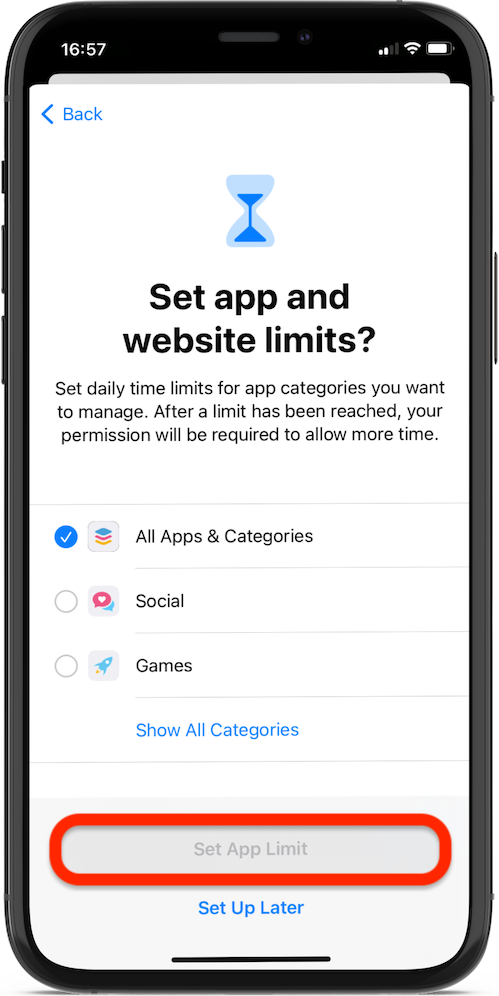
Step 18: Set App & Website Limits
Set daily time limits for app categories you want to manage, then tap the “Set App Limit” button.
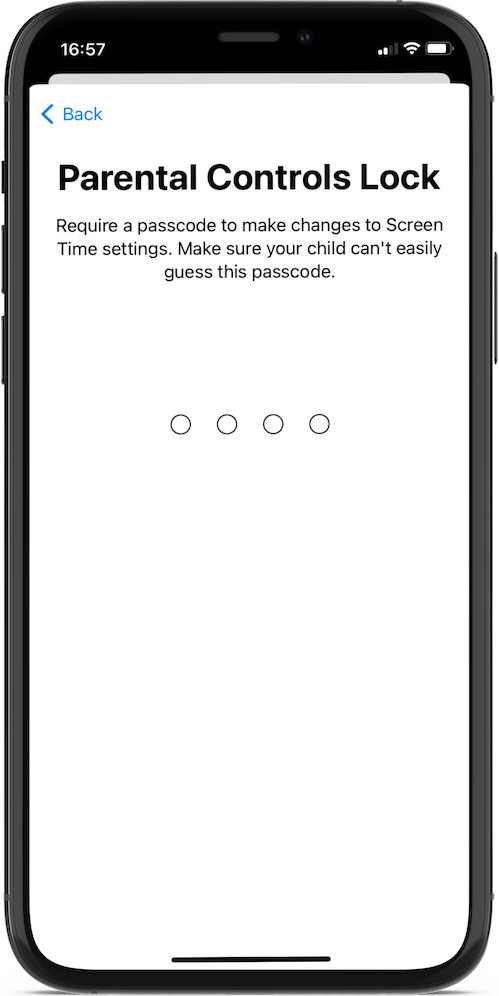
Step 19: Set a Screen Time Passcode
Once the setup is complete, you need to set a passcode that your child can’t guess to prevent them from changing the Screen Time settings.

You’ve successfully created an Apple ID account for your child’s iOS device! Now you can set up their iPhone or iPad with this new Apple ID. Here are the next steps:
Set Up Screen Time on the Child’s iPhone or iPad
After adding your child’s Apple ID to Family Sharing, proceed to their iPhone or iPad. Sign in with the newly created Apple ID to enable Screen Time settings for parental control and monitoring purposes.
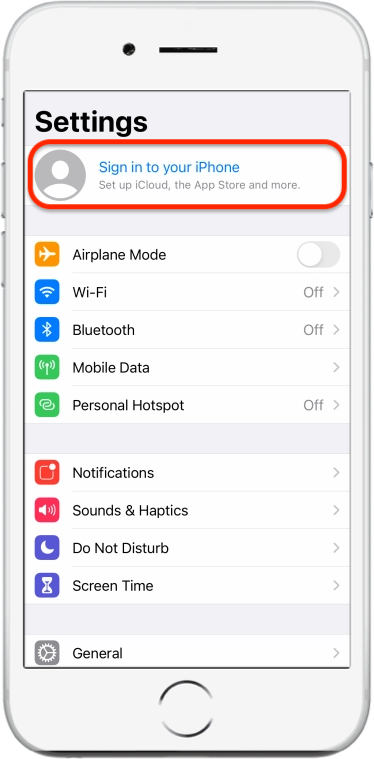
Step 20: Open Settings
Go to the child’s iPhone or iPad and open the Settings app.
Step 21: Tap on the user icon
In the Settings menu tap on the child’s name or the user icon at the top. This will open the Apple ID settings.
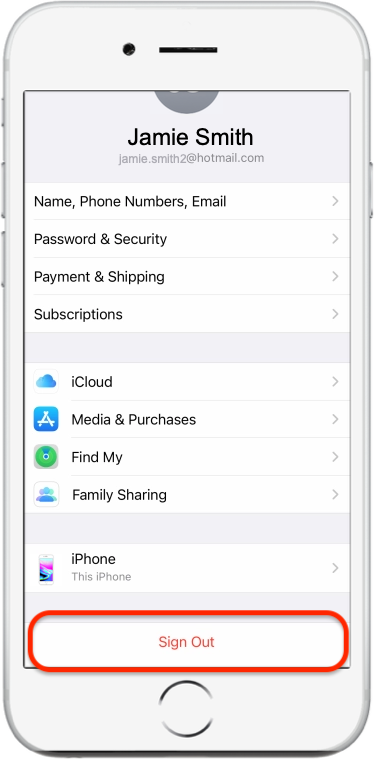
Step 22: Sign in with the Child’s Apple ID
Sign in with the new iCloud email address you’ve just created for your child.
- If the device is already signed in to a different Apple ID, scroll down and tap on “Sign Out”. Then sign in with the new iCloud email.
Step 23: Enter the verification code
To complete the sign-in process, type the verification code sent to your phone number.

After a short wait, Screen Time and the restrictions you set for your child’s account will automatically enable on their iPhone or iPad.
Remember that you can adjust these settings anytime by going back to Settings > Screen Time. For more information, you can also visit the official Apple Support article on setting up a child’s device with Family Sharing.