Notification profiles
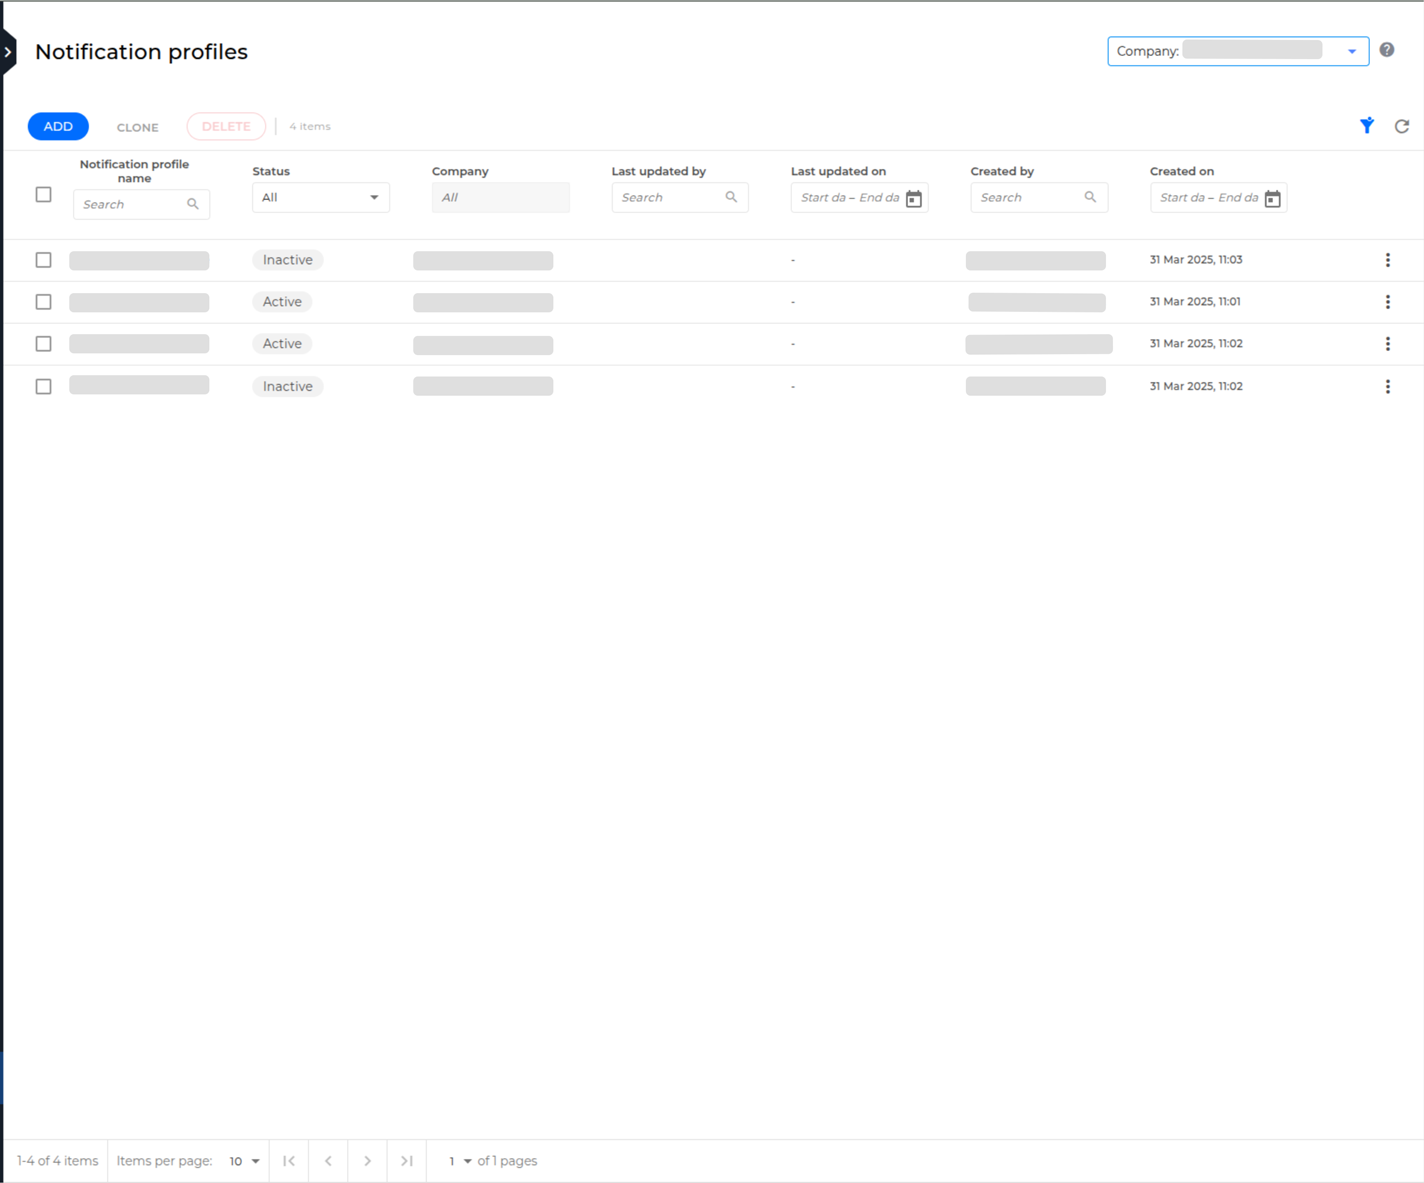
Notification profiles are sets of rules that determine how Bitdefender MDR notifies the specified recipients. The email notifications cover key MDR activities related to your company or the ones you manage.
You can create multiple notification profiles for the same company, each with customized settings for different recipient groups. If you manage multiple companies, you can create separate profiles for each.
If you are a Customer, the Notification profiles page in the MDR portal displays all the notification profiles for your company.
If you are a Partner, the page displays profiles based on the company selected in the top-right selector: either notification profiles for all your managed companies, or the profiles of a specific managed company.

The following sections guide you through adding, editing, cloning, deleting, and changing the status of a notification profile.
Important
To perform any action related to notification profiles, you must have the Admin or User role.
Adding a notification profile
To add a notification profile, follow these steps:
Optional: To allow the recipients of the profile you are adding to receive Breach warranty or Verification requests notifications:
Go to the Notification settings > Essential notifications setup page in the MDR portal.
Make sure the Recipients from notification profiles option is selected for the desired notification type.
Note
For detailed information on configuring Verification requests or Breach warranty updates delivery, refer to Essential notifications setup.
Go to the Notification settings > Notification profiles page from the left-side menu of the MDR portal.
Click Add.
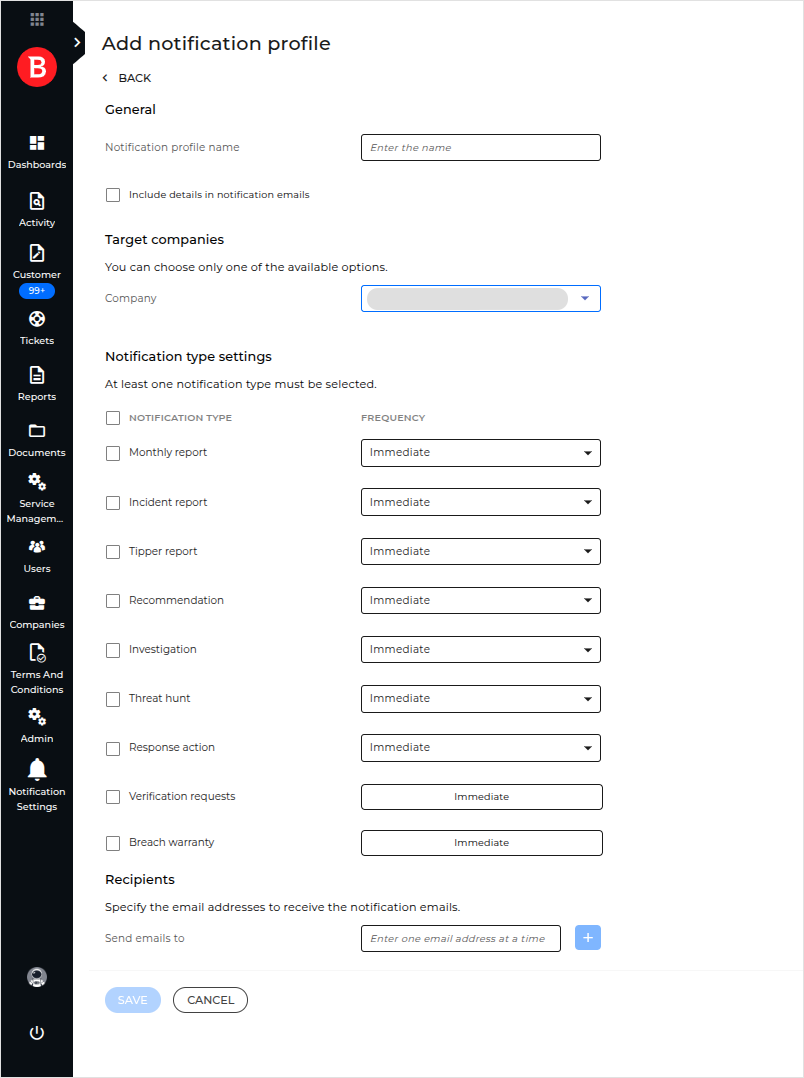
The Add notification profile page will be displayed.

Important
The Breach warranty notification type is visible only if you have an MDR Breach Warranty or MDR Breach Warranty Plus add-on license.
The Verification requests and Breach warranty notification types appear grayed out if Recipients from notification profiles was not selected on the Essential notifications setup page.
Enter a name for the notification profile.
Recommended: Select the Include details in notification emails checkbox.
Note
This option ensures that notification emails provide details such as the report type, investigation category, and severity level.
Select the types of notifications to be sent. At least one of the following notification types must be selected:
Monthly report, Incident report, or Tipper report
For more information on the MDR reports, refer to Reports.
Optional: Customize the delivery frequency for each notification type:
Immediate: Sends an email as soon as a new item is available.
Daily digest: Sends a daily email with all the new items from the previous day.
Weekly digest: Sends a weekly email with all new items from the previous week.
Important
The Verification requests and Breach warranty notifications can be configured only for immediate delivery.
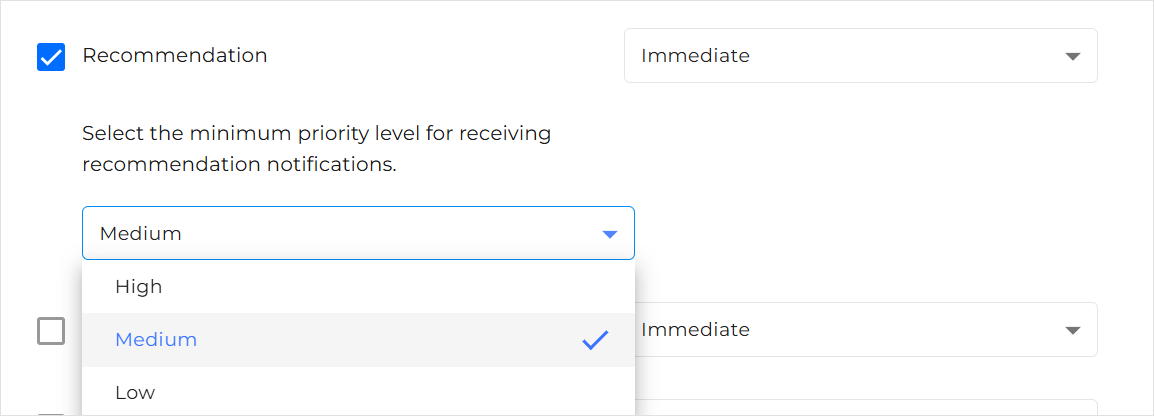
Optional: Customize the minimum priority level for receiving Recommendation notifications.

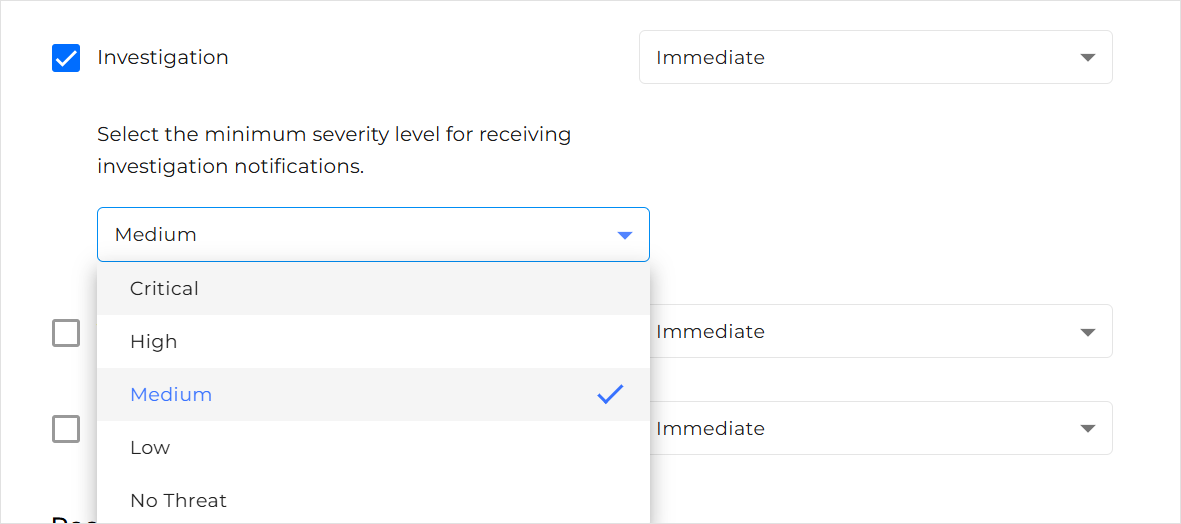
Optional: Customize the minimum severity level for receiving Investigation notifications.

Optional: If you manage multiple companies, you can customize which companies the recipients will be notified about.
Note
Currently, you can either keep the default option, All managed companies, or select only one of the other available options.

For each recipient, enter their email address and then click the Add button (
 ) to add it.
At least one email address is required to save the notification profile.
Click Add, then Confirm.
The notification profile will be active and displayed in the notification profiles grid.
Editing a notification profile
To edit a notification profile from the Notification profiles page:
Click the name of the notification profile you want to edit.
The Edit notification profile page with the most recent notification profile configuration will be displayed.
Update any options as needed.
Important
Make sure the notification profile name is provided, at least one notification type is selected, and at least one email address is provided in the Recipients section.
Click Save.
You will view the updated notification profile in the Notification profiles grid.
Cloning notification profiles
Cloning a notification profile is a convenient and effective way to create a new one that closely resembles the original.
To clone a notification profile from the Notification profiles page:
Click the three-dot menu (
 ) on the right side of the notification profile row.
Select Clone.
Click Clone to confirm.
You will view the cloned notification profile in the Notification profiles grid.
Alternatively, to clone one or more notification profiles, select their checkboxes, click the Clone button located in the top-left corner of the page, and then click Clone again to confirm.
Note
By default, all cloned notification profiles are set to Inactive.
Deleting notification profiles
To delete a notification profile from the Notification profiles page:
Click the three-dot menu (
 ) on the right side of the notification profile row.
Select Delete.
Click Delete to confirm.
Alternatively, to delete one or more notification profiles, select their checkboxes, click the Delete button located in the top-left corner of the page, and then click Delete again to confirm.
Activating and inactivating a notification profile
By default, all the new notification profiles have the status Active.
When a notification profile is active, its recipients receive notification emails. Otherwise, they do not receive any.
To inactivate a notification profile, follow these steps:
Click the three-dot menu (
 ) on the right side of the notification profile row.
Select Inactivate.
Click Change to finish the process.
To re-activate the notification profile, repeat the above-mentioned steps and select Activate from the drop-down menu.