Exclusions
In Antimalware > Exclusions section, you can configure various types of exclusions available supported by the Bitdefender security agent:
In-policy exclusions - These are exclusions defined specifically within the current policy. They are ideal for in-house applications or custom tools tailored to your organization’s needs.
Exclusions from configuration profiles - These exclusions are created in the Configuration profiles section and can be added to one or more policies. This allows for centralized management and reuse of exclusion lists across multiple policies.
Recommended vendor and product exclusions - These are default exclusions provided by Bitdefender for compatibility with common third-party software. When enabling this option, you can choose which exclusions to apply within the policy.
Antimalware exclusions are to be used in special circumstances, or following Microsoft or Bitdefender recommendations. For Microsoft recommendations, refer to the official documentation.
In-policy exclusions
In-policy antimalware exclusions apply to one or more of the following scanning methods:
On-access scanning
On-execute scanning
On-demand scanning
Advanced Threat Control (ATC/IDS)
Ransomware Mitigation
Important
If you have an EICAR test file that you use periodically to test antimalware protection, you should exclude it from on-access scanning.
If using VMware Horizon View 7 and App Volumes AppStacks, refer to this VMware document.
Click the toggle to enable the In-policy exclusions section.
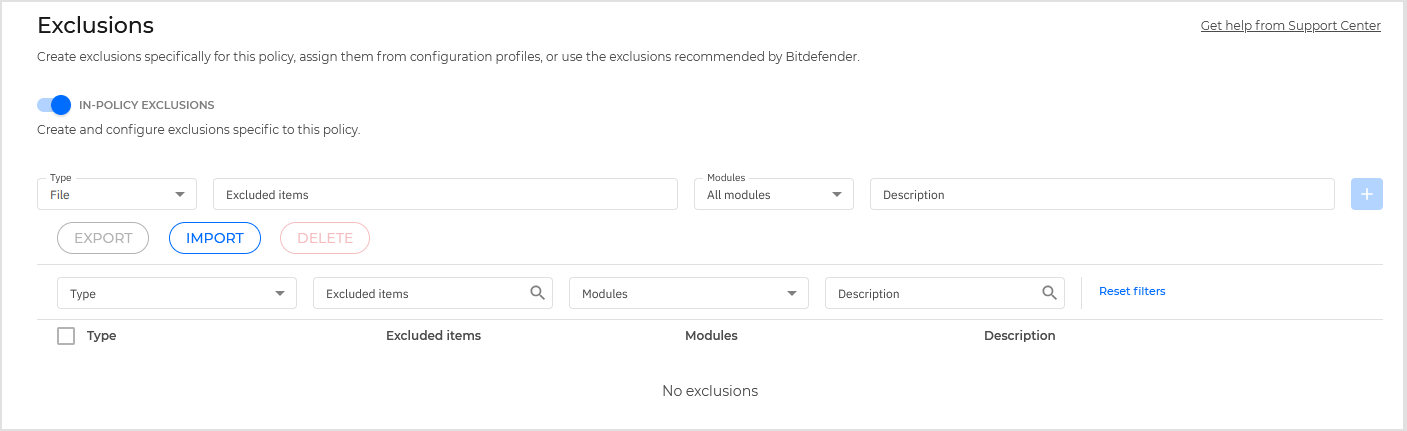
To add an exclusion rule:
Select the exclusion type from the menu:
File: only the specified file.
Folder: all files and processes inside the specified folder and from all of its subfolders.
Extension: all items having the specified extension.
Process: any object accessed by the excluded process.
File hash: the file with the specified hash. GravityZone supports the SHA-256 hash algorithm.
Note
Adding File Hash type exclusions could result in high CPU usage due to the checksum calculations performed.
Certificate hash: all the applications and PowerShell scripts (for Windows endpoints) under the specified certificate hash (thumbprint).
Threat Name: any item having the detection name (not available for Linux operating systems).
Command Line: the specified command line (available only for Windows operating systems).
Warning
In agentless VMware environments integrated with NSX, you can exclude only folders and extensions.
Provide the details specific to the selected exclusion type:
File, Folder or Process
Enter the path to the item to be excluded from scanning. You have several helpful options to write the path:
Declare the path explicitly:
For example:
C:\tempTo add exclusions for UNC paths, use any of the following syntaxes:
\\hostName\shareName\filePath\\IPaddress\shareName\filePathNote
To accommodate Linux requirements, GravityZone supports up to 4096 characters when defining paths. To apply this limit on Windows, make sure MAX_PATH is set to support this value on the target machines. Learn more in Microsoft documentation.
Use the system variables available in the drop-down menu:
For process exclusions, you must also add the name of the application's executable file.
For example:
%ProgramFiles%- excludes theProgram Filesfolder.%WINDIR%\system32– excludes thesystem32folder within theWindowsfolder.%SystemDrive%- excludes the drive where theWindowsfolder was placed, usually driveC:Note
It is advisable to use system variables (where appropriate) to make sure the path is valid on all target computers.
Use wildcards:
The asterisk (*) substitutes for zero or more characters excepting path delimiters. Double asterisk (**) substitutes for zero or more characters including path delimiters. The question mark (?) substitutes for exactly one character. You can use several question marks to define any combination of a specific number of characters. For example, ??? substitutes for any combination of exactly three characters.
For example:
C:\Test\*.*– excludes all files in the Test folder.C:\Test\*.png– excludes all PNG files in the Test folder.C:\Test\*- excludes all files in the Test folder.**\file.txt- excludes all the files that have the namefile.txt, regardless where these files are located.**\my_folder\*\file.txt- excludes all the folders on all levels abovemy_folderand all subfolders on a single level undermy_folderthat containfile.txt.**\application*.exe- excludes all the files that have the nameapplicationand variations of this name followed by one or more characters, regardless where the files are located.C:\MyApp\**- excludes all files and folders inMyAppfolder, regardless of the depth level.C:\Program Files\WindowsApps\Microsoft.Not??.exe– excludes the Microsoft Notes processes.
Note
The double asterisk (**) can lead to undesired exclusions when misused, therefore we recommend caution.
The double asterisk (**) is not available on macOS. On this operating system you can only use the asterisk (*) and the question mark (?) as wildcards.
Extension
Enter one or more file extensions to be excluded from scanning, separating them with a semicolon ";". You can enter extensions with or without the preceding dot. For example, enter txt to exclude text files.
Note
On Linux-based systems, file extensions are case sensitive and the files with the same name but with different extension are considered distinct objects. For example,
file.txtis different fromfile.TXT.File hash, Certificate hash, Threat name, or Command line
Enter the file hash, certificate thumbprint (hash), the exact name of the threat or the command line depending on the exclusion rule. You can use one item per exclusion.
Select the scanning methods to which the rule applies. Some exclusions may be relevant for just one of the scanning modules (On-access scanning, On-demand scanning, ATC/IDS, Ransomware Mitigation), while others may be recommended for all of the modules.
Optionally, add a description.
Click the
 Add button.
The new rule will be added to the policy.
To edit an exclusion:
Click the
 More icon in the table.
In the menu, click Edit.
Make the necessary changes.
Click the
 OK button to save the changes.
Alternately, click the
 Cancel button to discard the changes.
To remove a single exclusion from the list:
Click the
More icon in the table.In the menu, click Delete.
The exclusion is removed from the table.
To remove multiple exclusions from the list:
Select the checkboxes corresponding to the exclusions you want to delete.
Click the Delete button at the upper side of the table.
The exclusions are removed from the table.
Important
On-demand scanning exclusions do NOT apply to contextual scanning. Contextual scanning is initiated by right-clicking a file or folder and selecting Scan with Bitdefender Endpoint Security Tools.
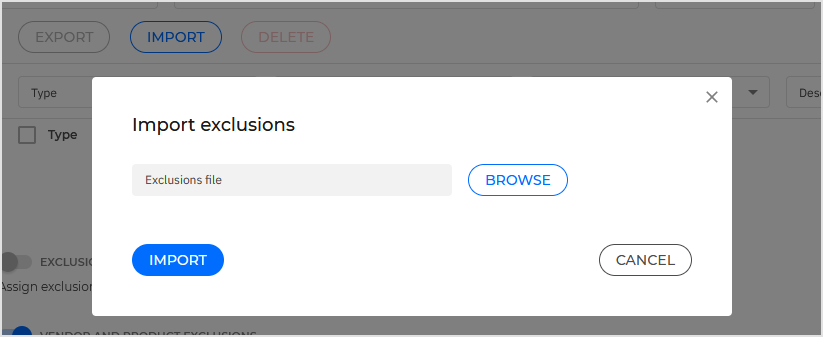
Importing exclusions
You can reuse the exclusion rules in more policies by importing them.
To import custom exclusions:
Click Import at the top of the table. The Import exclusions window opens.
Click Browse and select the CSV file.
Click Import.
The table is populated with the valid rules.
Note
If the CSV file contains invalid rules, a warning informs you of the corresponding row numbers.
Each row in the CSV file corresponds to a single rule, having the fields in the following order:
<exclusion type>, <object to be excluded>, <modules>
These are the available values for the CSV fields:
Exclusion type:
1, for file exclusions2, for folder exclusions3, for extension exclusions4, for process exclusions5, for file hash exclusions6, for certificate hash exclusions7, for threat name exclusions8, for command line exclusionsObject to be excluded:
A path or a file extension
Modules:
1, for on-demand scanning2, for on-access scanning3, for all modules4, for ATC/IDS6, for Ransomware Mitigation
For example, a CSV file containing antimalware exclusions may look like this:
1,"d:\\temp",1
2,%WinDir%,3
4,"%WINDIR%\\system32",4
Note
The Windows paths must have the backslash (\) character doubled. For example, %WinDir%\\System32\\LogFiles.
Exporting exclusions
To export exclusions:
Click Export at the top of the table.
Note
The Export button is available only for saved policies. To ensure you export the most recent rules, save the policy after making changes.
In the confirmation window, click Export.
The exclusions will be saved locally in your default download folder as a CSV file.
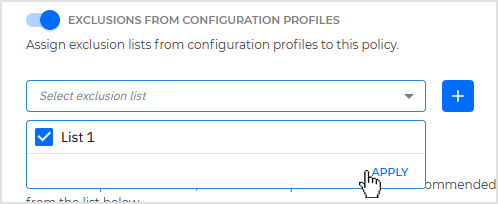
Exclusions from configuration profiles
To add exclusions from configuration profiles:
Click the toggle to enable the Exclusions from configuration profiles section.
Select at least one exclusion list and click Apply.
Click the
Add button.
Note
For more details on how to create and manage exclusion lists, refer to Configuration profiles .
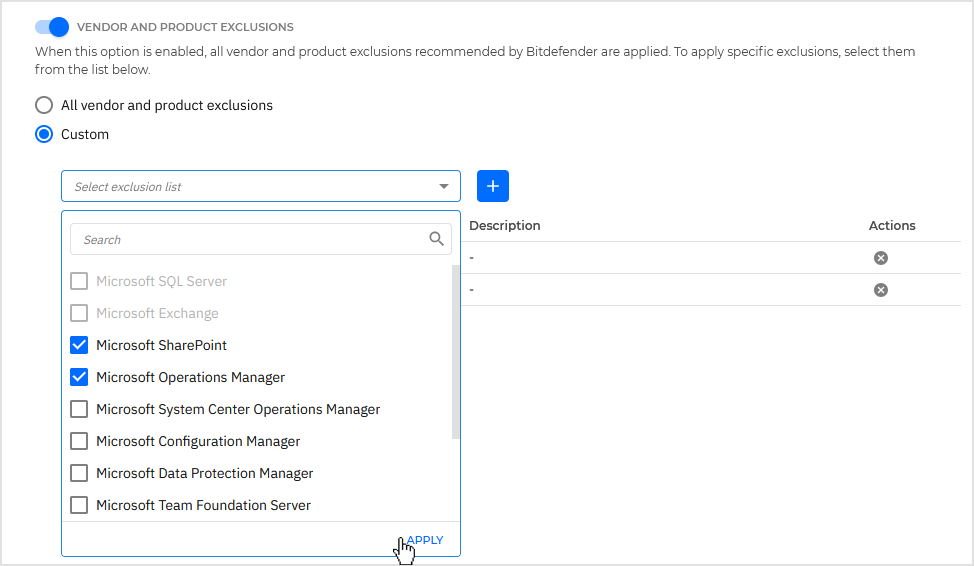
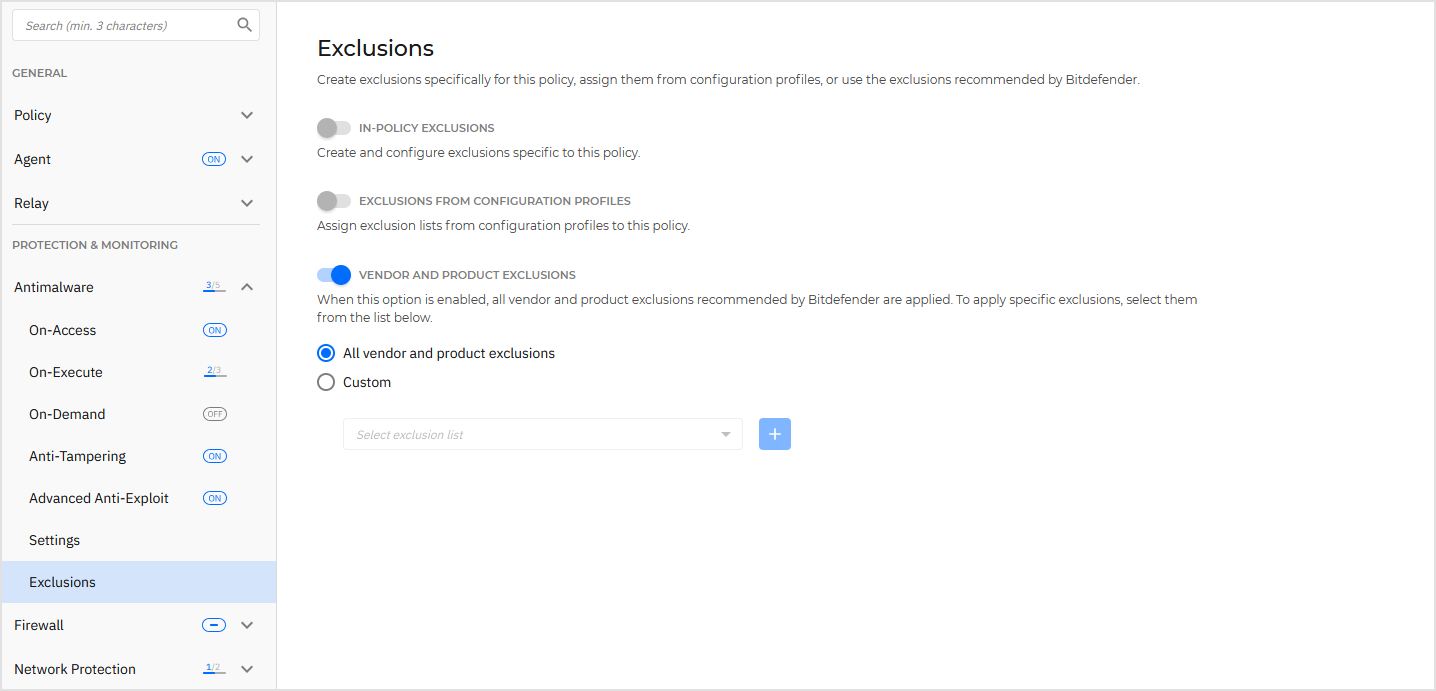
Vendor and product exclusions
Vendor and product exclusions refer to all recommended exclusions included in Bitdefender security agent. This option is enabled by default.
Caution
You can choose to disable vendor and product exclusions, if you want to scan all types of objects, but this option will considerably impact the machine performance and will increase the scan time.
To customize the list of vendor and product exclusions:
Click the Custom button.
Select at least one vendor or product in the drop-down list and click Apply.
Click the
Add button.Only the selected exclusions will apply to the policy.