Elastic SIEM
Integrate GravityZone Cloud with Elastic SIEM
As a Bitdefender partner, you can integrate GravityZone with Elastic using GravityZone APIs and an Elastic Agent. With this service, you are able to send data from GravityZone Control Center to Elastic.
Requirements
A Basic Elastic Stack license or better
Elastic Integration version 2.1.1 or higher
Kibana 8.14.3 or higher
A configured Elastic Agent to act as a collector
A configured Fleet Server, which is an agent management platform used to configure and manage the Fleet Server integration.
Integration steps
Enable Event Push API in GravityZone Control Center
Log in to GravityZone Control Center.
Go to My Account.
Under API keys section, click Add.
Select the Event Push Service API check box and click Save. The new key appears in the API keys table.

Click Save to apply the changes.
Configure the integration in Kibana
Log in to Kibana with an administrator account.
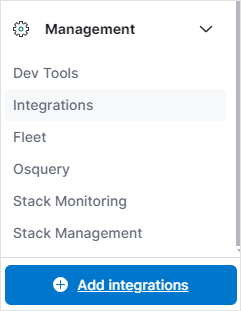
In the main menu, click Management and select Add Integrations.

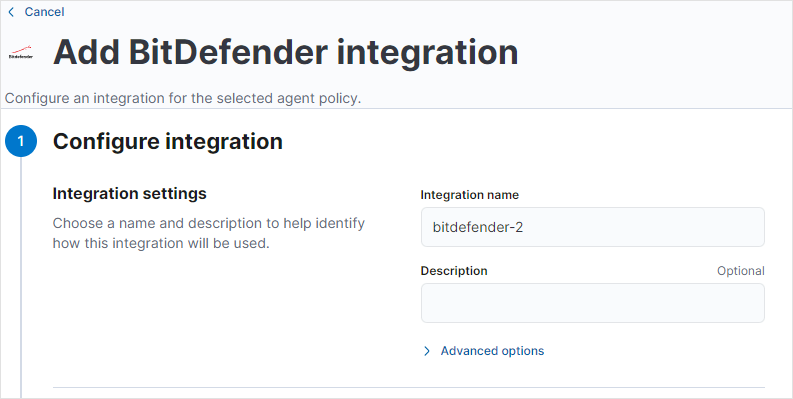
The Add BitDefender integration window is displayed.
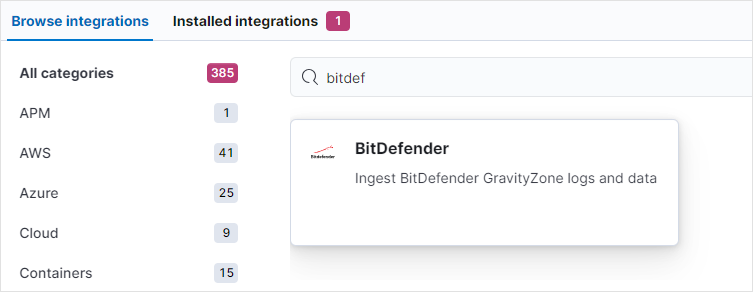
Under the Browse integrations tab, use the search function to locate the Bitdefender integration and select it.

Click the Add BitDefender button.

The Configure integration window is displayed.
Fill in the information in the Integration settings section:
Integration name: The name for the new integration
Description: A brief description for easy identification of the integration

Scroll down to the Receive Push Notifications Events option, enable it, and then fill in the information:
Under BitDefender GravityZone Push Notification ID, leave the default value.
Note
If you have multiple GravityZone companies you want to integrate, check the Elastic documentation to determine what input is required.
Under Company ID to company name mapping, add the pair
ID:namefor each monitored company.Make sure the BitDefender GravityZone push notification option is enabled.
Set the Listen Address to
0.0.0.0.Under Listen Port, type
8443.Generate a random password and add it under Authorization Value.
Tip
This key will be used later to register the agent in GravityZone.
Generate or purchase a security certificate and store it on the endpoit where the Elastic Agent which will receive the data is installed.
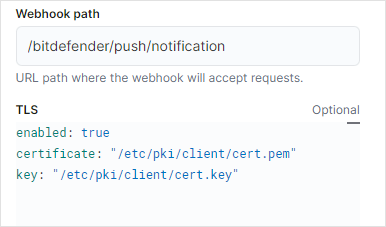
Set the TLS settings for the agent HTTP listener as shown below. Keep the default webhook path (
/bitdefender/push/notification).
Scroll down to the Poll Push Notification Information option, make sure it is enabled, and configure the following settings:
Under BitDefender GravityZone Push Notification ID, leave the default value.
Note
If you have multiple GravityZone companies you want to integrate, check the Elastic documentation to determine what input is required.
Add the Event Push Service API URL under URL of BitDefender GravityZone API push endpoint using this format
https://<cloud_control_API_URL>/api/v1.0/jsonrpc/push
Parameter
Description
cloud_control_API_URL
//add description
Enter the key created in the Enable Event Push API in GravityZone Control Center section, under GravityZone API Key.
Scroll down to the Push Notification Configuration option and enable it.
Optionally, you can click the Advanced options button to change the pooling time for statistics.
Scroll down to the Push Notification Statistics option and enable it.
Optionally, you can click the Advanced options button to change the status of the integration in GravityZone.
Scroll down to the Where to add this integration? section, go to the Existing hosts tab, and configure the settings under the Agent policy section:
Under the Agent policy, select the Elastic policy used by the endpoint that will receive data from GravityZone.
Scroll down to the bottom of the page and click Save.
Enable the Elastic integration in GravityZone
After you created the Event Push Service key in GravityZone Control Center, you need to enable the integration. That means you have to start sending events from GravityZone to Elastic.
Use the setPushEventSettings method to starting sending data:
{
  "params": {
    "status": 1,
    "serviceType": "jsonRPC",
    "serviceSettings": {
      "url": "https://<agent_ip>:<agent_port>/<webhook_path>",
      "requireValidSslCertificate": false,
      "authorization": "<secret>"
    },
    "subscribeToEventTypes": {
      "hwid-change": true,
      "modules": true,
      "sva": true,
      "registration": true,
      "supa-update-status": true,
      "av": true,
      "aph": true,
      "fw": true,
      "avc": true,
      "uc": true,
      "dp": true,
      "device-control": true,
      "sva-load": true,
      "task-status": true,
      "exchange-malware": true,
      "network-sandboxing": true,
      "malware-outbreak": true,
      "adcloud": true,
      "exchange-user-credentials": true,
      "exchange-organization-info": true,
      "hd": true,
      "antiexploit": true
    }
  },
  "jsonrpc": "2.0",
  "method": "setPushEventSettings",
  "id": "1"
}
Variable | Description |
|---|---|
| The FQDN or public IP of the agent that will receive data from GravityZone. |
| The port entered in step 6, under Listen Port, in the Configure the integration in Kibana procedure. |
| The port entered in step 7 in the Configure the integration in Kibana procedure. |
| The port entered in step 6, under Authorization Value, in the Configure the integration in Kibana procedure. |