Install the Microsoft Outlook Add-in for Email Security
You can use Microsoft Outlook Add-in for Email Security to report messages as spam or phishing attacks directly from your inbox. Once reported, the message will be sent to Bitdefender and analyzed.
Note
Version 1 of the add-in is not currently compatible with Outlook Professional Plus or iPadOS. For further information on mimimum requirements please see this Microsoft KB article.
Requirements
The add-in is only accessible from a primary mailbox. You cannot use the add-in on a shared mailbox.
Compatible outlook versions:
Outlook 2013 or later for Windows
Outlook 2016 or later for Mac
Outlook on the web for Exchange 2013 on-premises and later versions
Outlook on iOS
Outlook on Android
Outlook on the web in Office 365 and outlook.com
Installing the plugin
Copy the this add-in manifest URL :
Go to the Office 365 admin center Add-in page and sign in.
Click Deploy Add-in.
Click Next.
Select Upload custom apps.
Select the I have a URL for the manifest file option and paste in this URL:
https://download.bitdefender.com/business/EmailSecurity/OutlookAdd-in/emsaddinmanifest.xml
Select Upload.

Select the users you want to assign the add-in:
Everyone - all users in your company will have access to the add-in.
Specific users / groups - only the selected users will have access to the add-in.
Just me - only you will access to the add-in.
Select the deployment method:
Fixed - the add-in will deploy automatically to all assigned users. Only you will be able to remove the add-in.
Available - users will have access to the add-in but will need to deploy it manually. All users will be able to remove the add-in.
Optional - the add-in will deploy automatically to all assigned users. All users will be able to remove the add-in.
Click Deploy.

If successful, the following message will appear:

The add-in should now appear in the list:

In Outlook, go to File > Manage Add-ins.
Go to My add-ins.
Under Custom Add-ins click Add a custom add-in and select Add from URL....
Enter this URL:
https://download.bitdefender.com/business/EmailSecurity/OutlookAdd-in/emsaddinmanifest.xml
Click OK.
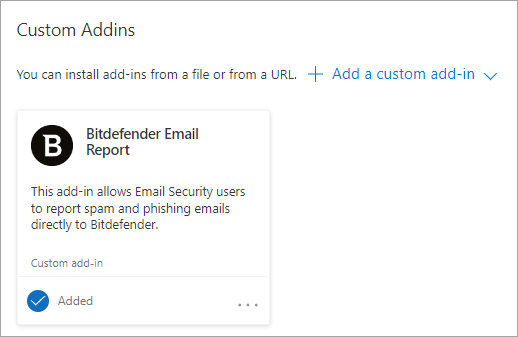
If successful, the Add-in will appear under My add-ins > Custom Addins
Using the add-in to report an email
Once installed, the a button will appear in your Outlook interface:
For web version

For desktop app

To report an email follow the steps below:
Select the email you wish to report.
Click the Bitdefender add-in button.
Select either Report spam or Report phishing.
Version 2.0
Version 2.0 of the add-in allows end-users to access familiar Email Security features from inside Outlook, Outlook Web App (OWA) and on mobile devices.
With this version, you can review their personal quarantine area, manage your safe/deny lists and access their SecureMail Inbox, all directly from Outlook.
Note
This version of the add-in is not currently compatible with Outlook Professional Plus or iPadOS
Installing the plugin
Log in to the Office 365 admin center. If prompted, select the new admin center.
In the menu on the left side of the screen, click Settings, and select Integrated apps.
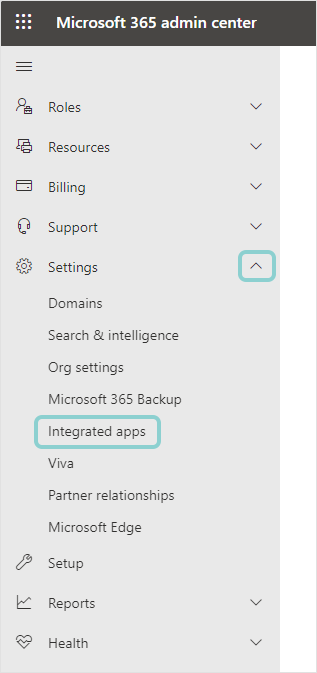
This will redirect you to the Integrated apps page.
Click the Upload custom apps button on the lower side of the page.
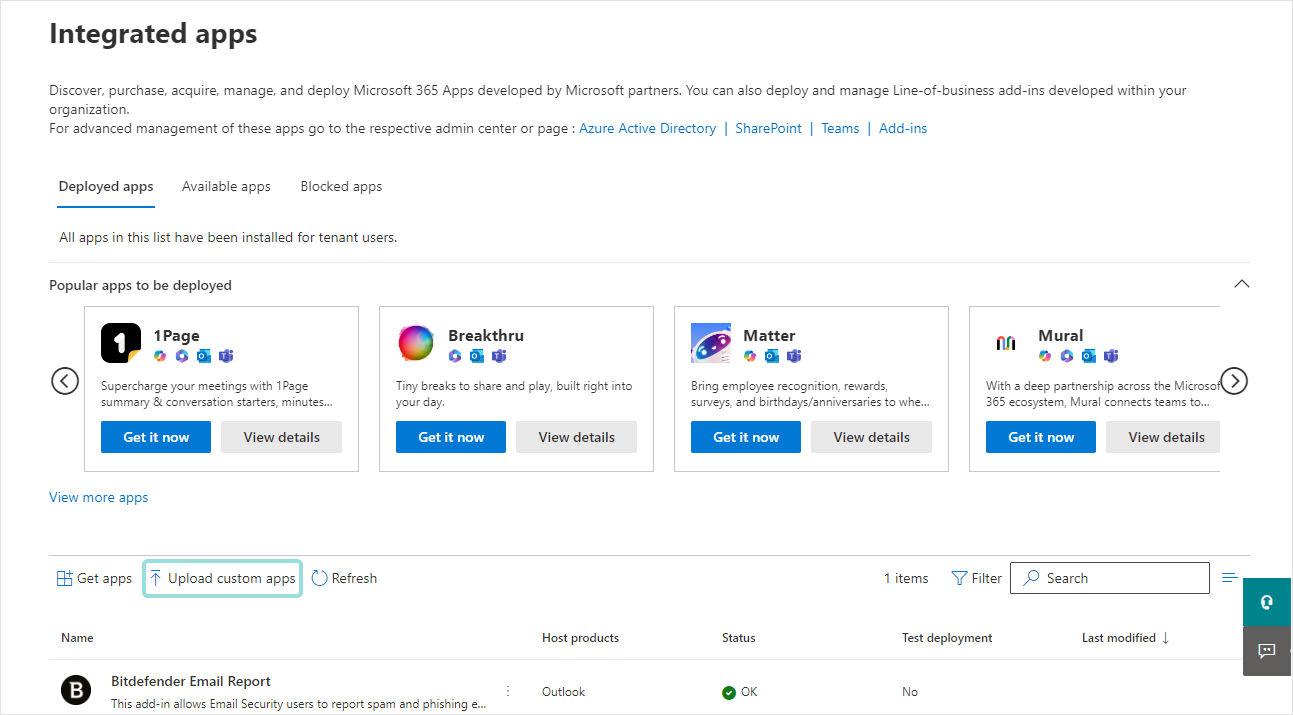
The Deploy New App window is displayed.
Upload the app:
Under Upload custom app, cofigure the following settings:
Under App type, select Office Add-in.
Under Choose how to upload app, select the Provide link to manifest file option.
Paste one of these URLs in the filed below and click Validate.
If your GravityZone is provisioned with
https://cloudgz.gravityzone.bitdefender.com/, use this URL:https://ems-addin.bitdefender.com/prod/Manifest_EU.xml
If your GravityZone is provisioned with
https://cloud.gravityzone.bitdefender.com/orhttps://cloudap.gravityzone.bitdefender.com/, use this URL:https://ems-addin.bitdefender.com/prod/Manifest_US.xml
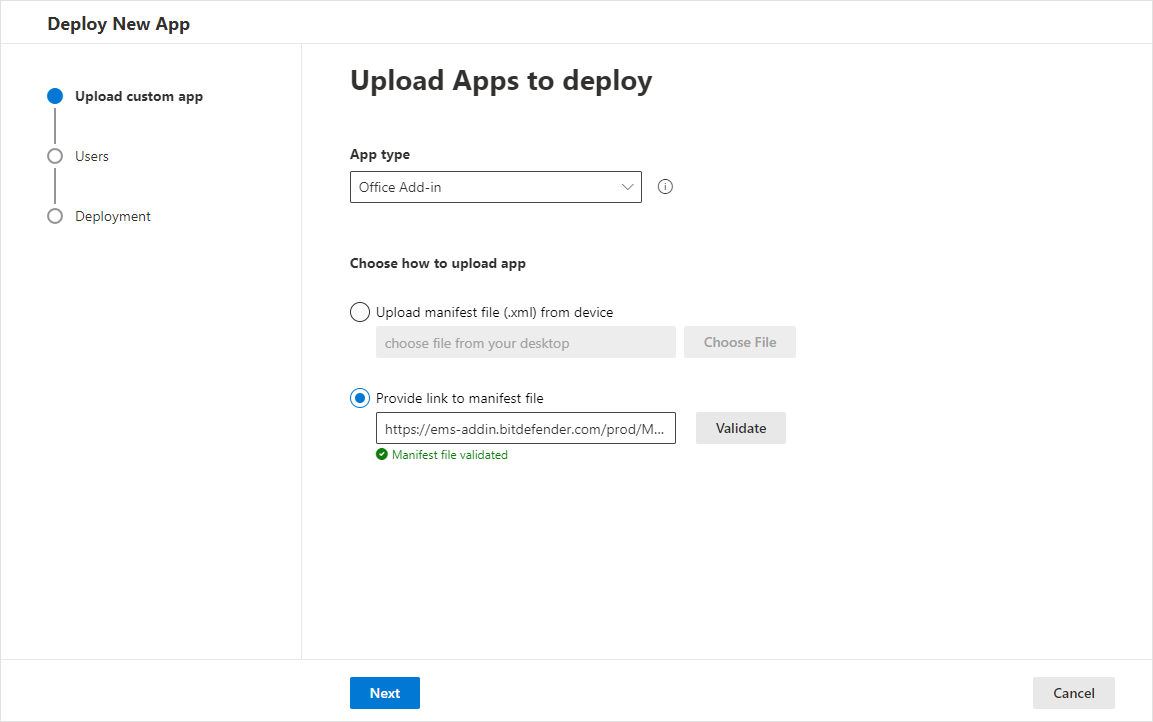
Click Next.
Under Users, configure the following settings:
Under Is this a test deployment?, set the toggle to
Yesif you'd like to deploy the add-in to a specific group of users. The Microsoft Admin Center also provides the option to filter apps based on whether they were deployed as a test.Under Assign users, select the users for whom you want to make the add-in available.
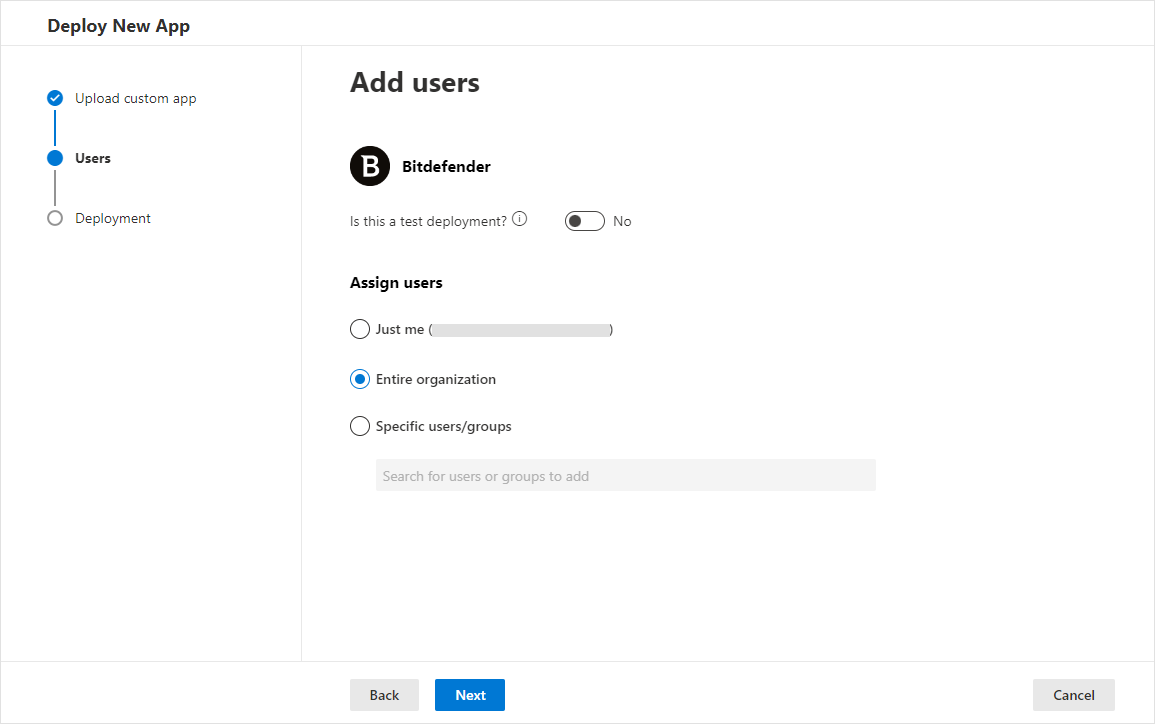
Click Next.
Under Permissions, read the app permissions and capabilities, click Accept permissions, and confirm grating permissions.
Click Next.
Under Finish, review the configured deployment settings, and click Finish deployment.
A window will appear showing the progress of the deployment. Once finished, click Done.
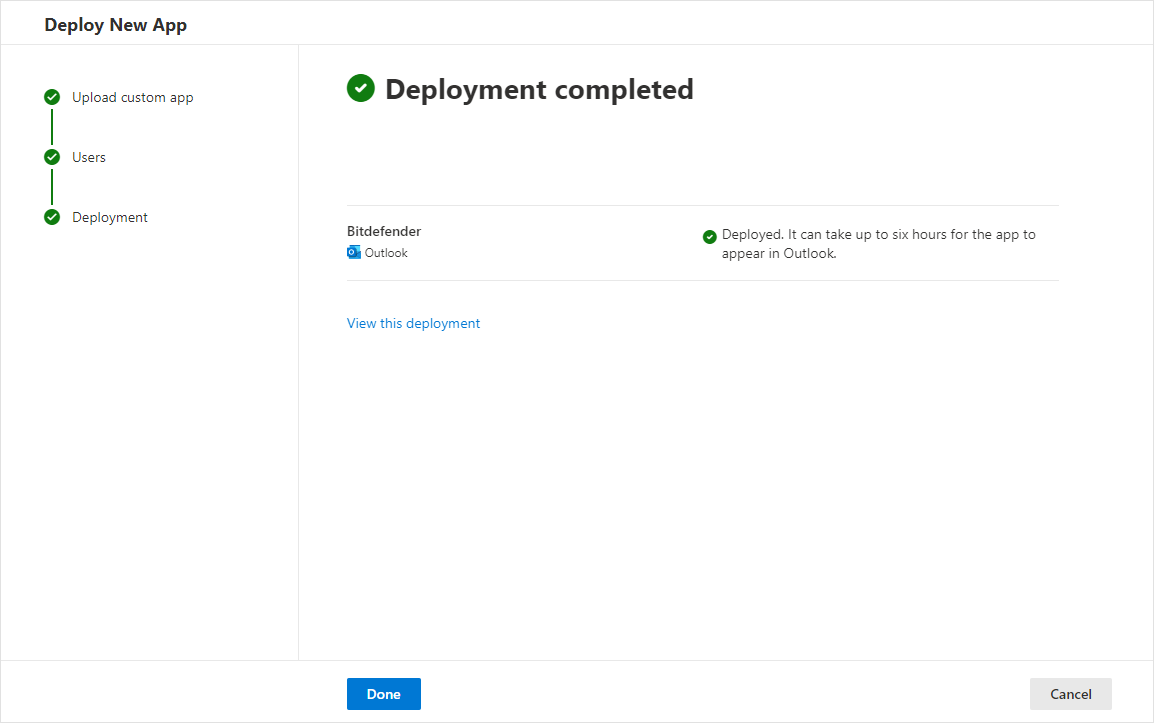
Note
It can take up to 24 hours for the app to appear in Outlook.
If after this time you are still not seeing the latest add-in version in desktop versions of Outlook, you may need to clear the Outlook cache.
Enabling the Add-in
To enable the add-in and make buttons and interactions visible in Outlook, follow the steps below:
Important
The add-in is only accessible from a primary mailbox. You cannot use the add-in on a shared mailbox.
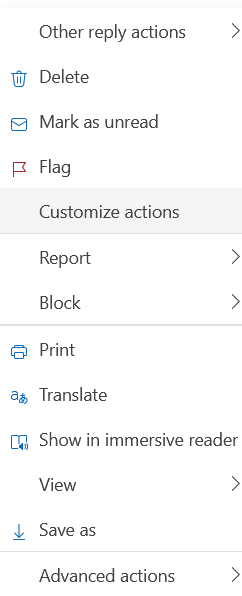
Select any message in either the online (web) version of Outlook, or the Outlook app, and click the More actions menu button on the right side of the email window.
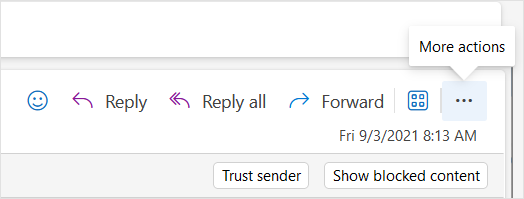
Click Customize actions.
The Customize readin page action window is displayed.
Under the Apps column, enable the Bitdefender checkbox, and click Save.
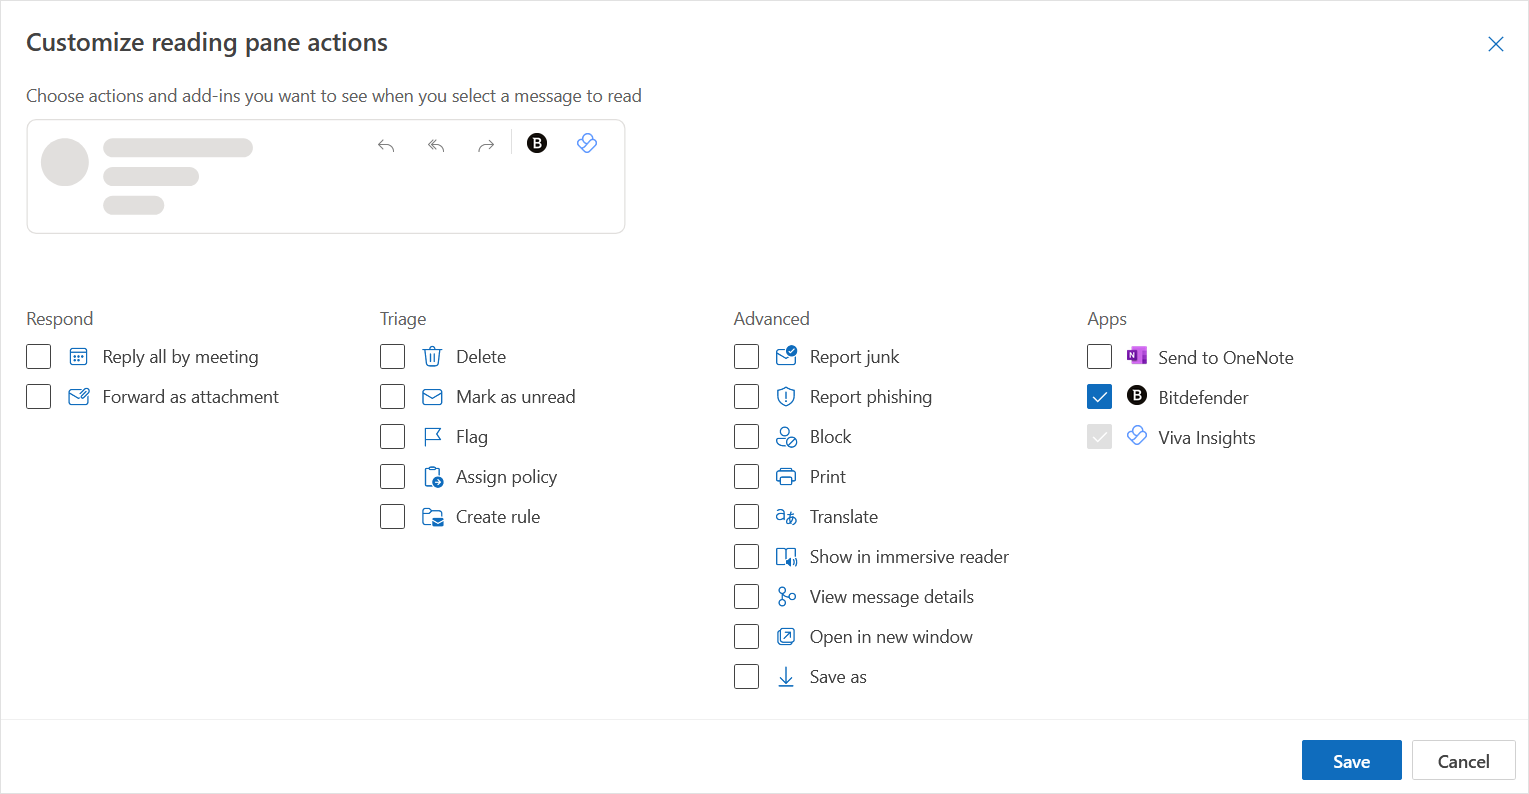
The button to access the add-in is now visible in the upper right side of the window, when viewing an email message:

Using the add-in
To access the add-in options, follow the steps below:
Click to view any email in either the Outlook app or the online (browser version).
Click the Bitdefender icon in the menu from the upper right side of the email window.
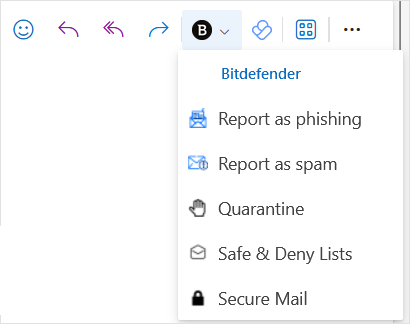
Select one of the available options:
Report as phishing - Sends a message to Bitdefender, reporting this email as a phishing attempt.
Report as spam - Sends a message to Bitdefender, reporting this email as a spam message.
Quarantine - Access your personal quarantine.
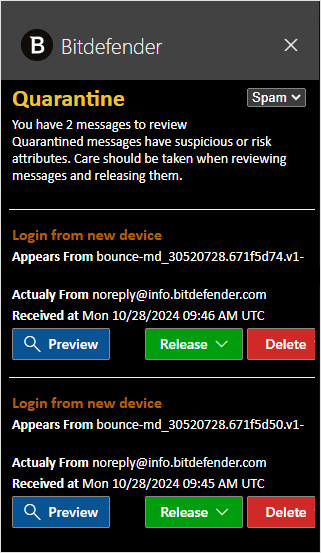
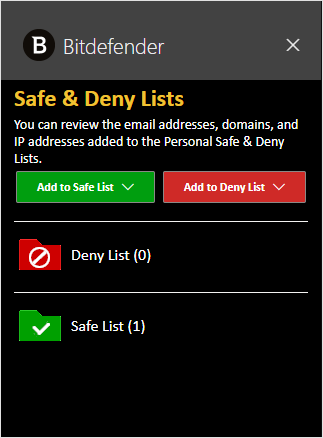
Safe & Deny Lists - Access your safe list and deny list in Email Securty. You can add or remove items to both lists.
Secure Mail - Access the Secure Mail dashboard.
