Configuring the integration
To configure the integration, you need to generate API keys for authentication. These authentication parameters are unique to ConnectWise members, granting them access to company resources. You can reuse the API key generated to enable the integration, but we strongly recommend that you create a new one.
You also need your GravityZone access URL and API key. These credentials will be used to link the ConnectWise PSA tenant to your GravityZone company.
For the initial setup, you must follow these steps:
Generating the ConnectWise PSA API keys
To generate API keys, follow these steps:
Log in to ConnectWise PSA.
Go to System > Security Roles.
Click New Item to create a Security Role and type a name in the Role ID field.

Click Save.
Edit the Security Role to add the following permissions:
Companies > Company Maintenance: Inquire Level set to All.
Finance > Agreements: Add Level, Edit Level and Inquire Level set to All.
Notice
This feature is unavailable for Basic Plan accounts.
Procurement > Products: Inquire Level set to All.
Procurement > Product Catalog: Inquire Level set to All.
Project > Project Ticket Tasks: Inquire Level set to All.
Project > Project Tickets: Inquire Level set to All.
Service Desk > Service Tickets: Add Level and Inquire Level set to All, Edit Level set to My or All.
System > Table Setup (customize): Inquire Level set to All.
Notice
Product Catalog is displayed as Product Entry in all versions prior to 2017.5.
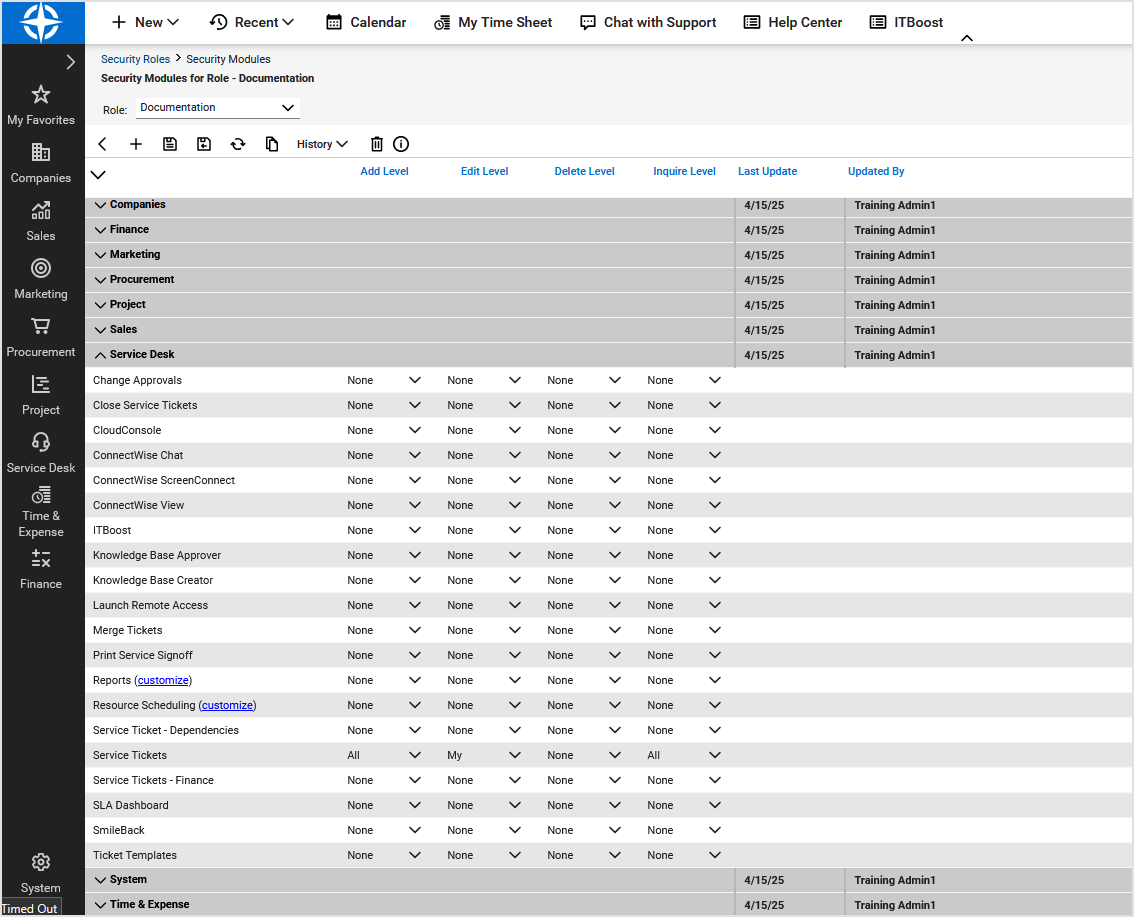
Create an API Member as follows:
Go to System > Members.
Go to the API Members tab.
Click New Item to add a new entry.
Fill in the mandatory fields and assign the previously created Security Role.
Click Save to apply changes.

Go to the API Keys tab.
Click New Item to add a new entry.
Write down the name in the Description field.
Click Save to generate public and private API keys.

Important
The private key is only available the first time you create it. Please save it for later use when configuring the integration.
Generating the GravityZone API key
To obtain the GravityZone URL and API key, follow these steps:
Log in to GravityZone Control Center using a partner account.
Go to Welcome, (User) > My Account in the upper-right corner of the screen.
Under Control Center API, copy the Access URL and paste it somewhere at hand.
Back in GravityZone, under API Keys, select Add.
Enter a name for the new GravityZone API key and select the following categories:
Companies
Licensing
Network
Event Push Service API
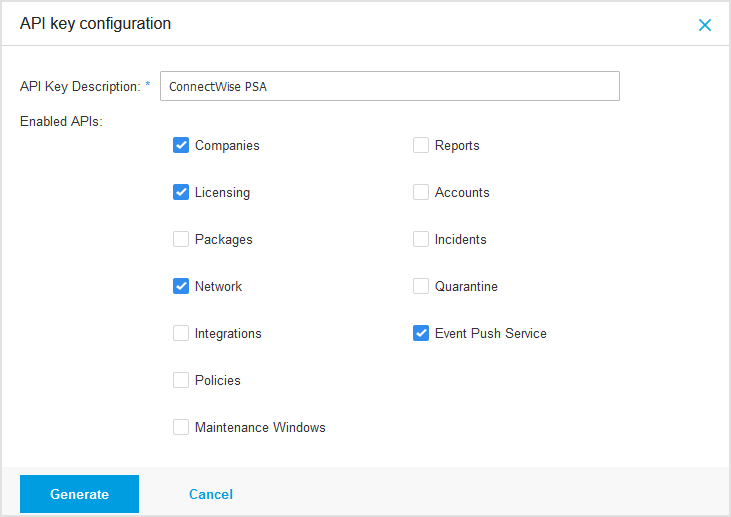
Click Generate.
On the new page, copy your API key and save it for later use when configuring the integration. After you close the window, the key will no longer be visible.
ConnectWise PSA App registration
To register in ConnectWise PSA App, follow these steps:
Log in to GravityZone Control Center using your partner credentials.
Point to your username in the upper-right corner of the console and choose Integrations. The Integrations page will show up.
Click the LAUNCH link corresponding to the ConnectWise integration.

You can alternatively access ConnectWise PSA App at https://cwpsa.psa.bitdefender.com.
Notice
As a Partner with the GravityZone Identity Provider (IdP) service enabled, you will automatically log in into ConnectWise PSA App.
As a partner that already configured single sign-on with a 3rd party identity provider in GravityZone, you need to log in via your ConnectWise PSA credentials, or via your 3rd party identity provider. The 3rd party IdP must be configured in ConnectWise PSA App. For details, refer to Configuring ConnectWise PSA single sign-on with an identity provider.
Enter the credentials obtained in the previous stage:
ConnectWise PSA URL
ConnectWise PSA PSA company ID
Public key
Private key
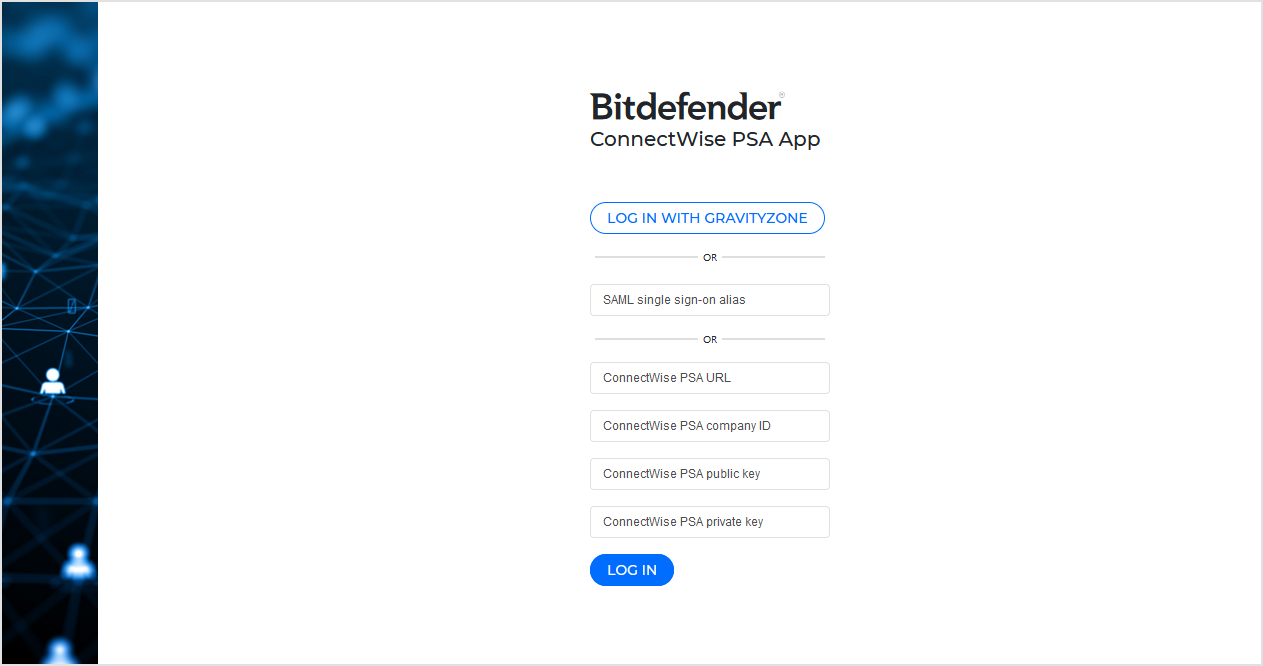
Click Login.
Note
After configuring single sign-on later on, you can log in to ConnectWise PSA App using an alias.
Initial configuration
After the initial login, you will be redirected to the Configuration wizard, where you can configure the integration for first time use. While the ConnectWise PSA configuration wizard is not finalized, all other menu options are disabled.
Integration
For the initial integration registration (or if the integration was reset), you need to add the necessary details to synchronize the ConnectWise PSA and GravityZone platforms.
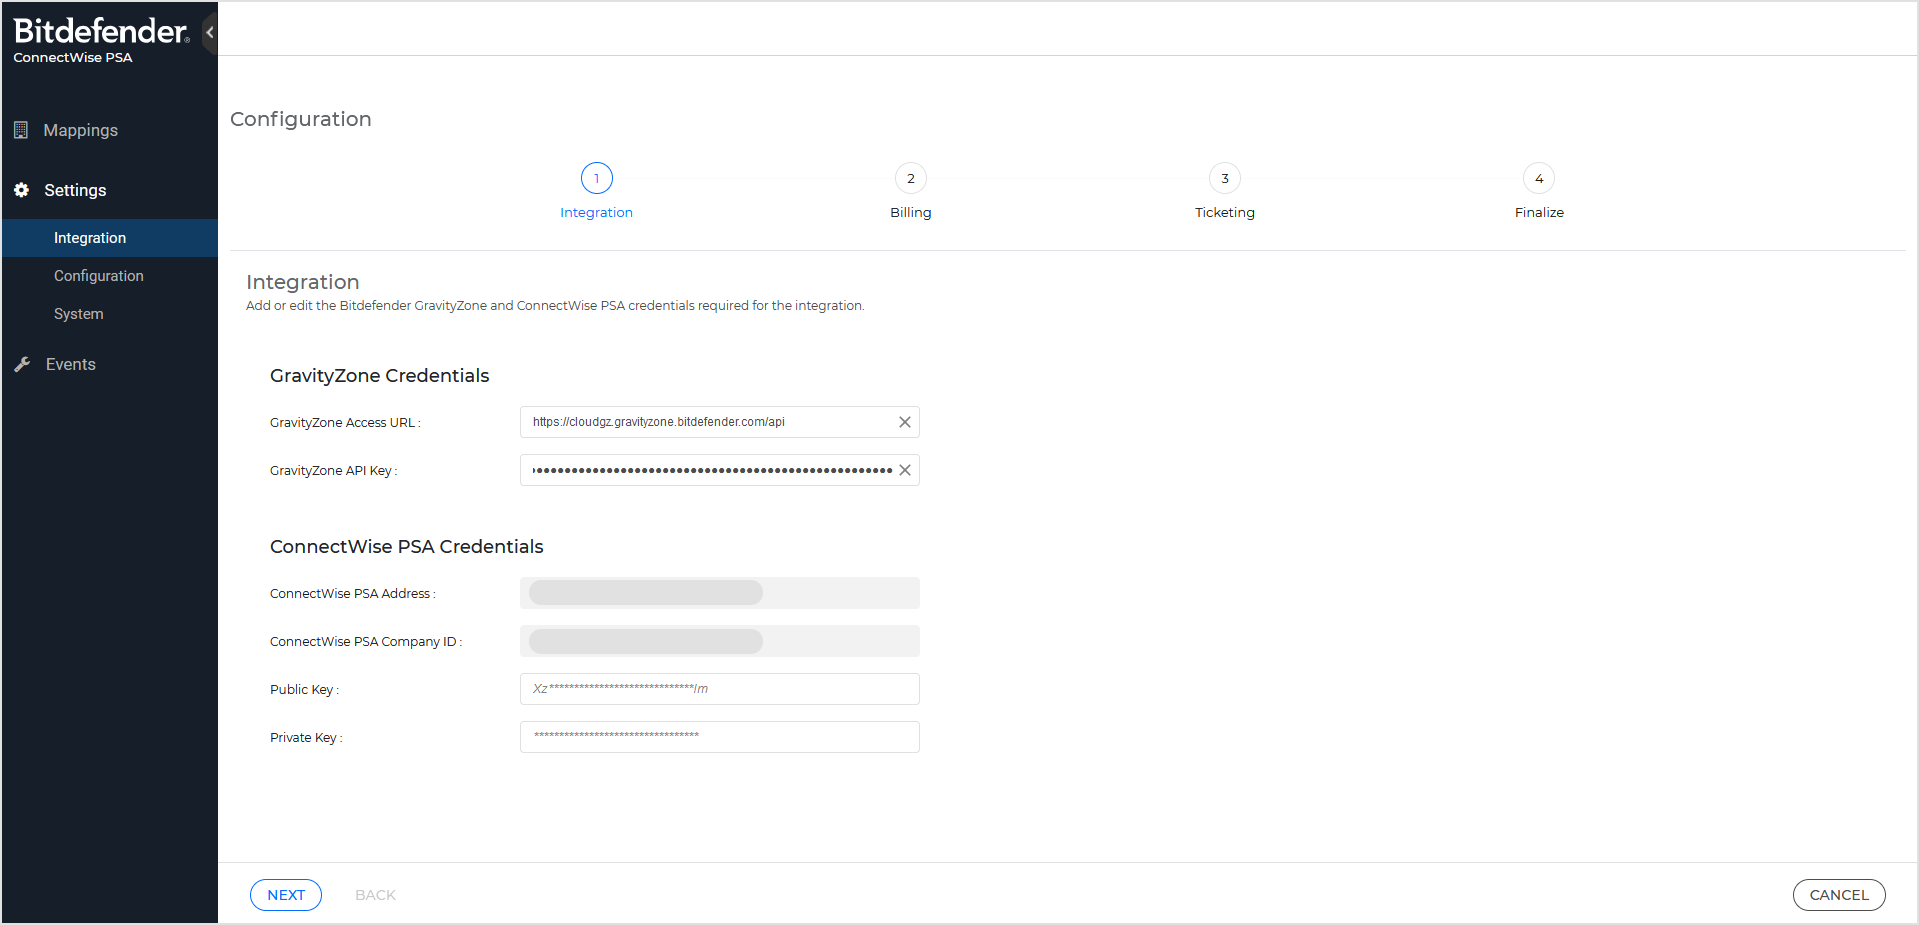
To configure the integration, follow these steps:
Under GravityZone credentials, add the GravityZone URL and GravityZone API key.
Under ConnectWise PSA credentials, add these details:
ConnectWise PSA address
ConnectWise PSA company ID
Public key
Private key
Click Next.
Billing
On this page, select the default agreement type and product, as provided by the ConnectWise PSA platform, to enable Bitdefender to report the number of active protected endpoints for each managed company.
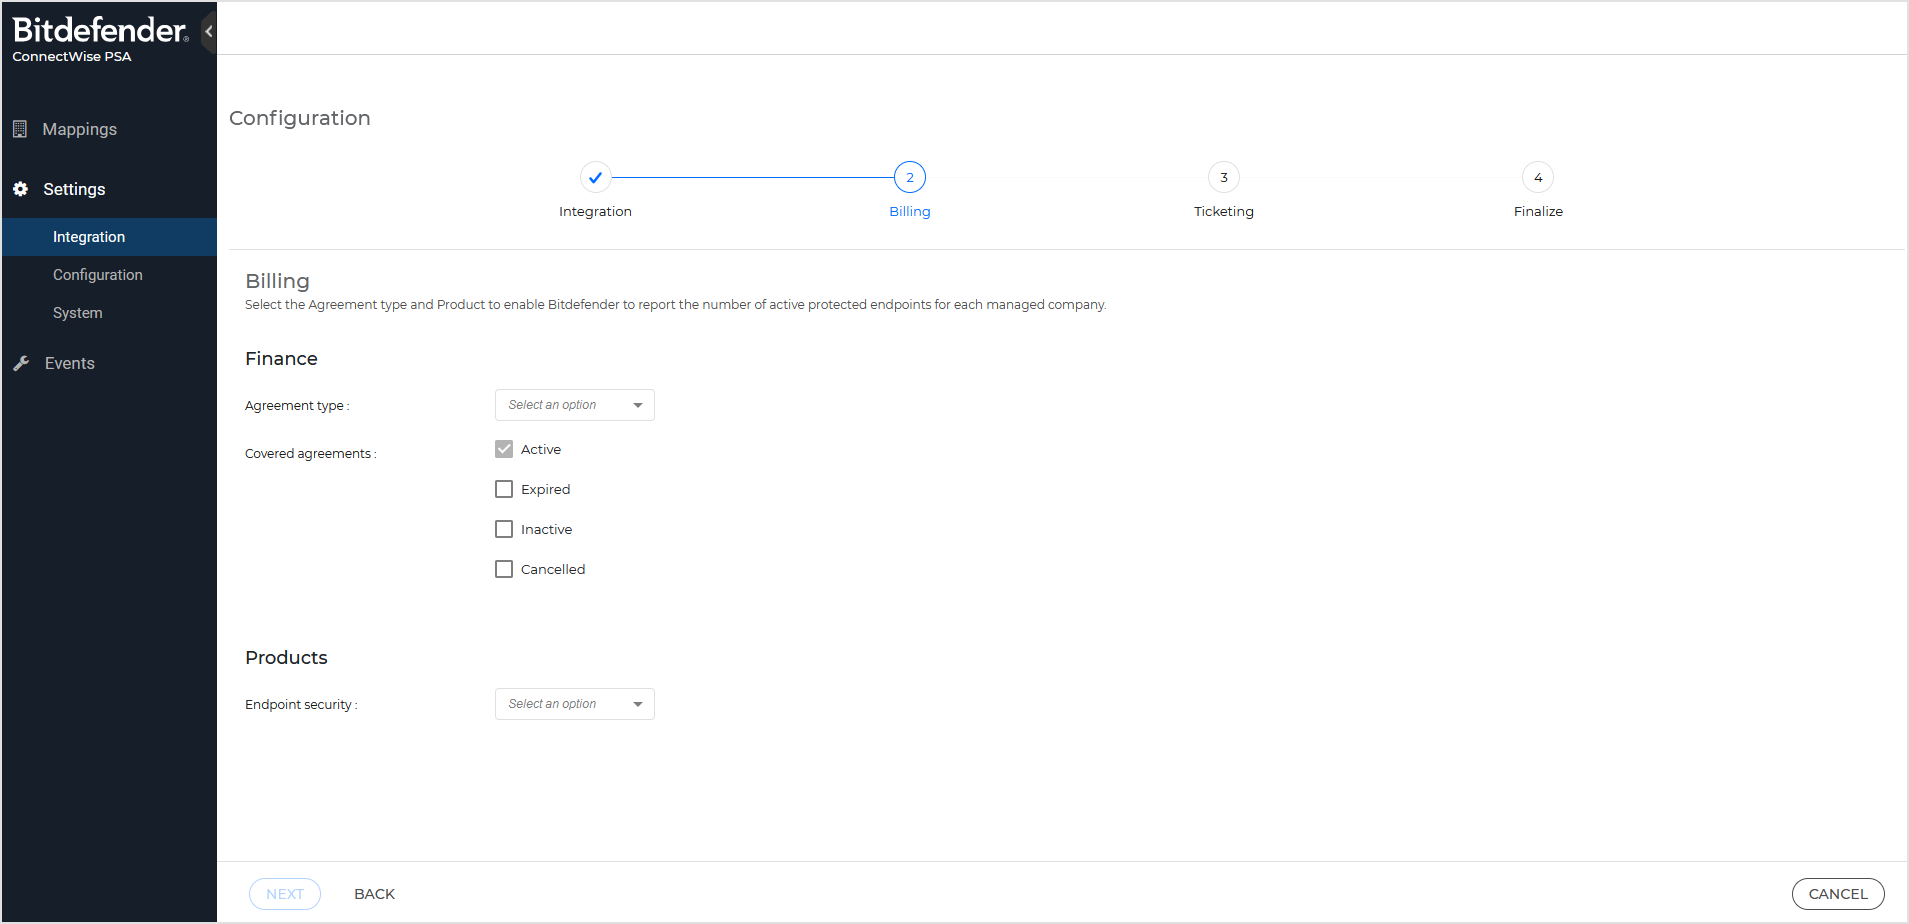
To configure the billing settings, follow these steps:
Under Finance, selected the default agreement type.
Notice
Mapping section offers the ability to select a specific agreement type or agreement, optionally. Mappings that do not specify a optional agreement, will use the default agreement type.
For Covered agreements, select which additional agreement statuses should be taken into consideration for creating additions:
Active - it cannot be unchecked and it represents the default agreement type status with the highest priority
Expired
Inactive
Canceled
Notice
The priority order for covered agreements cannot be changed. For example, if no Active agreements are available and the Inactive status is checked, but Expired is unchecked, additions will be added to available agreements with Inactive status.
Under Products, select the desired option available for Endpoint Security.
Click Next.
Ticketing
On this page, select the notifications for which ConnectWise PSA service desk tickets should be created.
Tickets can be configured by:
Priority. All priority list items will be available for selection, as defined in your ConnectWise PSA Priority List:
Priority 1 - Emergency Response
Priority 2 - Quick Response
Priority 3 - Normal Response
Priority 4 - Scheduled Maintenance
Any custom defined priority.
Service Boards. All service board items will be available for selection, as defined in your ConnectWise PSA Service Board List.
Notice
Default Service Board represents the default service board available in your ConnectWise PSA. For other service boards, select the appropriate option from the drop-down menu.
Threat type. You can use one or both options:
Blocked threats - Bitdefender took action and stopped the detected threats.
Current threats - Bitdefender reported but did not take action on the detected threats.
To create ConnectWise PSA service tickets, the following options are available:
Select to create PSA service desk tickets if no active agreement is available. Bitdefender generates these tickets for expired, inactive or canceled agreements of the selected agreement type, if enabled. The ConnectWise PSA service ticket will be generated on the corresponding ConnectWise PSA company every 4 hours, if no existing service ticket is already open, otherwise no new service ticket is generated.
Note
If the issue has been resolved and an available Agreement status is detected, the generated ConnectWise PSA service ticket will not be update automatically and needs to be closed by the The ConnectWise PSA user.
Select the detection types for which you want to receive ConnectWise PSA service tickets:
Endpoint Detection and Response - Bitdefender detects a phishing event based on a new Root Cause Analysis (RCA) displayed in the Incidents section in GravityZone.
Antimalware - Bitdefender generates this event when detecting malware on endpoints.
Advanced Threat Control - Bitdefender detects and blocks potentially dangerous applications.
Advanced Anti-Exploit - Bitdefender detects zero-day and advanced persistent threat activities in real time.
Hyper Detect - Bitdefender detects advanced attacks and suspicious activities in the pre-execution stage.
Ransomware Detection - Bitdefender generates this event when blocking a ransomware attack.
Firewall - Bitdefender blocks a port scan or application from accesing the network, according to the applied policy.
Antiphishing - Bitdefender detects a phishing attempt when accessing a web page.
Network Attack Defense - Bitdefender detects network attacks designed to gain access on the endpoints.
Web Traffic Scan - Bitdefender blocks user activity such as web browsing, according to the applied policy.
Sandbox Analyzer - Bitdefender detects a new threat among the submitted files to Sandbox Analyzer.
Note
ConnectWise PSA service tickets that have a different status from Closed (resolved), will be updated with a new note if Bitdefender detects a new threat of the same type, on the same Bitdefender endpoint. Otherwise, a new ConnectWise PSA service ticket will be generated for each Bitdefender enabled detection.
Click Next.
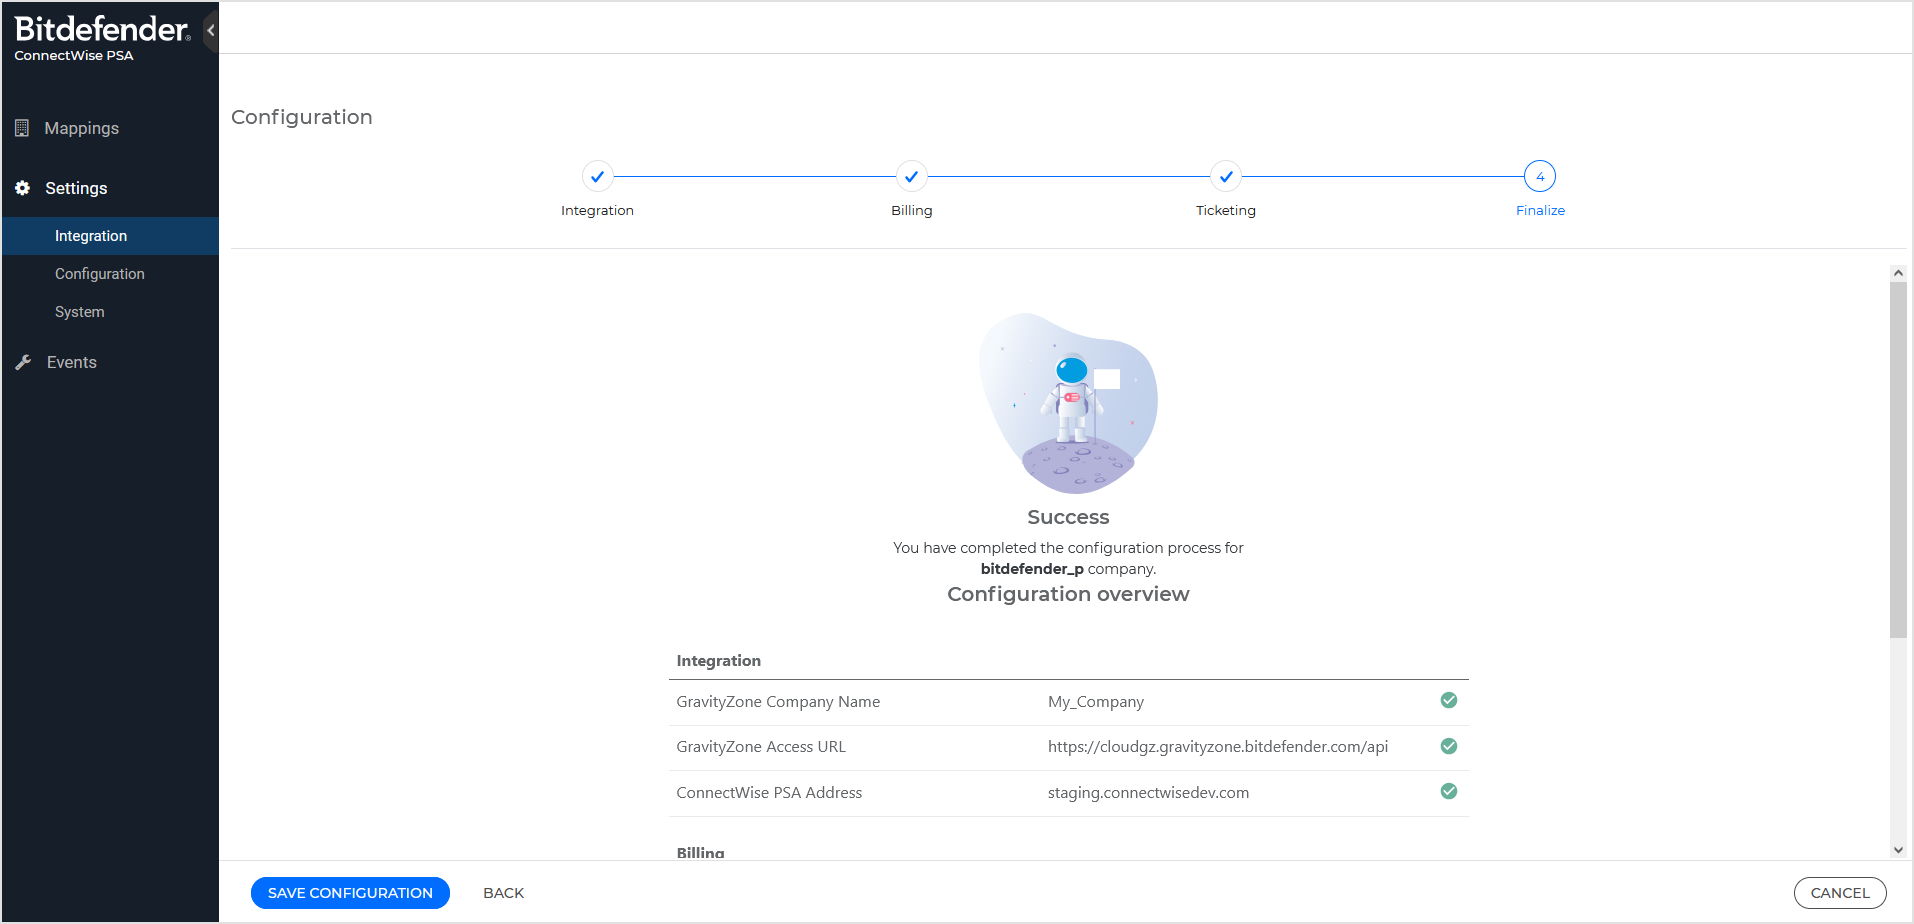
Finalize the configuration
On this page, review the settings and click Save configuration to create the integration. After this, all the integration pages become active.
If needed, click Back to make changes at previous steps.
Settings
After the initial configuration, you can access the Settings page to make any changes to the integration, referring to ConnectWise PSA App and GravityZone credentials, billing and ticketing services, your tenant, and single sign-on through your SAML 2.0 identity provider.
Notice
The Settings page will be fully accessible only after performing and finishing the initial integration setup.
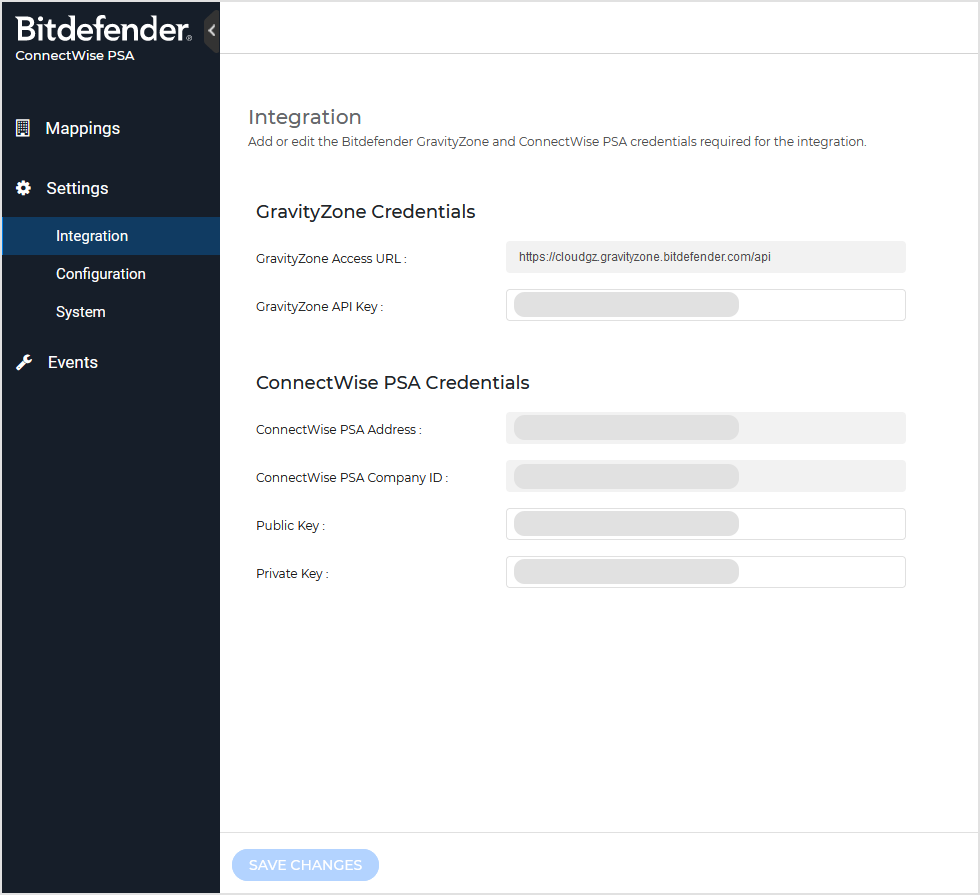
Integration
On this page, you can edit the ConnectWise PSA App and GravityZone credentials provided with the initial configuration. For details, refer to this topic.
When done, click Save changes.
Configuration
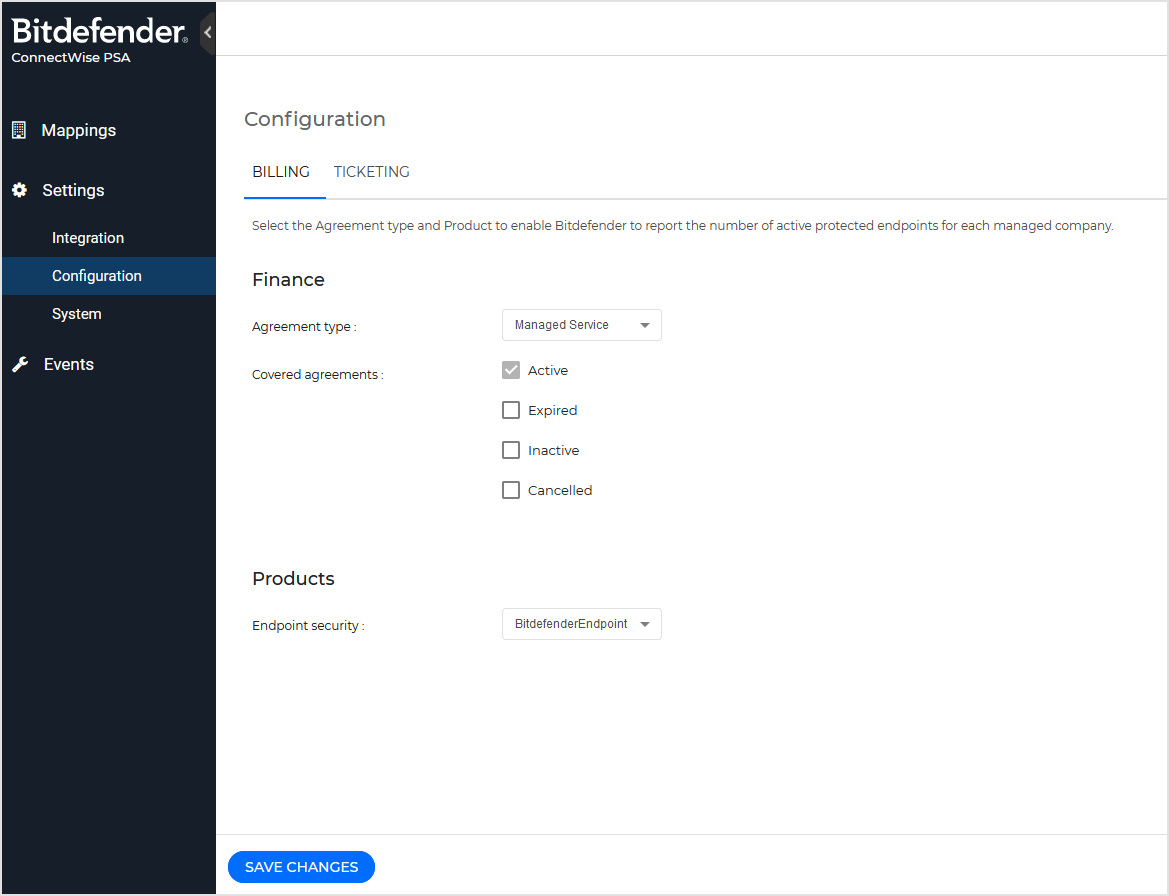
This page contains two tabs for the billing and ticketing service settings.
Billing
In this tab, select the default agreement type and product, as provided by the ConnectWise PSA platform, to enable Bitdefender to report the number of active protected endpoints for each managed company. The settings are the same as during the initial configuration. For details, refer to this topic.
When done, click Save changes.
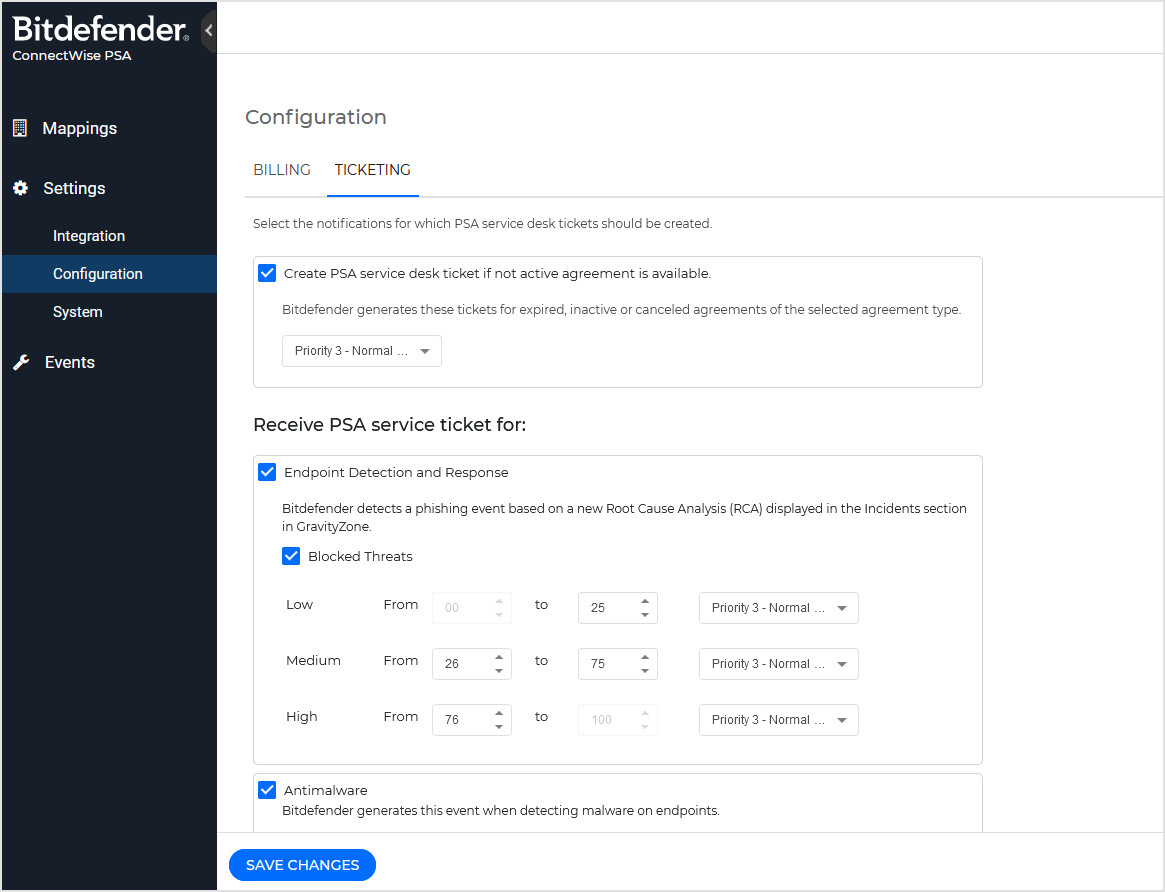
Ticketing
In this tab, select the notifications for which ConnectWise PSA service desk tickets should be created. The settings are the same as during the initial configuration. For details, refer to this topic.
When done, click Save changes.
System
This page contains two tabs for the tenant reset and authentication settings.
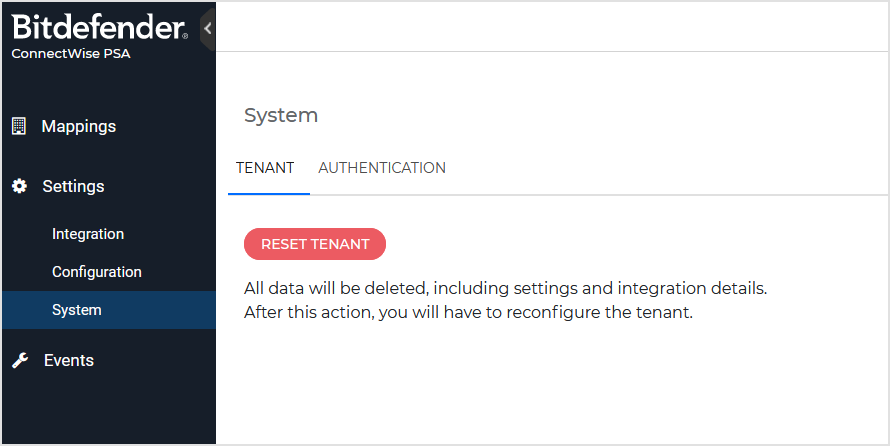
Tenant
If you need to reset the current integration in order to change the ConnectWise PSA tenant or the GravityZone company, use the Reset tenant option.
Warning
All data will be deleted, including settings and all integration details. After this action, you will have to reconfigure the entire ConnectWise PSA integration through the configuration wizard.
Authentication
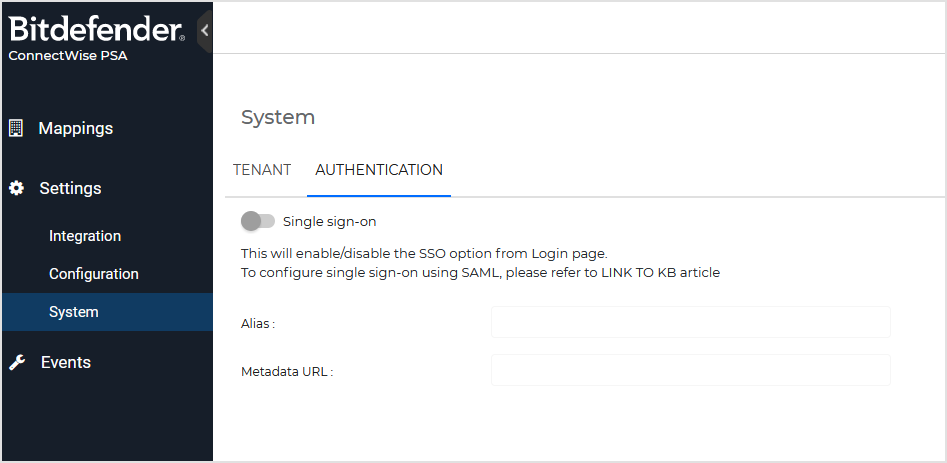
To enable single sign-on (SSO) for ConnectWise PSA App, follow these steps:
Click the single sign-on switch to activate it.
Enter the alias and the metadata URL available with your preferred identity provider.
Click Save changes.
For details on how to configure the identity provider and ConnectWise PSA App to use single sign-on, refer to Configuring ConnectWise PSA single sign-on with an identity provider.
After enabling SSO, you can log in to ConnectWise PSA App using the alias you specified.
To temporary disable the single sign-on service for your tenant, click the switch again to disable it. This will not remove your configured settings.
To permanently remove the single sign-on service for your tenant and the configured settings, follow these steps:
Make sure the single sign-on switch is active.
Delete the alias and metadata URL.
Click Save changes.
Click Disable in the confirmation window.
