Managing the integration
You must have an active Security for AWS subscription before you can protect your EC2 instances. For more information, refer to Subscriptions.
Manage your Amazon EC2 instances
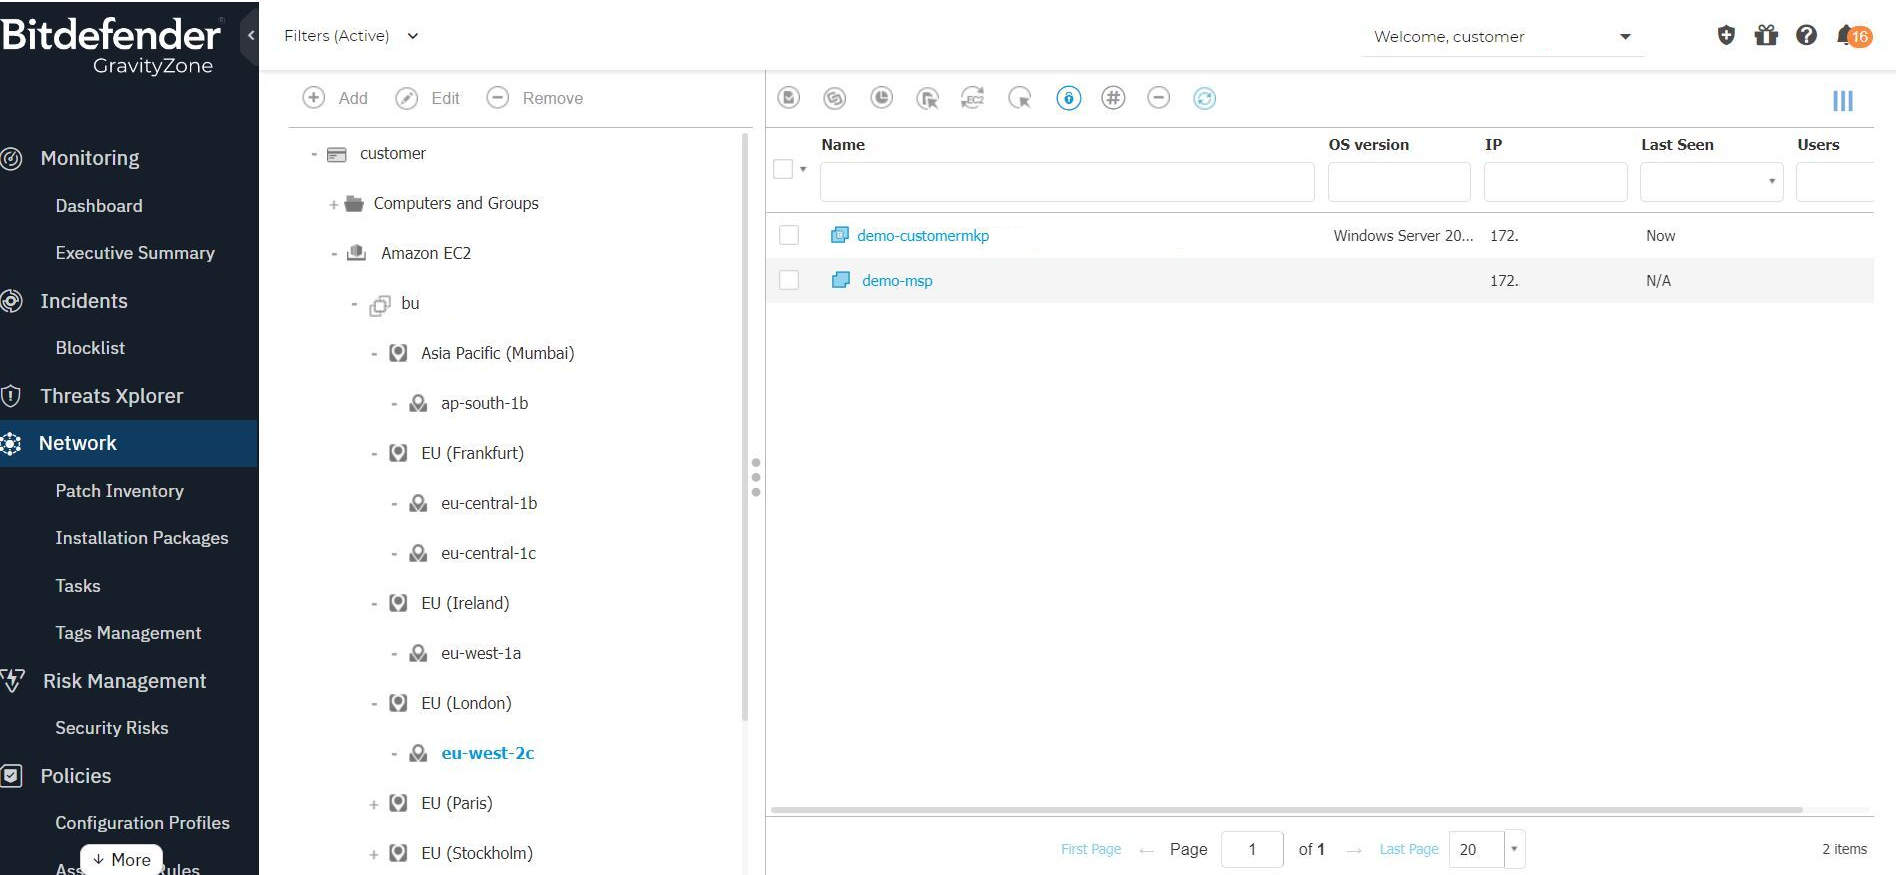
Once you have successfully set up the Amazon EC2 integration, the Amazon EC2 inventory is going to be displayed in GravityZone Control Center, in the Network page.
You can now start installing the security agent on EC2 instances, apply security policies, and monitor the security events using the dashboard and the available reports.
Warning
Only the supported security modules are going to be applied to target endpoints. On Amazon EC2 instances the following modules are supported: Antimalware, Advanced Threat Control, Device Control, Content Control, Network Attack Defense, Encryption, and Risk Management.
GravityZone provides several options specifically designed for managing the EC2 instances. These options are described below.
View the Amazon EC2 inventory
The Amazon EC2 inventory imported in GravityZone is grouped by Amazon regions and Availability Zones. You can find the Amazon EC2 inventory in the Network page, at the same level as the Computers and Groups folder. You can view the Amazon EC2 group in the left-side pane of the Network page, while the instances contained in the selected group are displayed in the right-side pane.

Terminated instances are grouped in a specific folder of the Network tree. Previously managed (protected) instances that were terminated from the Amazon management console are stored under the Terminated Managed Instances group placed in the Amazon EC2 folder. You can obtain information about these instances through reports. If they are no longer needed, terminated instances can be deleted from the network inventory.
You can recognize online and offline instances by their icon:
 Online instances that are unmanaged
 Online instances
 Offline instances that are unmanaged
 Offline instances
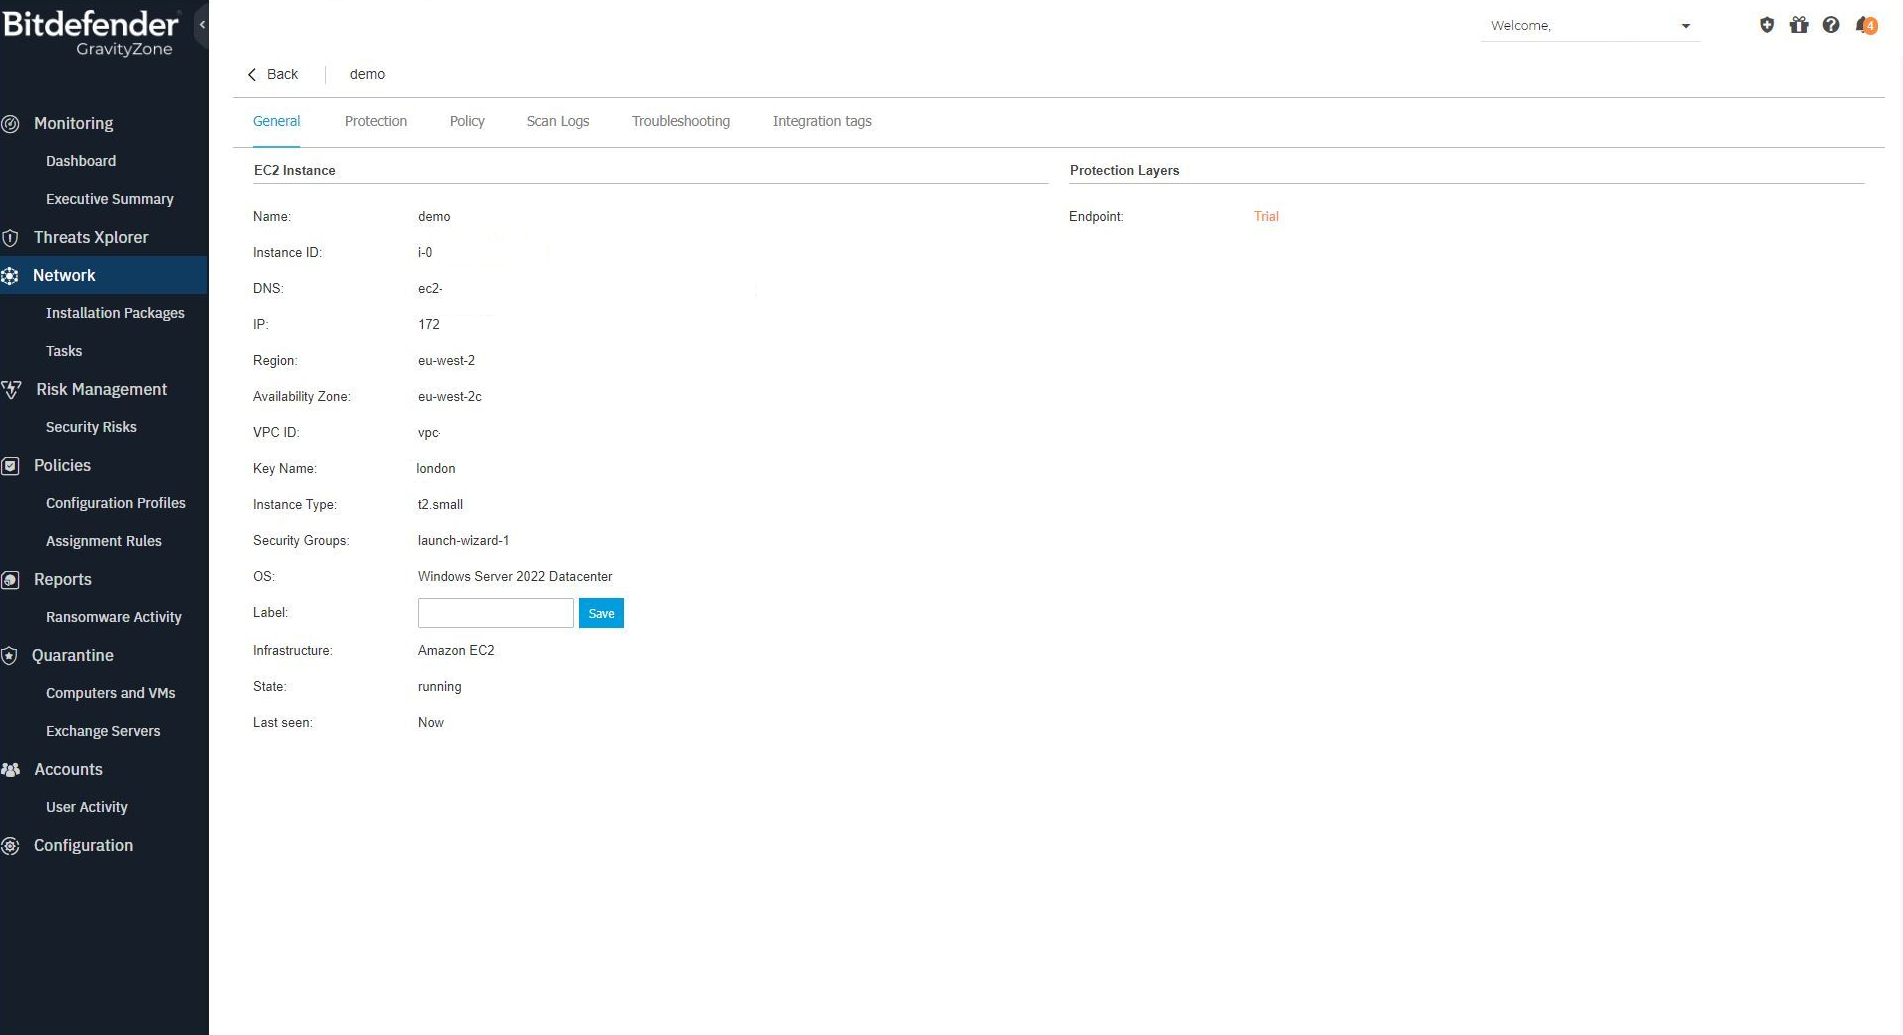
To obtain details about an EC2 instance, click on it in the Network page. The Information window is going to display various information about the instance, such as ID, DNS, IP, Region, etc.

In addition, the Integration tags are also displayed on this page. For more information on how to configure integration tag rules, refer to Configuring integration tag rules.
Filter the Amazon EC2 instances
To access the network filtering options, select the group that you want in the left-side pane and click the Filters menu at the upper-side of the network panes area.
GravityZone Control Center provides several filtering options for the network inventory, including a few specific filters for Amazon EC2 instances:
Type: displays only EC2 instances.

Power: filters EC2 instances by their power status (running, stopped, terminated).

Integration Tag: filters instances by EC2 tags defined in your Amazon management console.

Synchronize the Amazon EC2 inventory
Control Center automatically synchronizes with the Amazon EC2 inventory every 15 minutes. You can also manually push the Amazon inventory synchronization by selecting an integration or integration node and using the  Synchronize with Amazon EC2 button placed at the upper side of the Network page.
Create Amazon EC2 specific reports
To generate a report in GravityZone Control Center, go to the Reports page from the left side menu and click the Add button at the upper side of the table. A configuration window is going to be displayed, where you can find several options for defining the report that you want.
For more information about AWS reports, refer to Report types.
Monitor the user activity logs
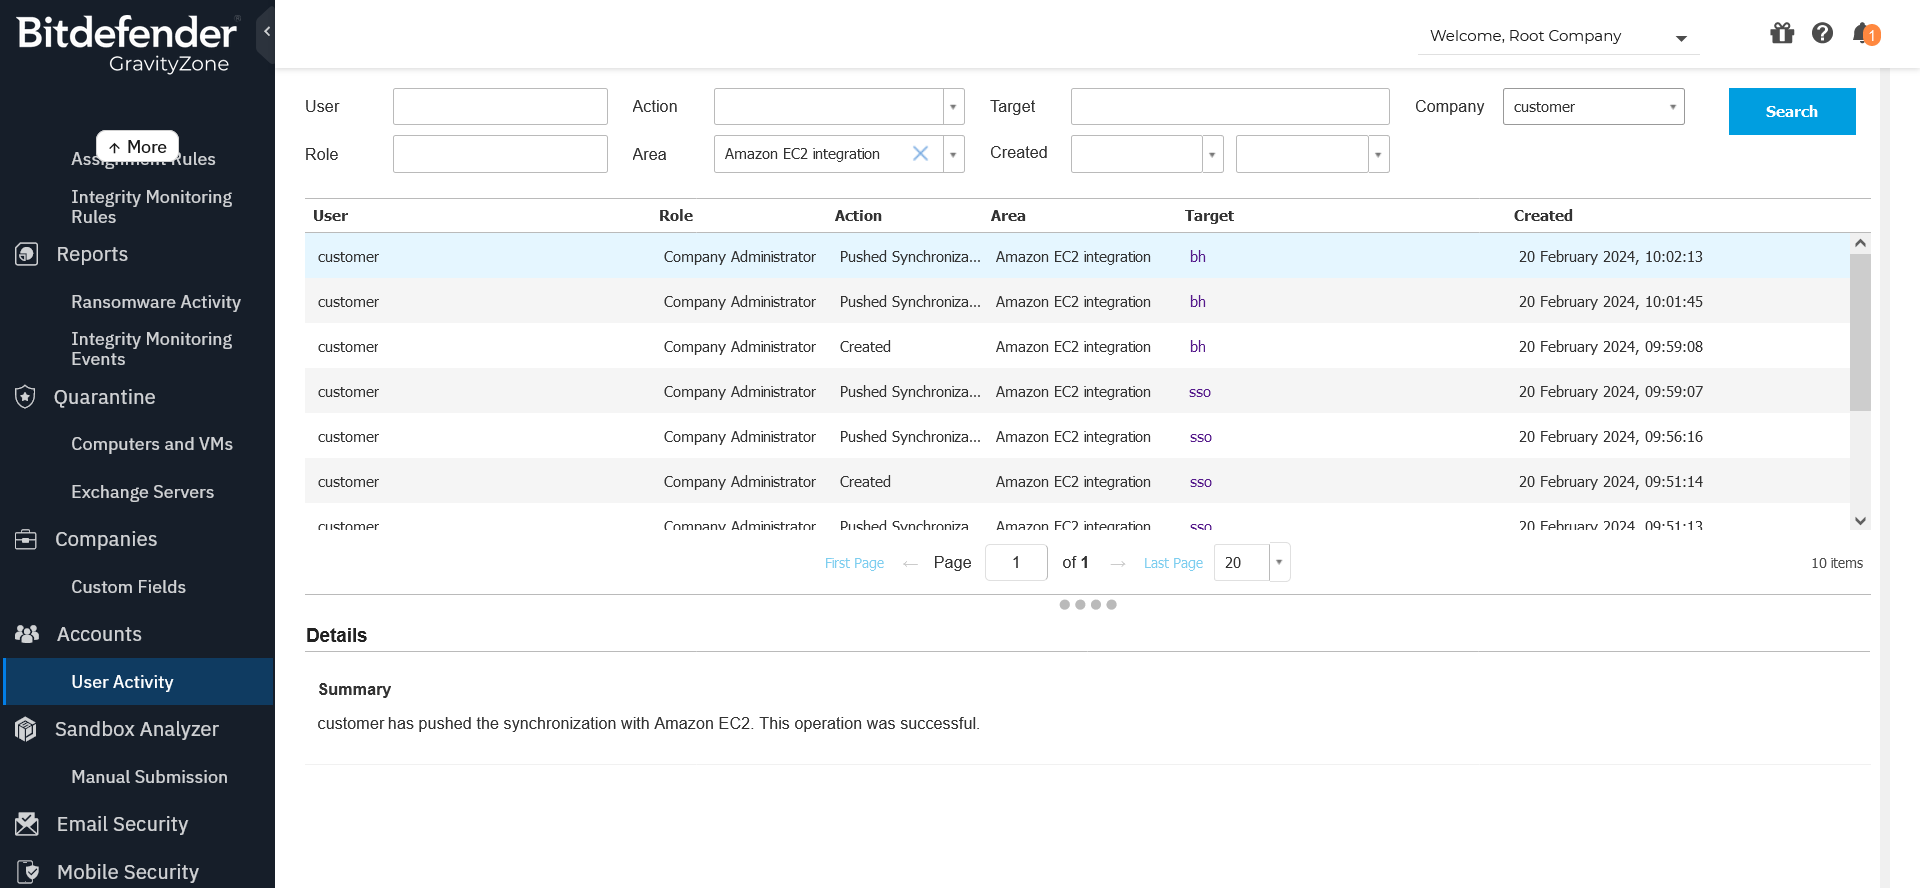
You can check the GravityZone user accounts activity records in the Accounts > User Activity page.
Control Center logs all the operations and actions performed by users. The user activity list includes the following Amazon EC2 specific events:
Creating, editing, synchronizing and deleting Amazon EC2 integrations
Creating and canceling Security for AWS subscriptions
Creating, editing and deleting Integration tag rules

Configure the Amazon EC2 Control Center notifications
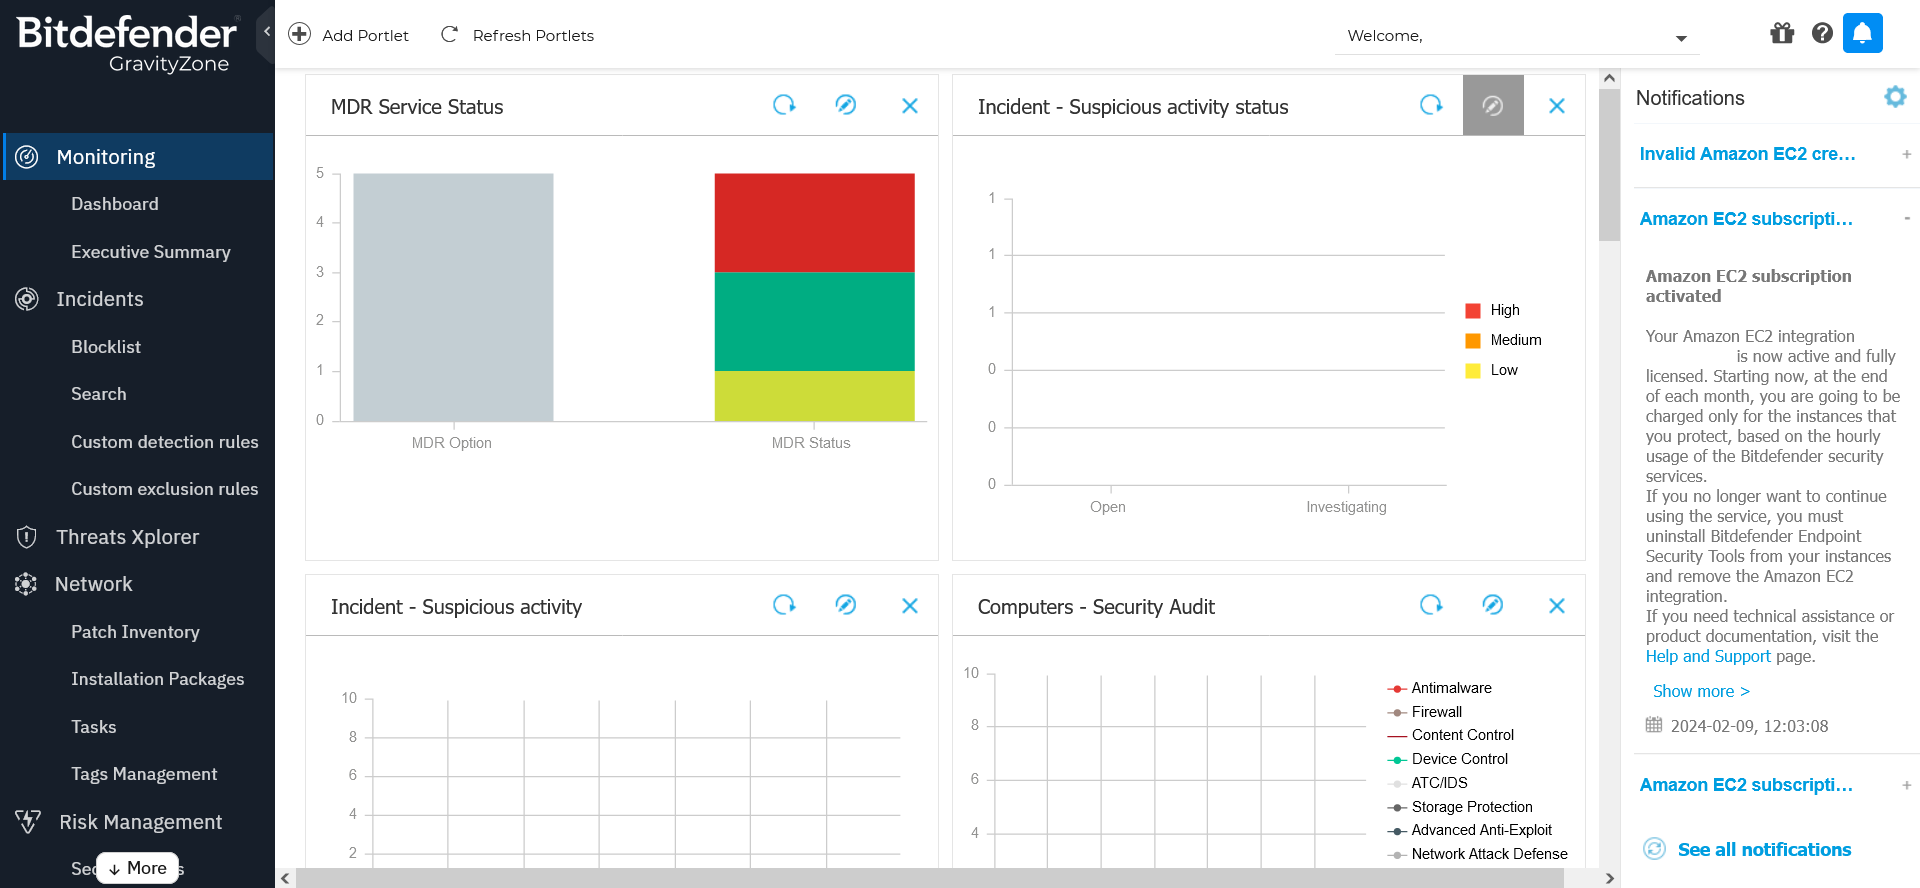
Control Center informs you about the security status of your environment via notifications, which are displayed on the right side of Control Center, in the Notification area:

To view the notifications, click the  Notifications button and then click See All Notifications. A table containing all the notifications is displayed.
You can configure which types of notification you want to receive in Control Center or by email, and several other options. To configure notifications you can:
Click the
 Notifications button at the right side of the menu bar and then click See All Notifications. A table containing all the notifications is going to be displayed.
Click the
 Configure button at the upper side of the table. The Notification Settings window is going to be displayed.
For more information about GravityZone notifications, refer to Notification types.
Connect to GravityZone Control Center
To access GravityZone Control Center, go to https://gravityzone.bitdefender.com and enter your GravityZone account credentials.