Connection Rule examples
This article provides you with the components and settings required to create a specific Connection Rule. For instructions on how to create a rule, refer to Connection Rules.
IP Geo-location connection rule
Since users may have location requirements, we do not provide a default Geolocation Rule. Create this custom rule to detect the location of the connecting IP address and restrict or allow connections from specific areas.
Rejecting large emails
By default, Email Security accepts emails up to 50Mb inbound or outbound. This is done through the Maximum Mail Size default standard rule.
Warning
NDR's are not sent from your Mail Server (Domain Route) back to the Internet if your server rejects the message and Email Security routes it. This is due to security policies that help to avoid being blacklisted due to backscatter and NDR spam.
If your mail server (Domain Route) does not accept messages of this size, you can reject the message at the point of SMTP connection. This will make the connecting server create a Non-Delivery Report (NDR) for the sender.
Tip
If you create a Message Rule to perform the same function, the sender will not be advised that the email was not received by the recipient.
To change the Maximum Mail Size connection rule follow the steps below:
Go to Products > Email Security > Connection rules.
Double-click the rule's title or click on the Change Rule
button.
Note
The Rule might be called Large Files on your system.
Find the Email Size condition, and click Configure.
Choose a new limit from the Condition Value.
Click the Save
 button.
Creating connection exclusions for disabled mailboxes
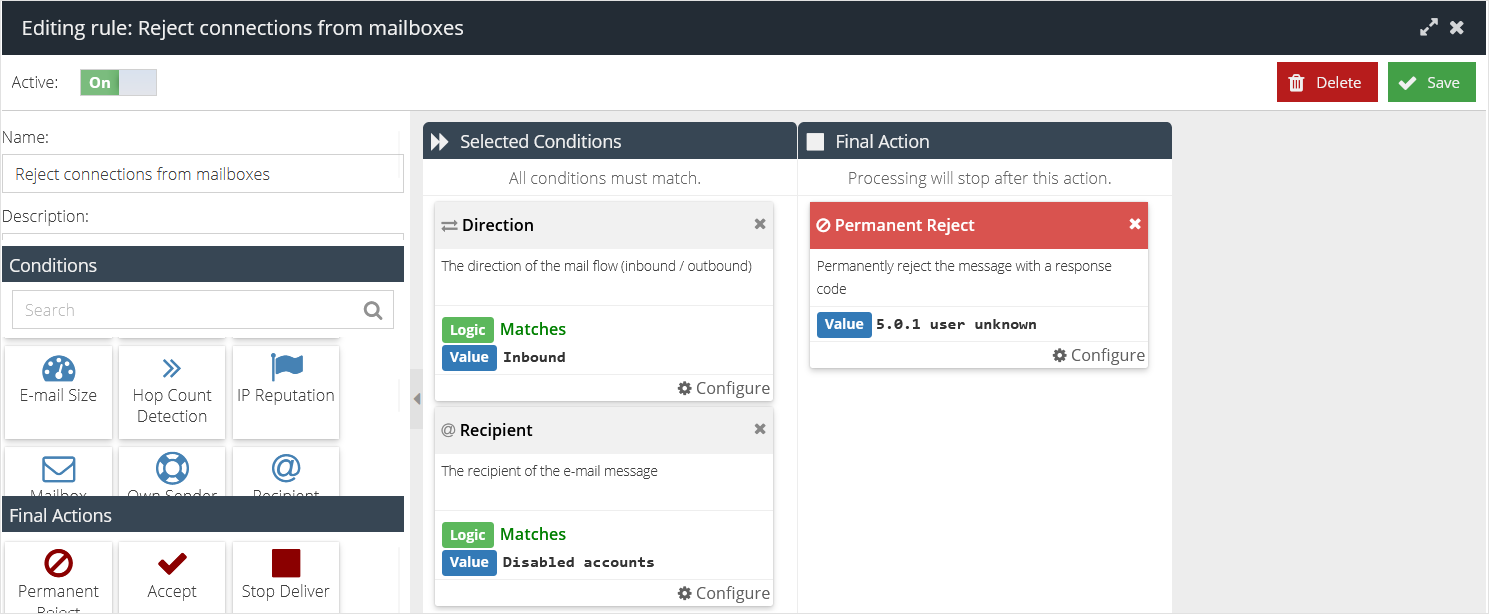
This section provides you with the steps required to set up a connection rule that you can use to reject any connection attempt from disabled email accounts, ensuring that they are excluded from billable Email Security usage.
Go to Products > Email Security > Custom Rule Data
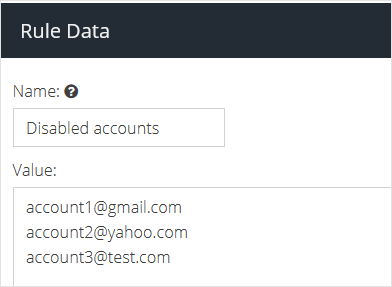
Click the Add New button and select Rule Data. Give it a descriptive name (e.g. Disabled accounts) and click Update.

Add the email addresses for the users you want to include in the list, each on a separate line:

Click the
 button.
Go to Products > Email Security > Connection rules.
Click the Add Rule
 button.
Add a descriptive rule name, click the Add
 button, and configure the rule using the following settings:
Click the Save
 button.
Decide the priority of the rule in relation the other existing rules and drag it to the appropriate position in the Message Rule window.
For more information on usage, refer to the Licensing & Provisioning section.
